 My name is Kim Hardin.
💥 I’m 34 🛠️ I’m a small business owner @kickstandcoffeekitchen 👩🎓 I have a BS in Human Physiology, and a Master’s in Healthcare Administration 🚣🏻♂️ I was a professional whitewater kayaker for over 12 years, winning every downriver race I entered as Pro Female 🎤 I was nominated for @canoe_and_kayak female paddler of the year in 2015 🚴🏽 I started racing bikes professionally in 2015 after a shoulder surgery took me out of paddling 🚴🏽 Currently riding for @evilbicycles @chriskingbuzz and a handful of other awesome brands 💍 I married my best friend @nickhardin11 in Argentina between EWS Rounds 🐕 We have two Australian Shepherds, our kids: Pilot & Mae 🍏 I’m a farmer: apples, pears, peaches, galore… 🍻 I don’t like the taste of beer 🏍️ I ride a KTM 300xc 💪 I’m an ACE certified Personal Trainer 🚗 I LOVE anything with a motor, especially my MINI Cooper JCW 🌶️ I like my spice rack labeled and alphabetized 🦄 Unicorn slippers make me happy I think that’s it! Ask me anything ⬇️
0 Comments
 New to racing? Been racing forever, but looking for an edge? Follow along for some tips and tricks... 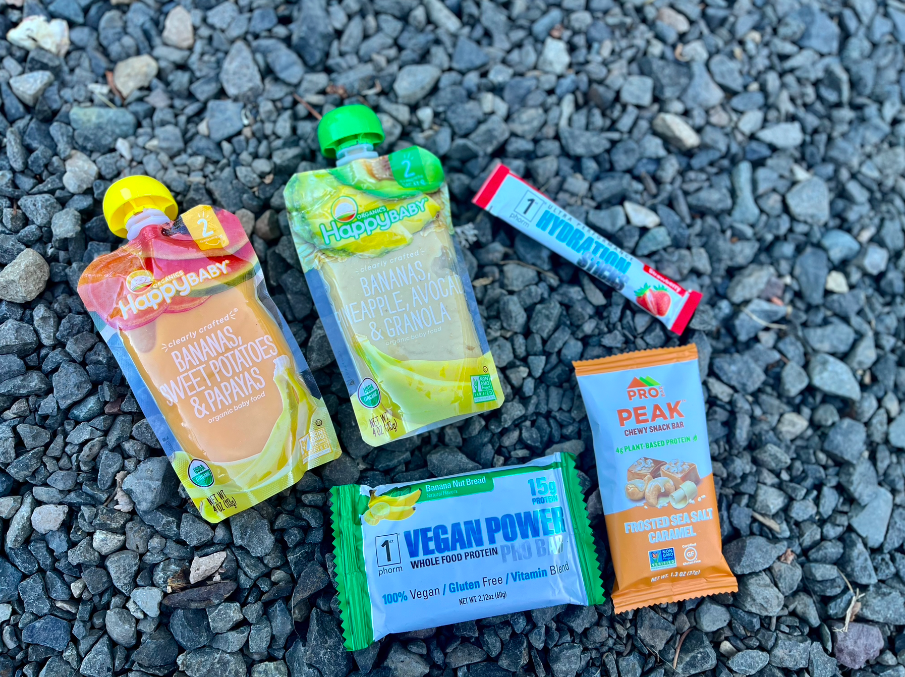 1. Snacks & Electrolytes - You can have all the skills to pay the bills, but if you miss on race day nutrition, you might not even make it to the next stage! I generally look to replace half my calories expended every hour while racing and bring food accordingly. I prefer to do so via Whole Foods whenever possible, with a heavy lean on the fast and light program - I usually err on the side of baby food (sugar!), banana, and nut bars. I always have a bottle of electrolyte on me as well to offset sweat loss. My favorite is 1st Phorm citrus hydration sticks - they even come in little packets! The way to avoid the "bonk" is to stay ahead of it nutritionally - eat every hour whether you are hungry or not. Sip your electrolytes whether you are thirsty or not. Depending on daytime temperature also take a salt tab. 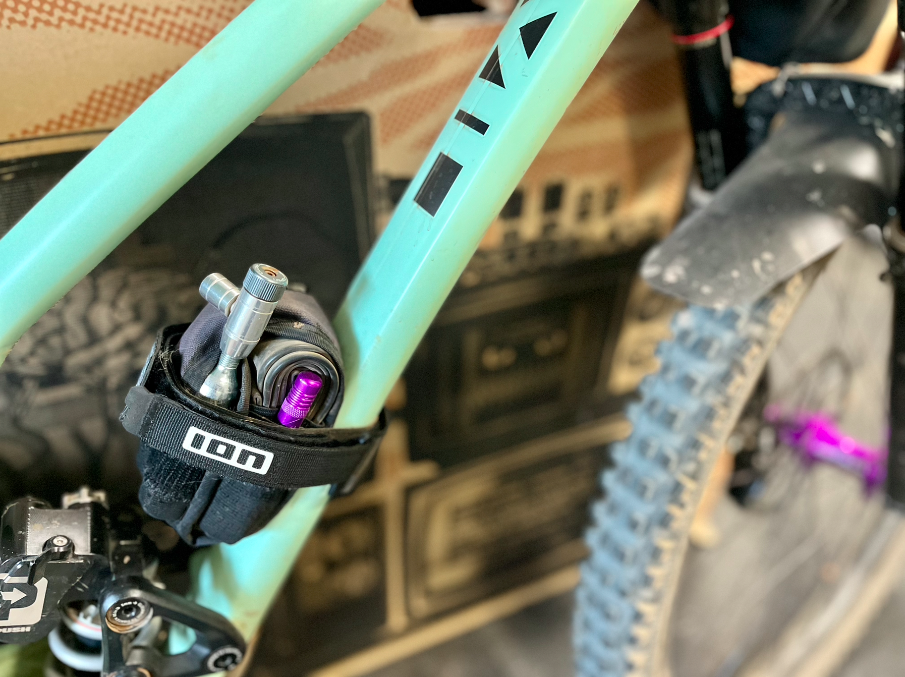 2. Bike Maintenance - Ideally you're able to get your bike some love before race day - new cable for your derailleur, brake bleed, new brake pads, the works. If you have a wireless derailleur, make sure to put on new batteries race day morning, and bring a spare, just in case. Put on a new set of tires for race day - mount them the day before, pump them up about 10-15 psi higher than you typically run and leave them overnight to help stretch the casing a bit and and ensure a proper bead. Why put all the time, energy and money into training to race with clapped out tires. New tires = better traction! Pay attention to tread compound as well as tread pattern relative to rolling resistance as well as punctures. Lots of sharp rocks? Consider a tire with a heavier casing and beefier tread pattern... 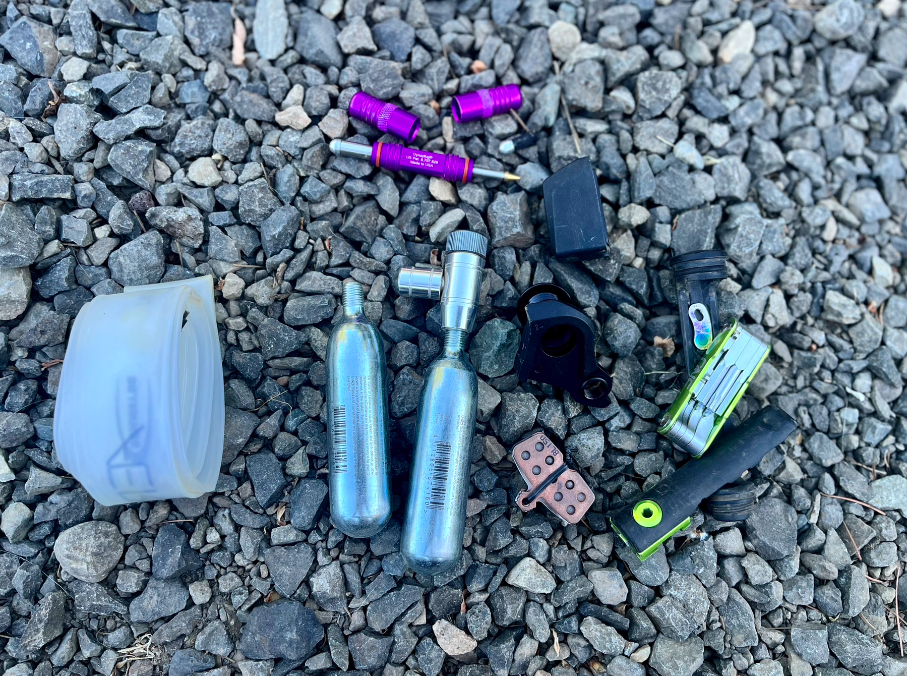 3. Tools - Bring all the tools you need, however, resist the temptation to bring the whole toolbox. Focus on the basics - multitool, tube, CO2, plug tool, master link & derailleur hanger. Take into consideration the kind of terrain and tracks you are racing - are there extra technical tracks with sharp rocks? If yes, be sure to bring an extra plug or two. These are small parts/tools that pack small and can save your race. Where you can, put tools on your bike - pack a tube, plug tool, multitool & CO2 on your frame. Fold zip ties in half and put them in your bottom bracket/cranks from the non-drive side. 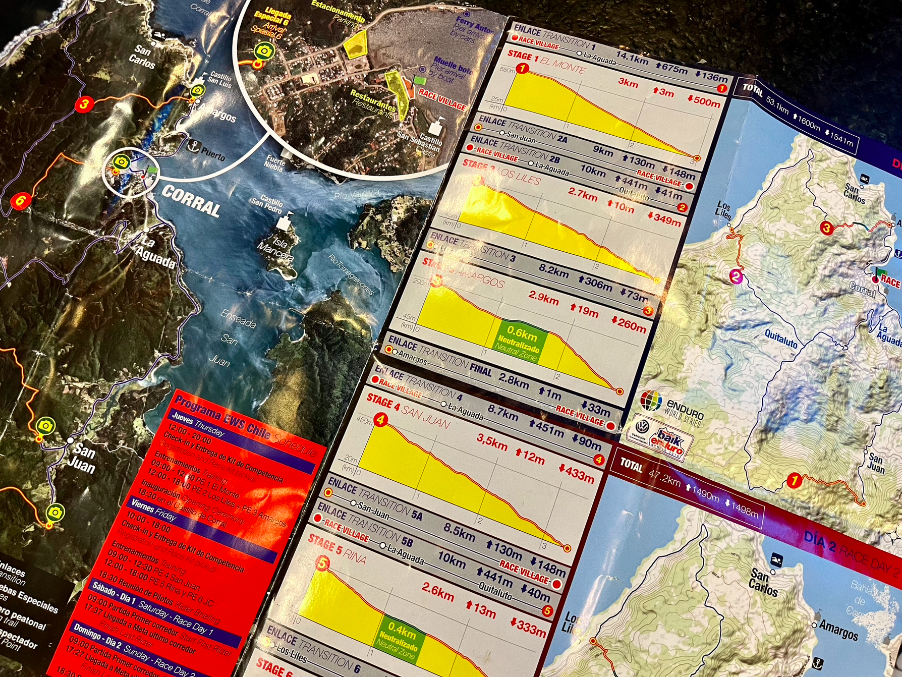 4. Plan ahead! Know what your day looks like - total miles and elevation profile. Know where your support/aide stations are for water refills. Make a nutrition plan - when and where are you going to snack. Look at the weather - is it going to rain? Is it 90 degrees? Do I need to bring a jacket or extra electrolytes? Know your stages as intimately as you can, both via practice for line choice, as well as to reduce the likelihood of any surprises, including going the wrong way on a transfer. The more variables you can control the better! Most importantly, develop a pre-race routine - this will help you maintain focus and be more relaxed prior to the race. With the right routine, you'll start the day with far less stress as you have provided yourself time and space to ensure you have all the necessary equipment, nutrition bits and more. None of this last minute stuff....  5. Practice, but don't over practice - Practice obviously gives you the opportunity to ride race stages, and session various place on track, however, be careful not to over practice and overdo it for race day. Give yourself time to recover, get your bike setup for the next day, eat a proper dinner and plenty of sleep for race day.
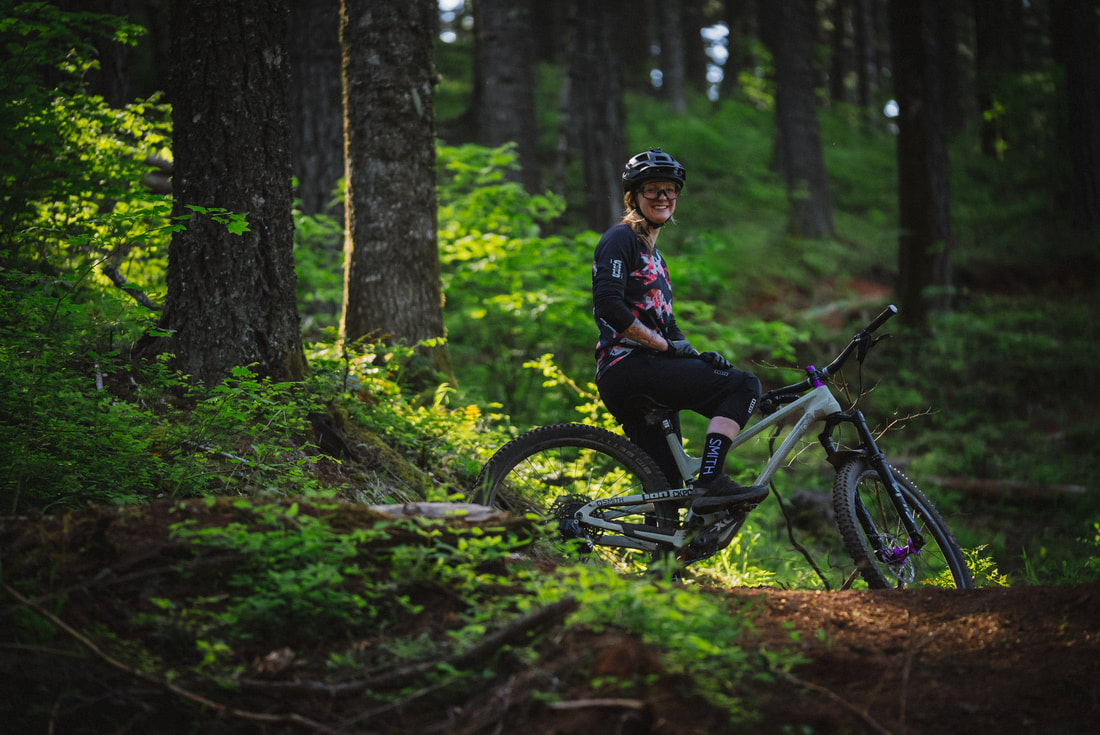
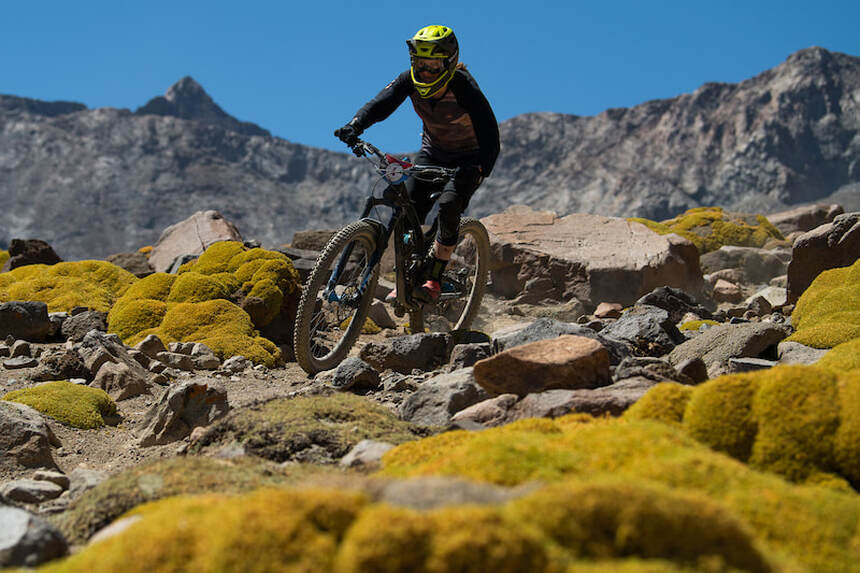
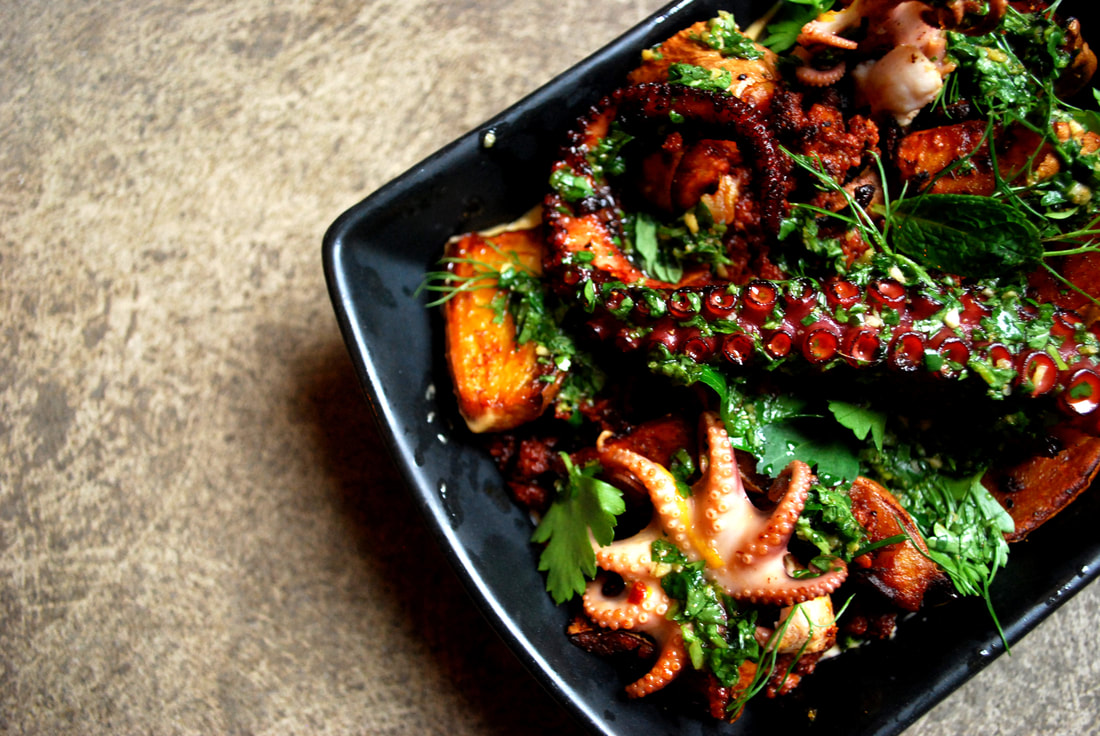
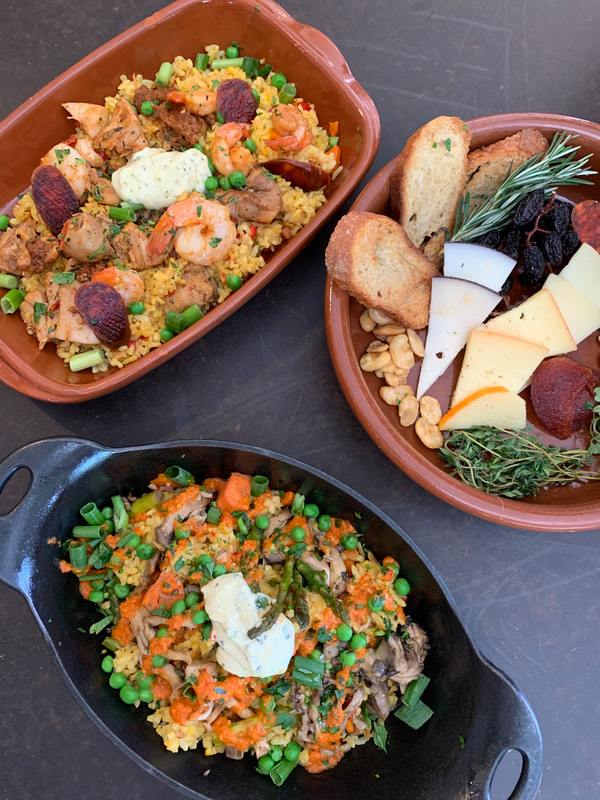
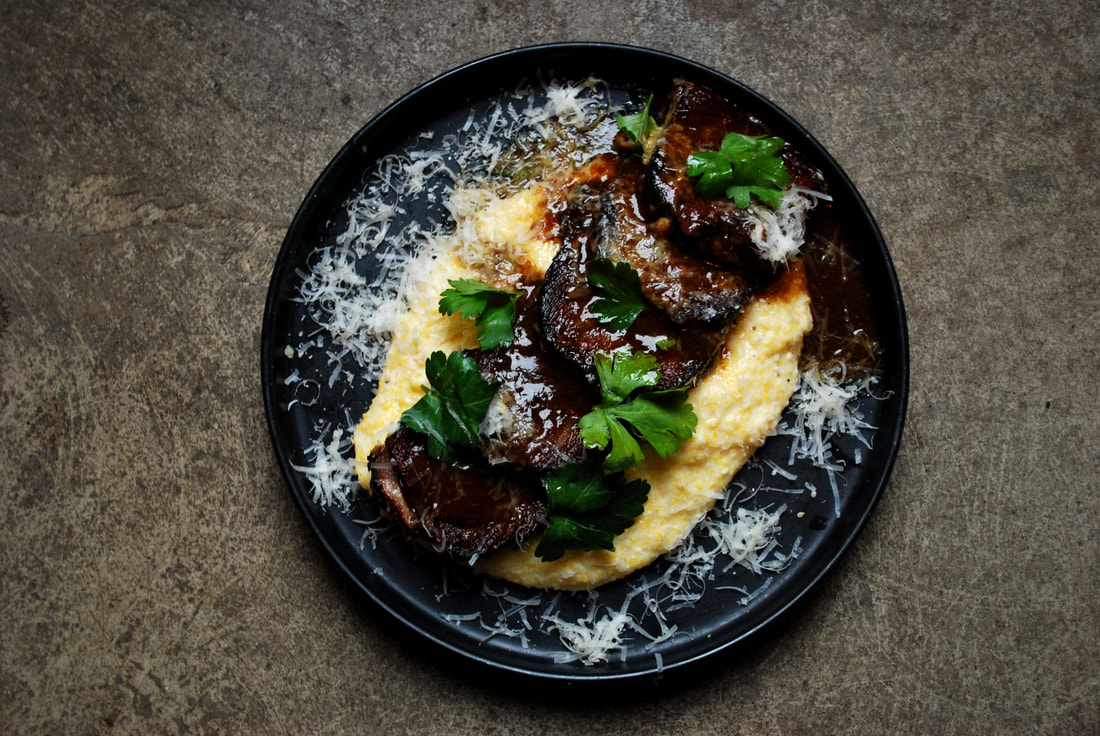
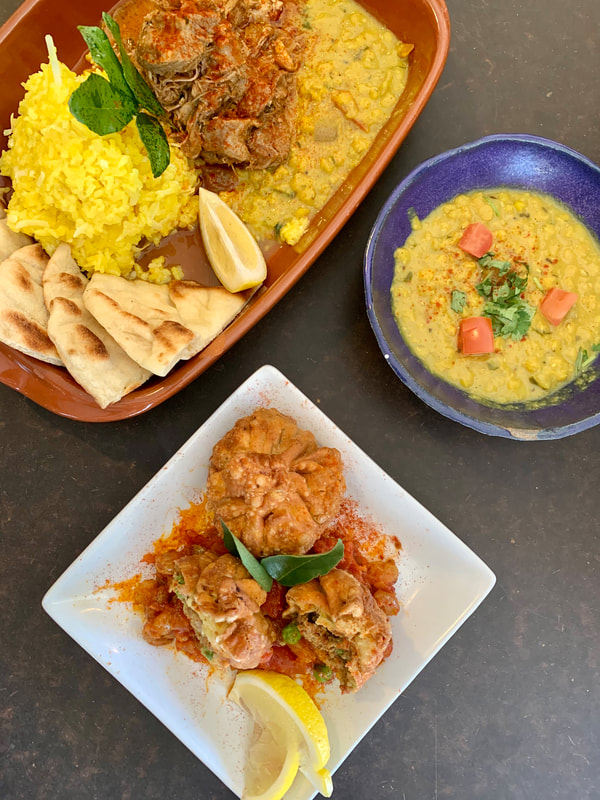
Pro Tip: If you didn't hit a line in practice, don't try a new line on race day, especially one you're nervous about. 6. Come racing day, ride your race, your pace, not theirs - While the race atmosphere is infectious, ride your own race. If you prefer to stop and linger a bit between stages, do so. If you prefer to keep moving, keep moving. Personally, I like to keep moving - my muscles stay warm, my focus stays clear and I'm less distracted by what other people are doing. Got some tips of your own? Share them below! Til' Next Time, Kim Hardin You never know until you try! That's what they say at least. 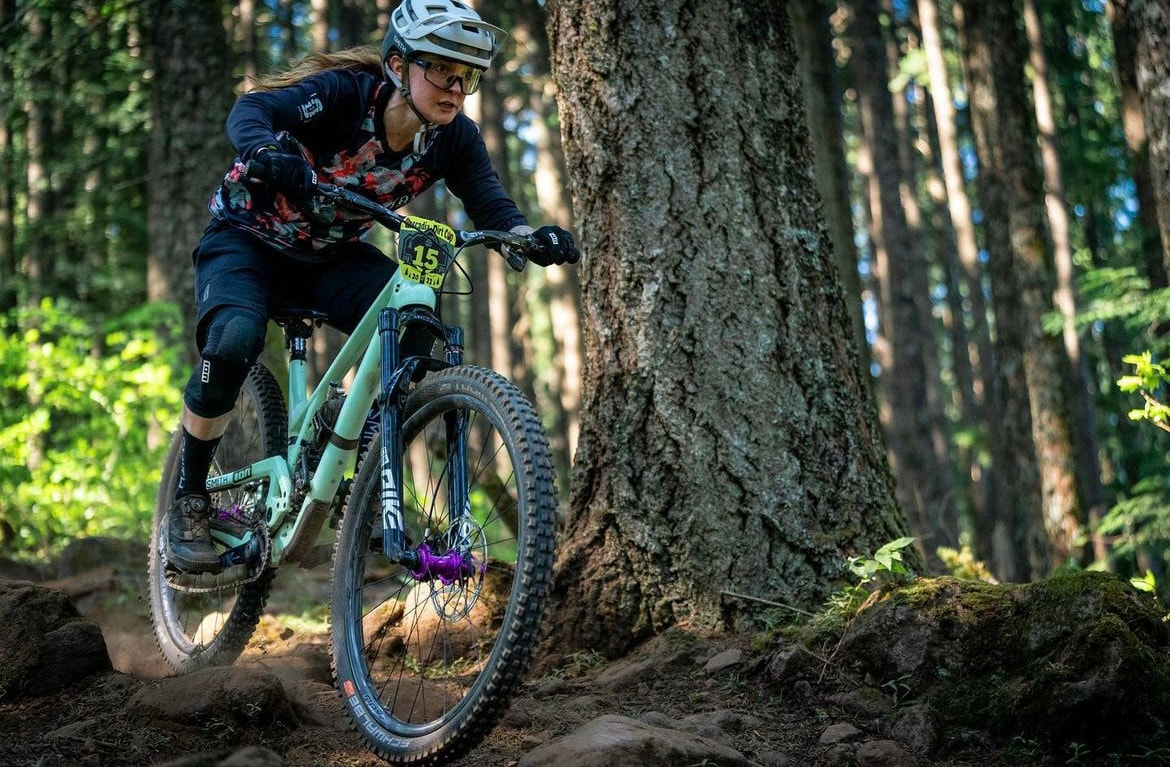 Photo: Heather Carter Photography It'd been over three years since I've been between the tape (thanks COVID) and I wasn't sure what to expect - would I have race day jitters? Would I be able to handle my nutrition properly? Can I still start well? What about my pre- race ritual? While I had considered myself more or less "retired" from racing after three years off, I tossed my name in the hat, got on the waitlist for the first round of Cascadia Dirt Cup 2023 (CDC Hood River Enduro) and said to myself if I get in I will race. Well, I got in! If you're not familiar with enduro racing, here's the low down - generally speaking there are 3-6 timed race "stages" each day - these stages can be anywhere from 1 minutes to 25 minutes long, pinned, descending as fast as you can. Events may be 1 day or two day and at times more (5!). When you finish one "stage" you "transfer" to the next. Depending on the series, you may have a start time at the next stage, meaning you have to hustle even the untimed section. Other events you can take your time as you start the next stage when you get there. Most enduros total 20-40 miles/day with between 2000 and 6000ft of climbing in total for the day. It's a unique format as you have to have the power to sprint and skill to descend, but also have the endurance to make it through the entire day. Imagine yourself racing a 25 minutes stage after you've raced 4 stages already, climbed 5000ft and ridden 30 miles. You're beat, but it's time to race. It's so very fun and challenging at the same time. Race day eventually came, and it's like I'd never left. There were no race day jitters - just focused, almost moving slower through my old routines. The day went as planned, albeit my starts could use a little bit of work - I managed the win by 40 seconds, and was proud to stand on the top of the podium amidst some folks I used to race against three years ago. Note to self: Anything is possible if you want it bad enough, just do the work, and never be afraid to try! But, where do I start? 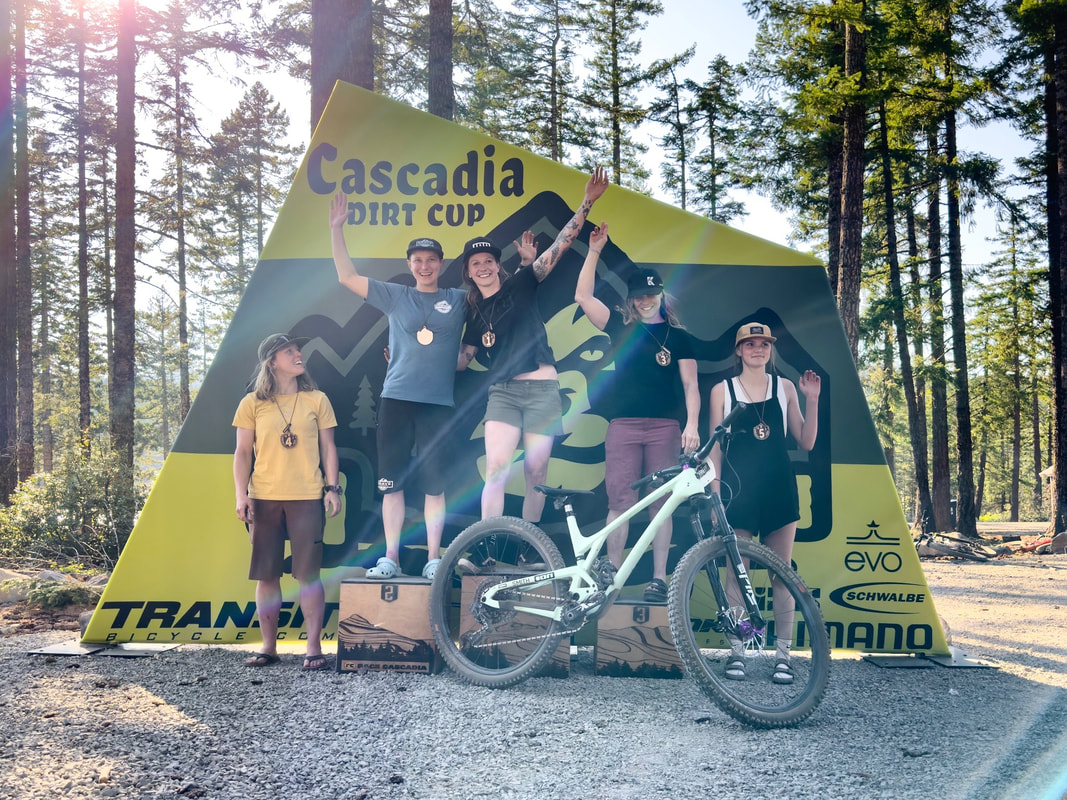 They say preparation is the key to success - one of my most important pre-race habits is prehydration! Starting the day before, I make sure to pre-hydrate with plenty of water. I usually aim for my body weight + 20oz daily, so will typically aim for an additional 20-40oz prior to race day. I then take a preworkout the morning of about a half hour before the race - my favorite is 1st Phorm Endura-formance - a stimulant free pre-workout containing creatine and beta alanine, supporting optimal ATP energy regeneration, while fighting off muscle fatigue via reduction in lactic acid. You can expect improved muscular endurance and overall anaerobic power. I've been using this formulation during training rides over the winter and can tell a pretty big difference in how I feel on the bike, as well as overall strength - I am generally able to ride harder and longer than when I do not take it before rides. If you haven't tried it, you should. It's all natural, comes in a whole bunch of different flavors and tastes DELICIOUS! Check it out! 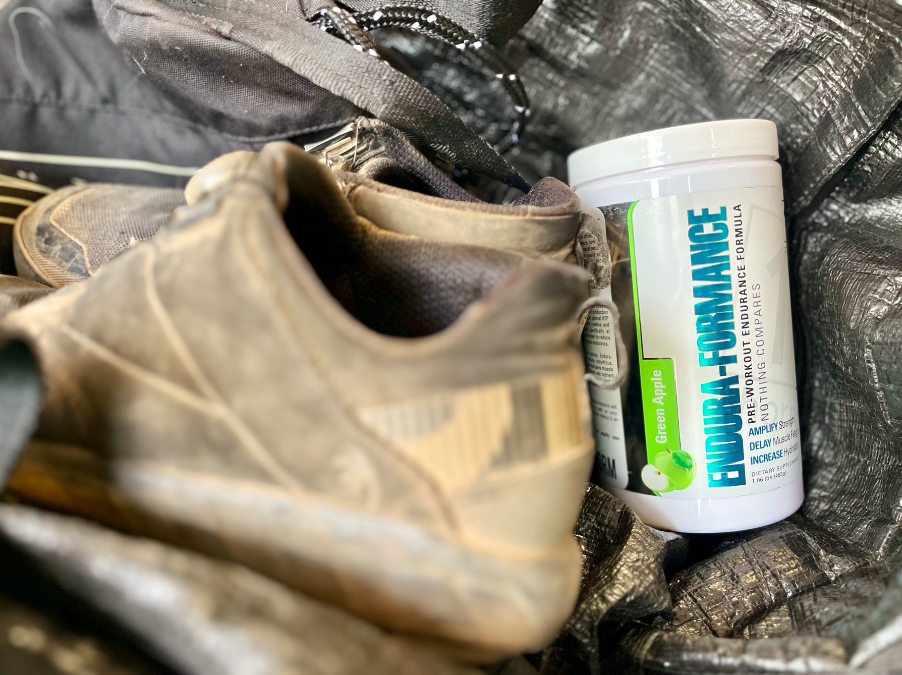 Stay tuned for more race day tips & tricks! Kim Hardin  March 2020, Nick and I had just returned from racing bikes at Andes Pacifico in Chile when our world, in fact, everyone's world, came to a screeching halt. We were only home for ten days before we not only closed our doors for dine-in as required by the State of Oregon, but to all dining. COVID had made it to the US and spreading rapidly amongst the population. Based on the information we had, the timeline associated, and the seriousness of the matter, we had no idea when we would be able to re-open to dining - we made the dreadful call to each and every one of our employees to share the news. Fearing for the livelihoods of our staff, we made the difficult choice to officially lay off everyone so they could receive unemployment benefits (the only way people can access these benefits in Oregon), otherwise there was potential they wouldn't qualify. Never in my life did I think I'd have to make that sort of phone call, let alone 25 times over, to some of my most favorite people - everyone had a job as soon as we were able to re-open, but we had no timeline when this would happen, and little to no information. The only thing we could do was assess state rules & regulations, and reopen when we were allowed to. That night Nick and I went through all the emotions - sadness, anger, anxiety, frustration, confusion... The restaurant and community we had worked so hard to build was forcibly closed to any and all dining. While we had hopes it would only be a few weeks, and thought perhaps we take a few weeks to "Go Ride Bikes in Moab", we decided we at least needed to try to make rent - let's sell some milks and toilet paper - as we truly had no idea when we could reopen to in person dining! We were not going down without a fight! We decided to give it a go with TO GO dinner service seven days a week, just Nick and I, until COVID went away or until we were able to bring back staff. Within a day we had built an Online Portal for online ordering for KickStand, and created a "socially responsible pick-up" zone. What is the normal now was brand new and even foreign back then - place your order online via our website, and pickup at the stated pickup time. We would package up your order and put it on a table outside in the parking lot with your name on it. We asked that you did not come inside, per State regulations, and wear your mask, keeping proper social distancing in the parking lot as you waited for your order. Our first night was a catastrophic failure with a major printer error - luckily we live in an amazing community of patient humans. Our second night we could hardly keep up - Nick solo in the kitchen, myself packaging orders and managing the phone. The third night we were even busier - every to go order had a note of encouragement with it, encouraging us to keep at it, to not give up. Some reminded us of their favorite meal or experience at KickStand while others came alongside a gift card that would never get picked up - a gift of financial support in difficult times, so to speak. While we would end each shift in tears not knowing what our future would look like or if KickStand would be in existence at the end of all this, or when we could bring our staff back, we fell asleep exhausted every night knowing that we were trying as hard as we could for the community and our future. After a few weeks, we realized we needed help and were able to bring a few staff back to work - we wore masks and kept our distances. We sat around post shift in our corners of the restaurant sharing stories of the crazy world we live in: the lack of toilet paper at the store, the "shelter in place" orders asking people to stay home and stay safe. Luckily, we were considered a vital business, and "allowed" to go to work. In time, we began rotating our menus weekly, taking our local community on various "worldly travels" as no one could travel for spring break - Spain, Mediterranean, Hawaii, Cuba & more! It kept us busy, and provided us all with purpose and distraction in such a challenging time. I believe it was July before we were able to properly open our doors to indoor dining again and bring back all our staff. At this time, we were able to bring back lunch as well, with breakfast still very much behind a locked door, key thrown away. Over the course of the next few months, restrictions would change almost weekly based on COVID prevalence in Hood River county - how many people allowed per table, how many people allowed in the building, masks not required at tables, but are required if you stand up. Some weeks we would move forward as a county, and other weeks we would take two steps back, especially challenging as a tourism-based town where as a business we were dying and needed sales to survive, however were emotionally torn knowing the tourism might potentially affect our COVID numbers as a county, meaning we might have to close to indoor dining the following week. Despite these challenges, we had a successful summer. In November, per the state, we were closed to indoor dining again due to a re-surge in COVID numbers in Hood River county. We found ourselves going through all the emotions yet again, however, took the pivot in stride, and got creative serving tables under a tent outside. Mind you, it was winter and may I remind you we were serving tables OUTSIDE in the SNOW while it's 31 degrees - with only ONE WALL on our tent (thanks Oregon!). I thought we'd seen challenging before, but this was a whole new kind of challenge. However, we made it work with 3 fire sticks and 3 firepits adding a bit of ambiance to the tent. Blankets were encouraged. Once again, the community surprised us and came out in full force, booking all five tables in our tent almost every night.  Fast forward a few months and we were able to reopen to indoor dining in March or April 2021- we strategized from every direction what COULD happen and what was more LIKELY to happen. We had every mask related sign possible you could imagine (wear inside, but not outside & wear at all times expect if you're seated at your table, etc. etc). COVID was re-assessed bi-weekly, with us being notified at the end of the week as to change in service structure, or restrictions - some weeks were a ridiculous challenge pivoting, others simply required taking down signage. We made moves, and planned ahead as though by July we could expect normalcy. What we didn't expect however were extreme staffing shortages - we simply didn't have the staff to reopen for breakfast, let alone be open for our normal counter service lunch. We pivoted and introduced QR codes - Simply scan the code, place your order, and we brought your food to your table. Culture and atmosphere were not ideal & while this was not our preference, it was a necessary evil to even entertain serving lunch. Unfortunately, while we were taking slow but steady steps forward as a business, the industry we loved so much became extra challenging, as in guests' minds, everything was normal, but within the industry it was the farthest from it. What is normally a "Yes" industry had turned into a "no" as we were so often having to say "no". No, I'm sorry per the state of Oregon we cannot have more than 8 people at a table. No, I'm sorry, our menu is not as elaborate as it has been in the past because we don't have the staff to run a full menu. No, I'm sorry, we don't have donuts - we don't even have staff to open for breakfast. No, I'm sorry we are still closed for breakfast. No, I'm sorry, I need to ask you to keep your mask on unless you are seated at your table. The service industry was beyond exhausting and took its toll. Yet we fought hard every day and never gave up. In November 2021, we reopened for coffee & breakfast - a small, simple, executable menu. Rolling into winter, while low staffed, the menu was manageable, and it was now or never. We were able to move away from QR codes for lunch, and revert back to counter service for breakfast and lunch. The bar was fully back open, no more plexiglass, and things were feeling even closer to normal. Fast forward to July of 2022 and we were finally fully staffed. Although, to be honest, even now I'm afraid to say we are fully staffed. What I can say is that we have an amazing team of big-hearted lovely humans in our KickStand family, and it is only growing. While it's been a few years since COVID, it feels like it was just yesterday. What was the most challenging moment in our lives became even more challenging the following year due to staffing shortages, and even more challenging returning to normal operations even now. It has taken every ounce of grit & hustle in every cell of our bodies to keep moving forward. Most days we didn't even know what we were working towards, or to what end, but we were not about to give up. Even when we were at our wits end, knocked down and run over, we found the strength to get up and fight knowing that even if we didn't make it out alive, we'd die trying. GRIT & HUSTLE - courage & resolve, persistence & drive, has become our daily mantra - no matter how hard or challenging something is, if you put your mind to it and never give up, you can get there. You may get knocked down in the process, but if you keep getting up and taking small steps forward, eventually you will reach your goal.  It feels strange writing this three years later, but it's about time I share a snippet of the COVID years, however abbreviated it may be. Every industry faced its challenges, and while ours is one of many, perhaps it can inspire you.
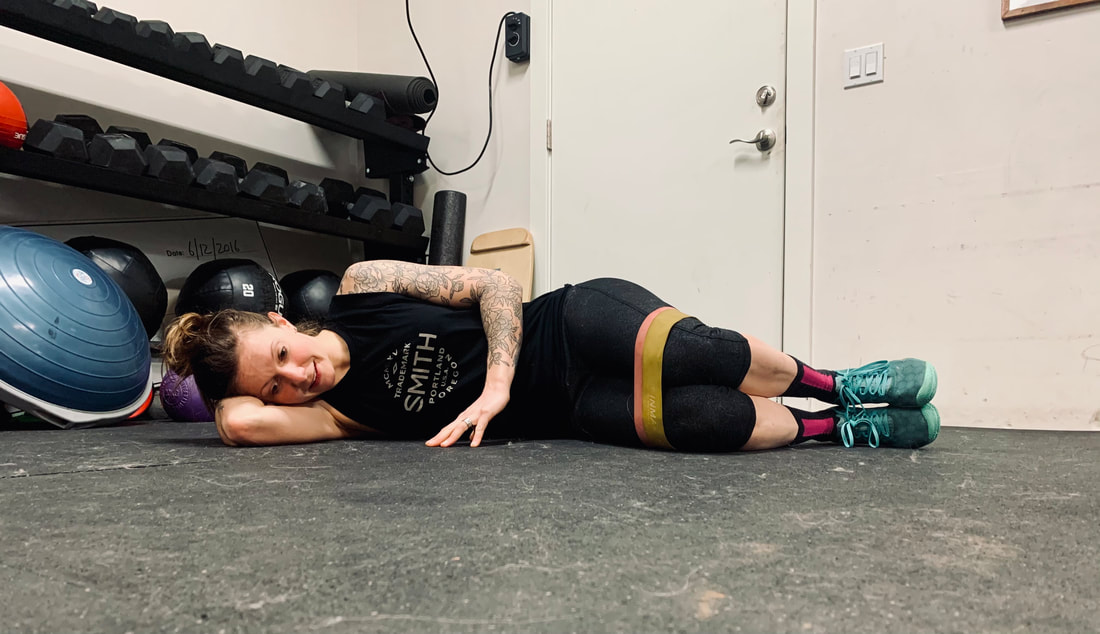
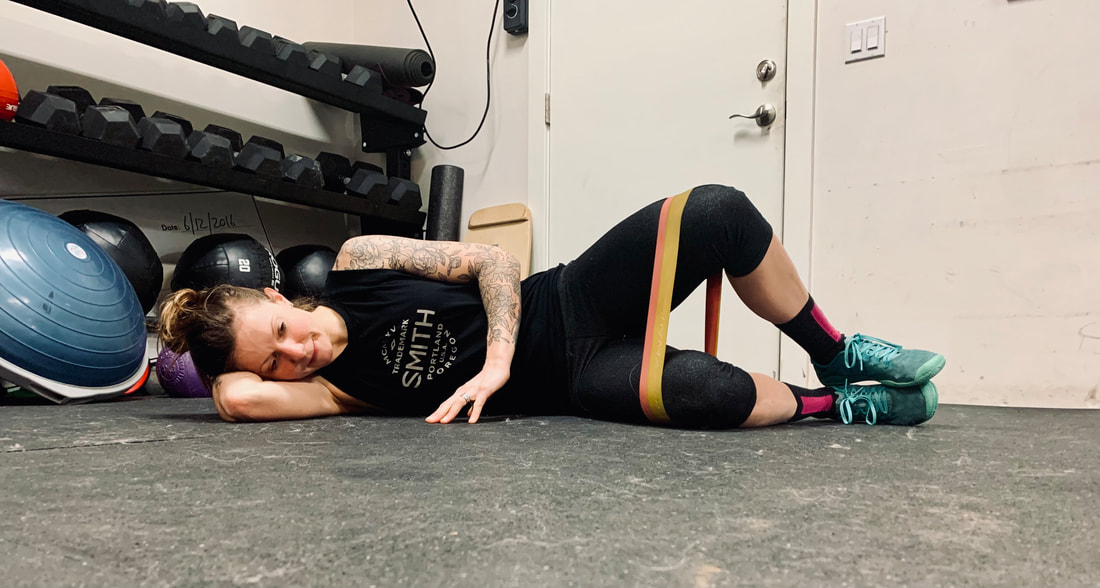
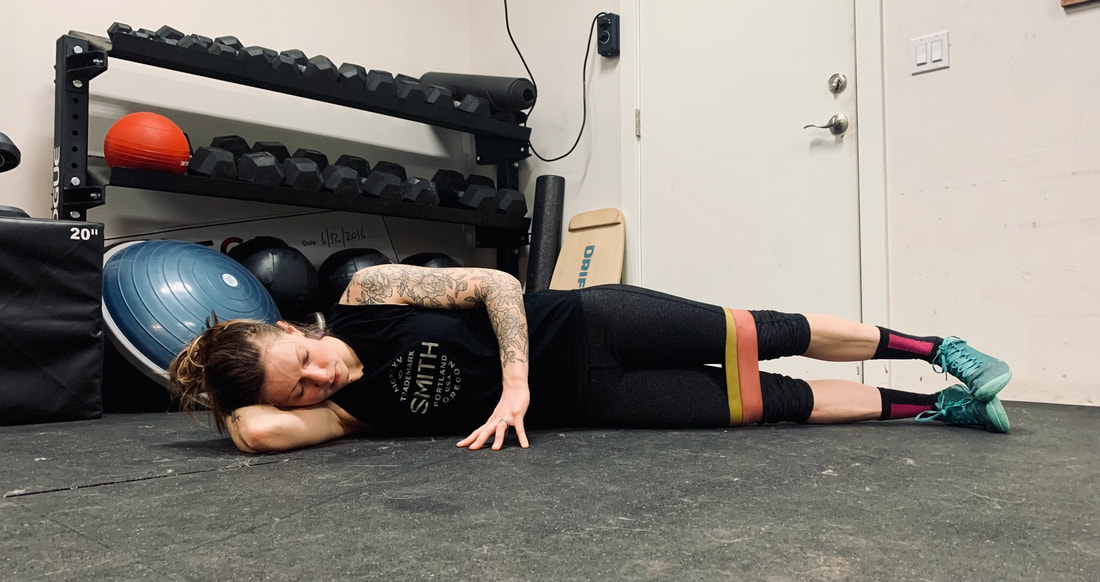
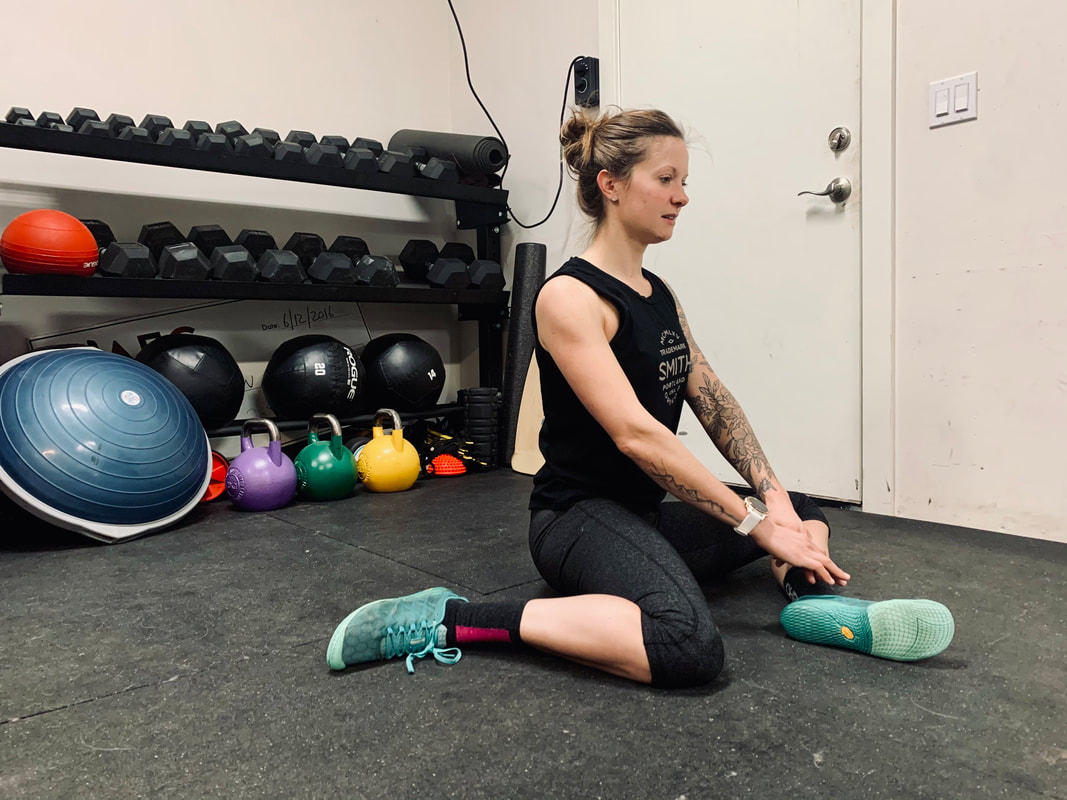
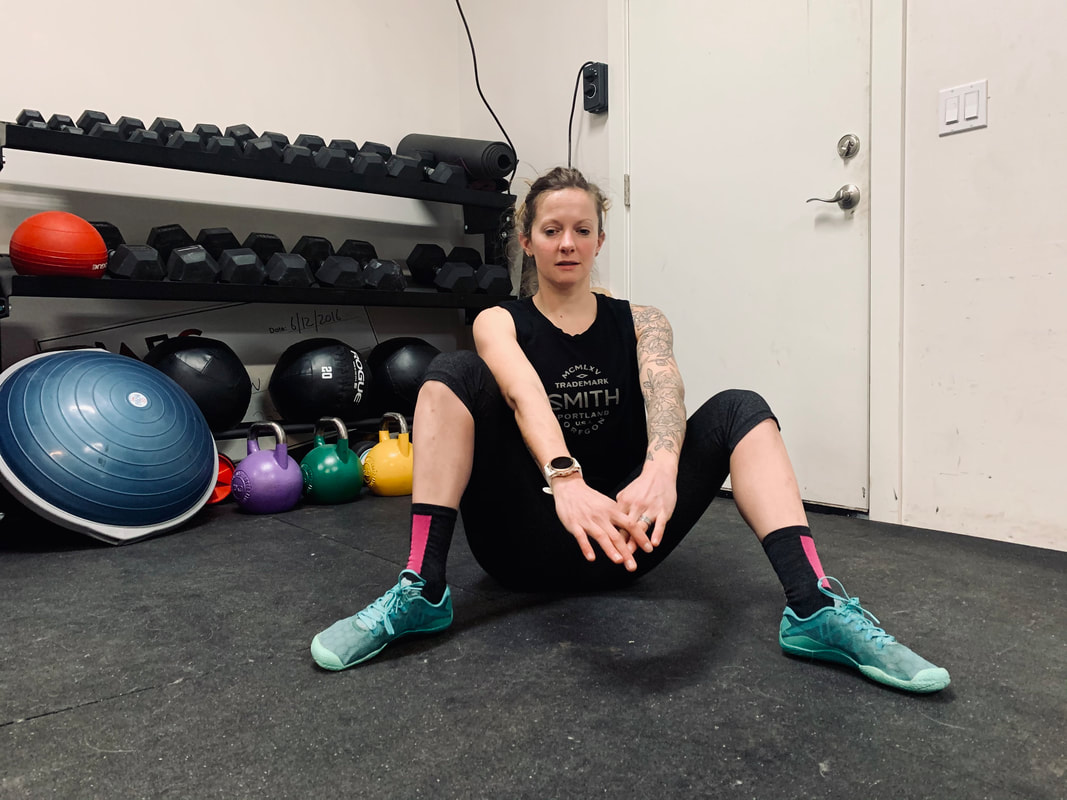
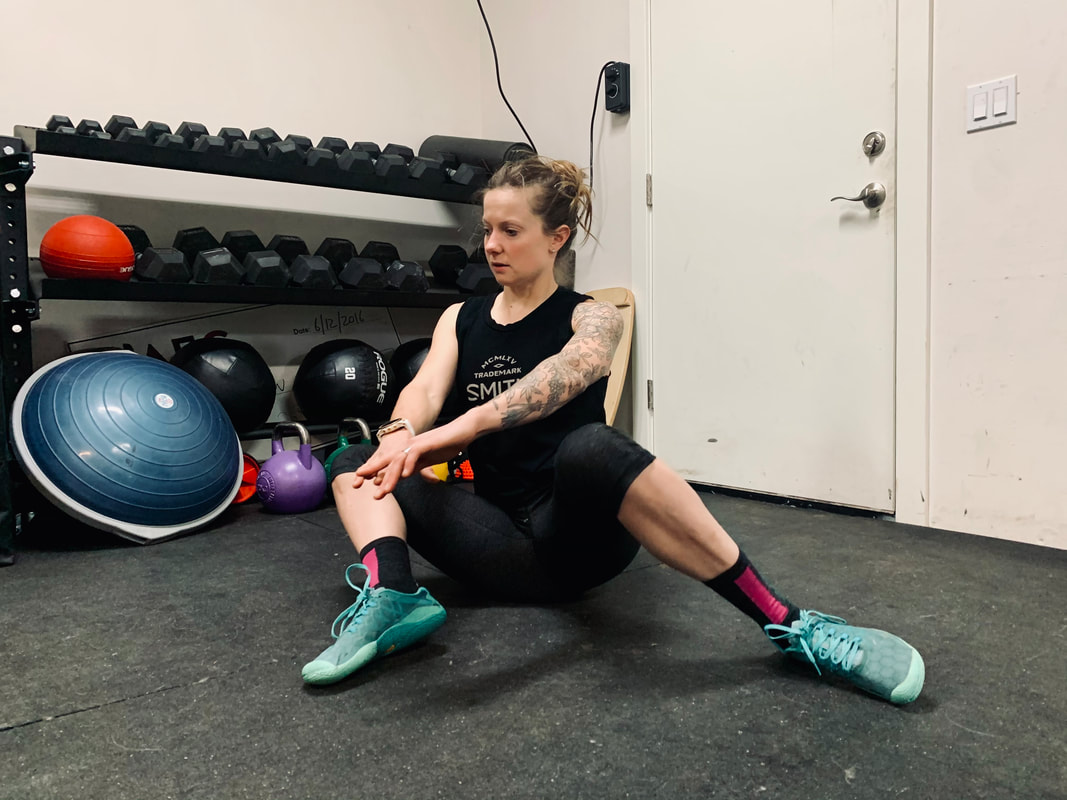
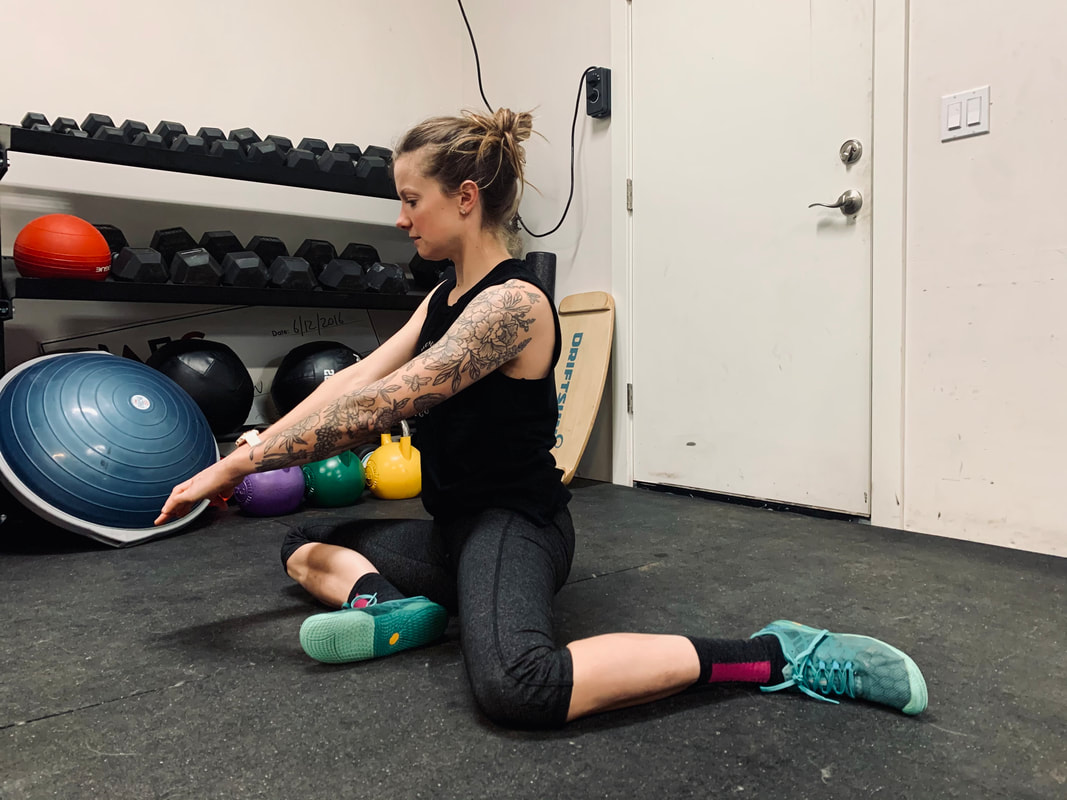
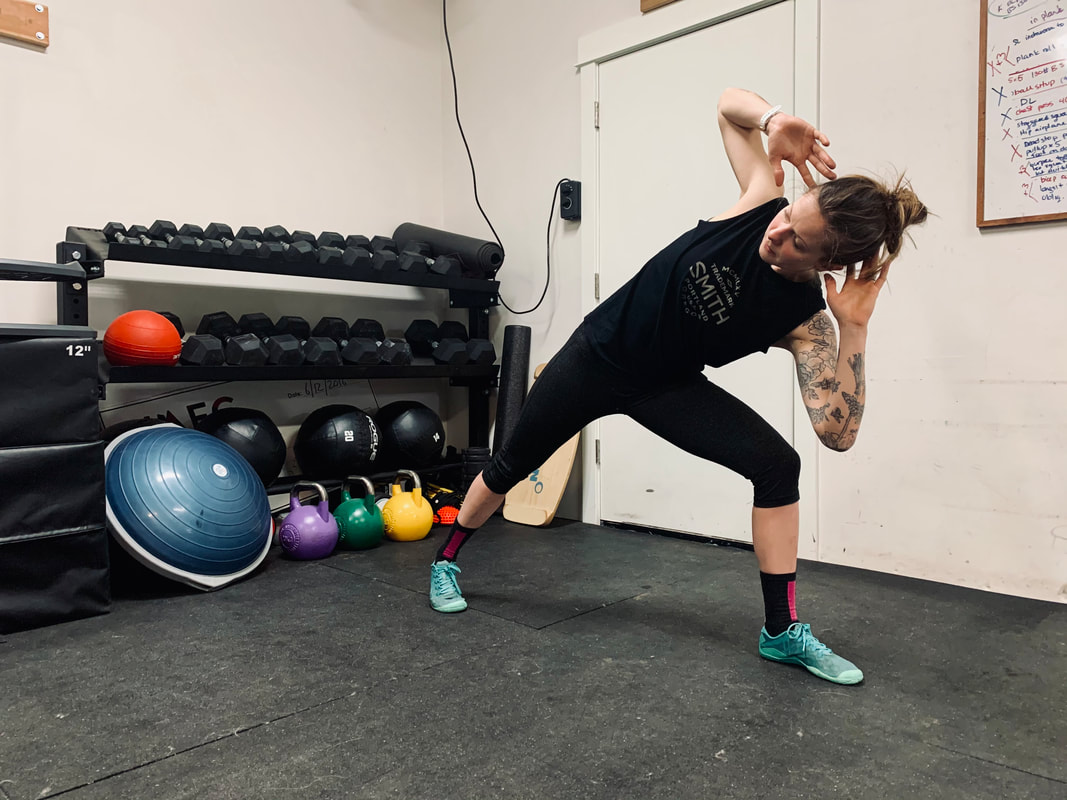
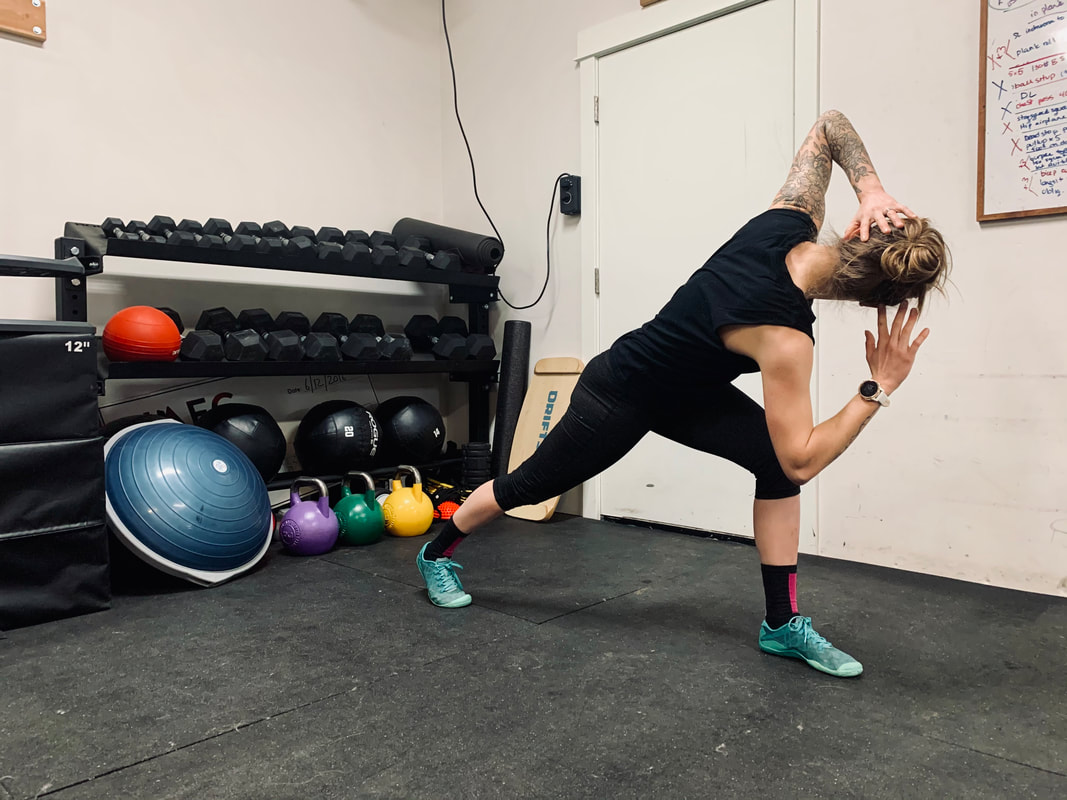
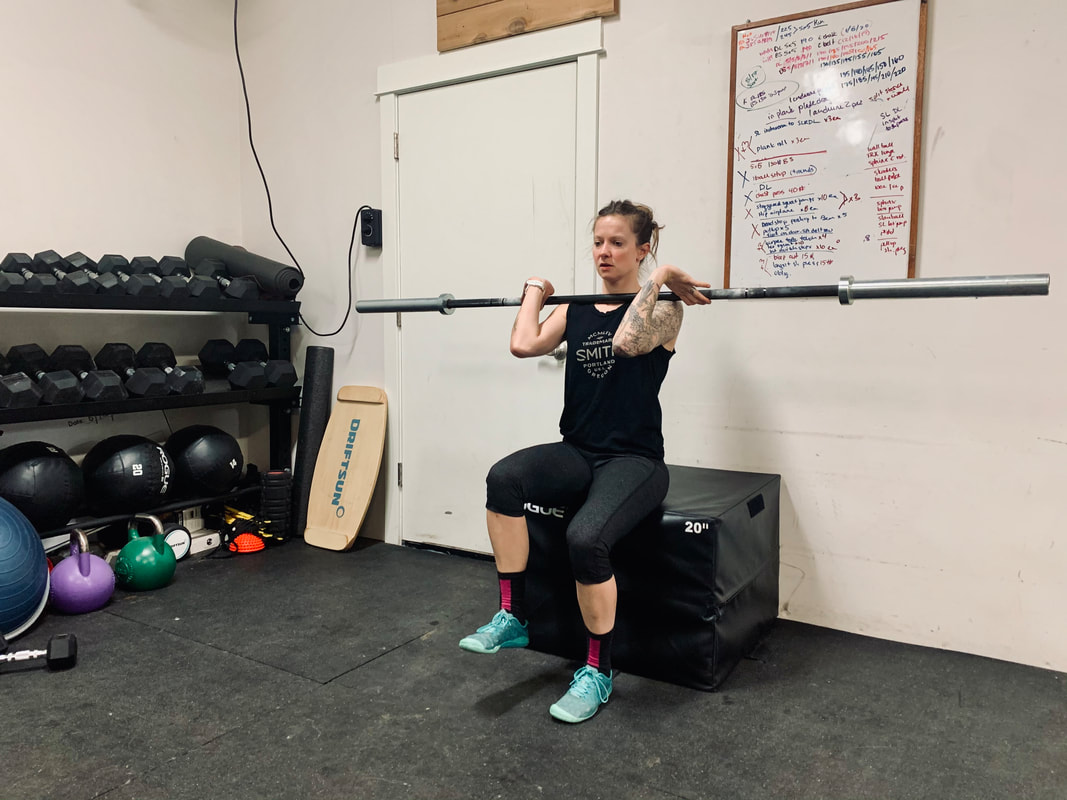
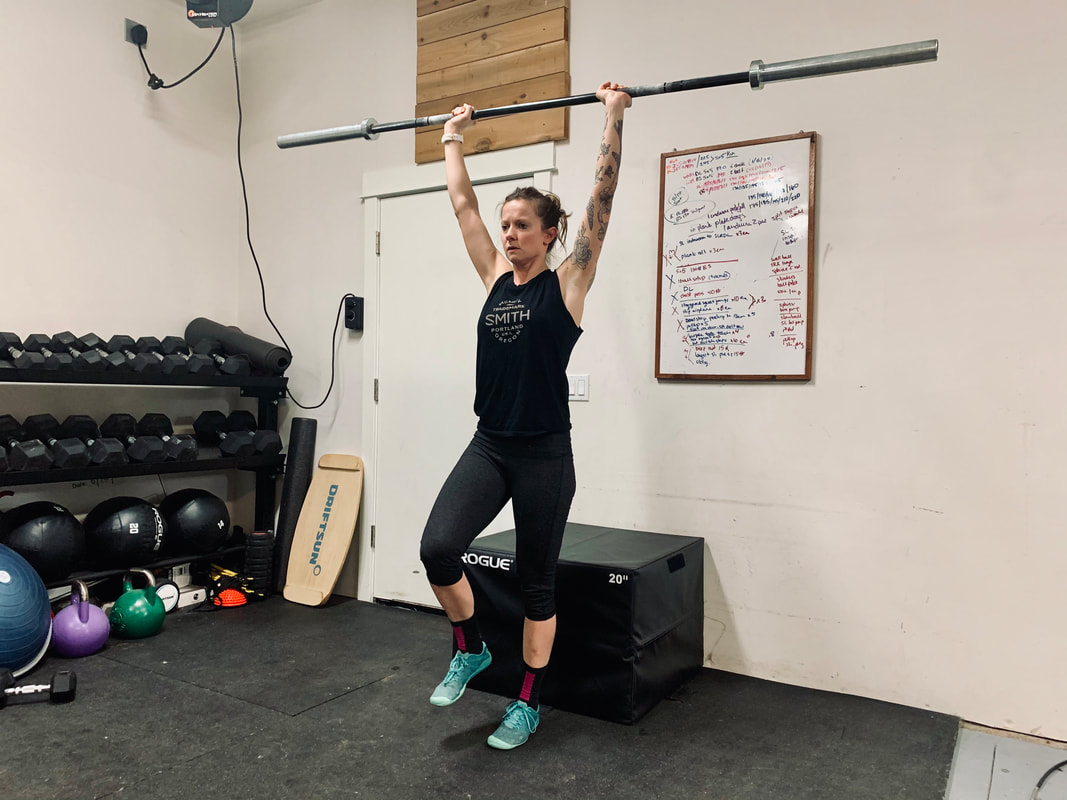
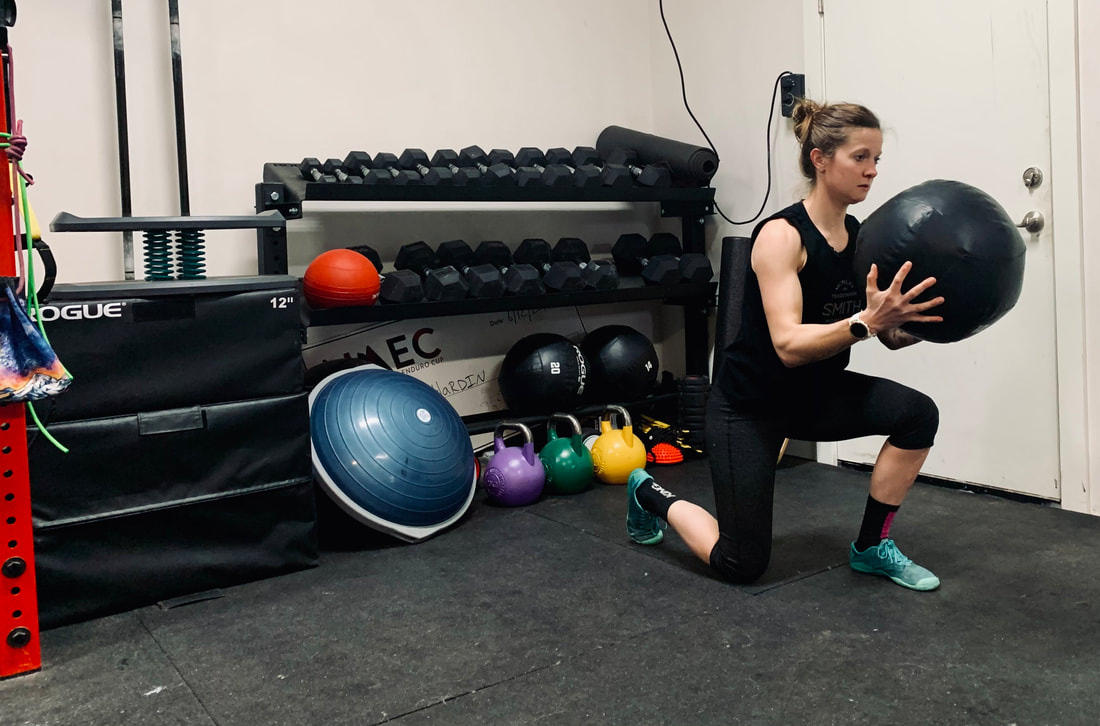
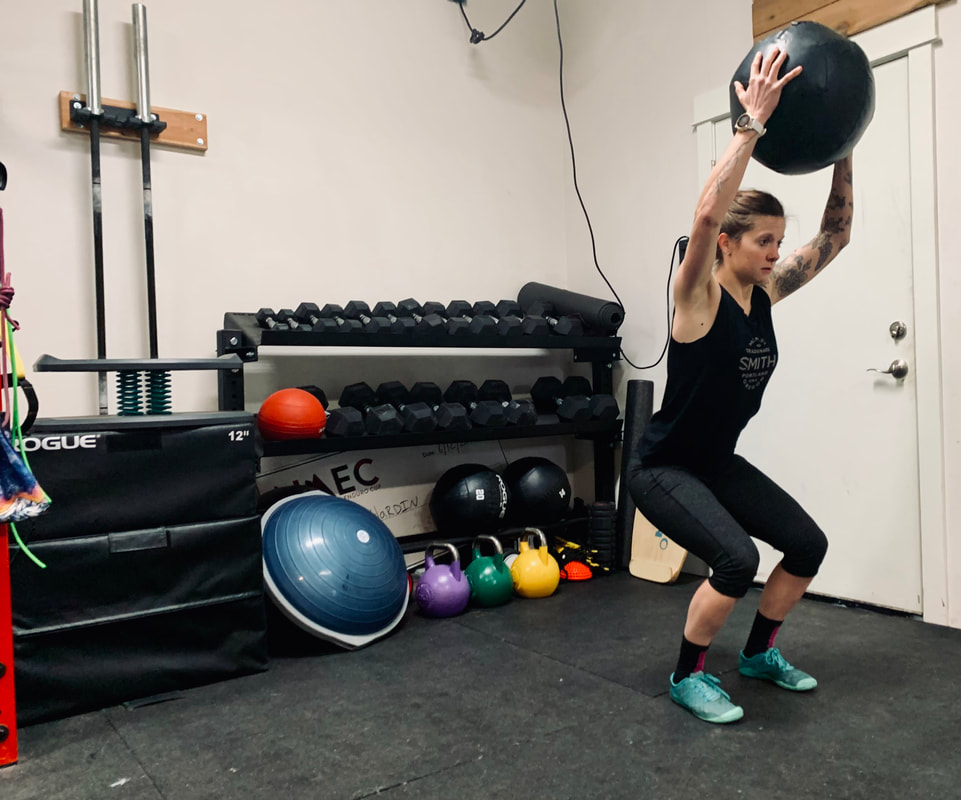
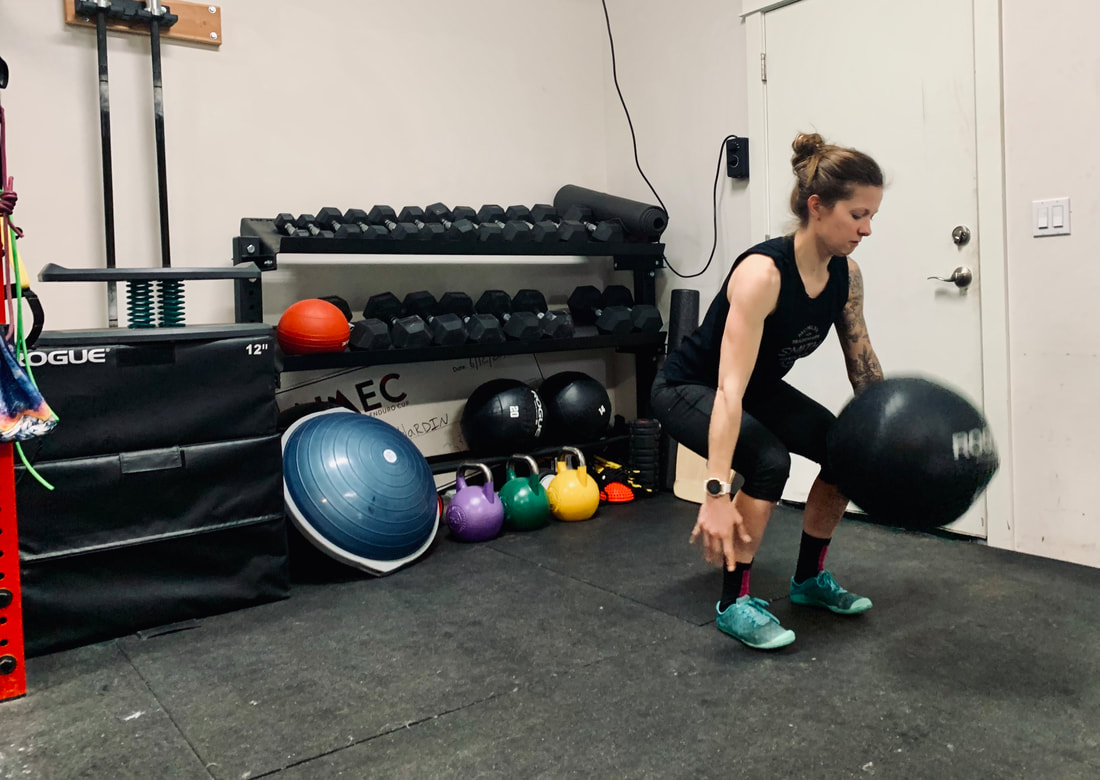
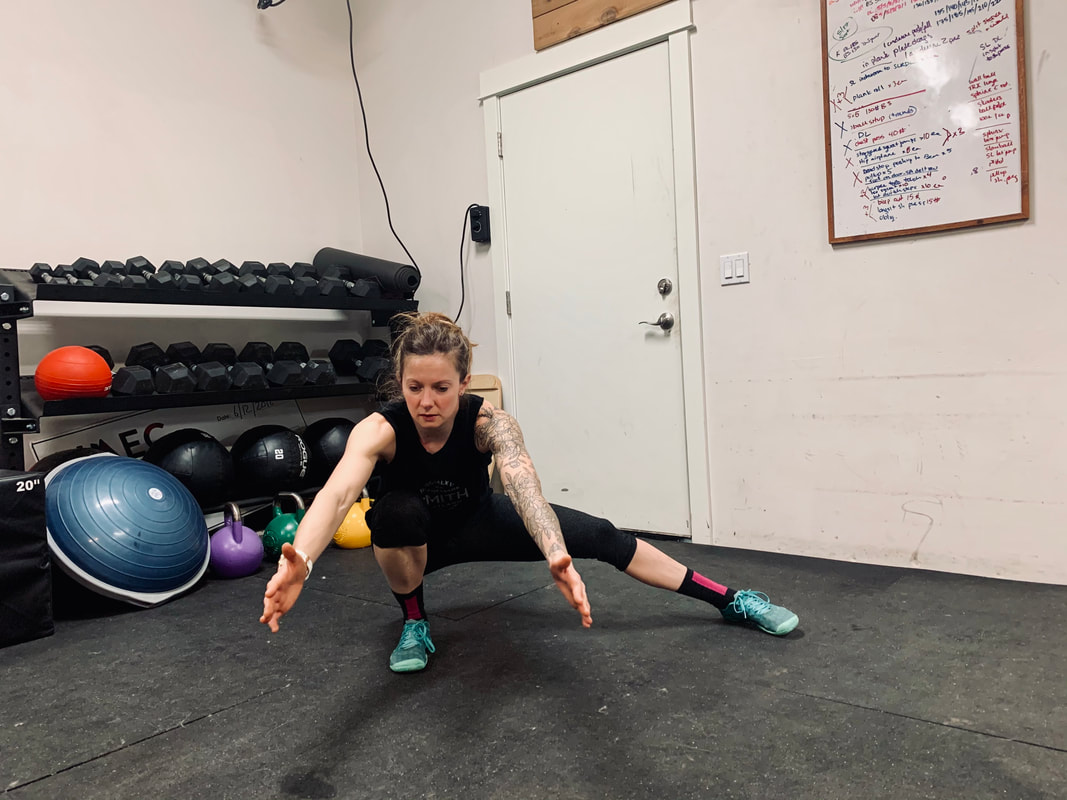
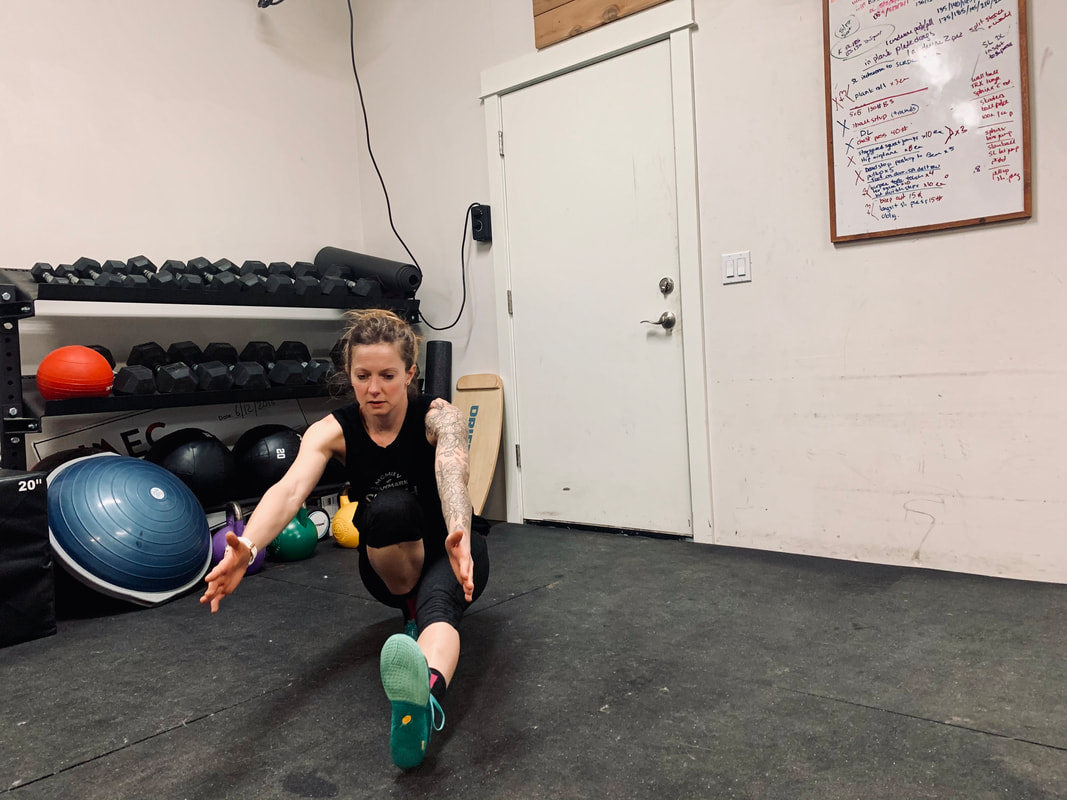
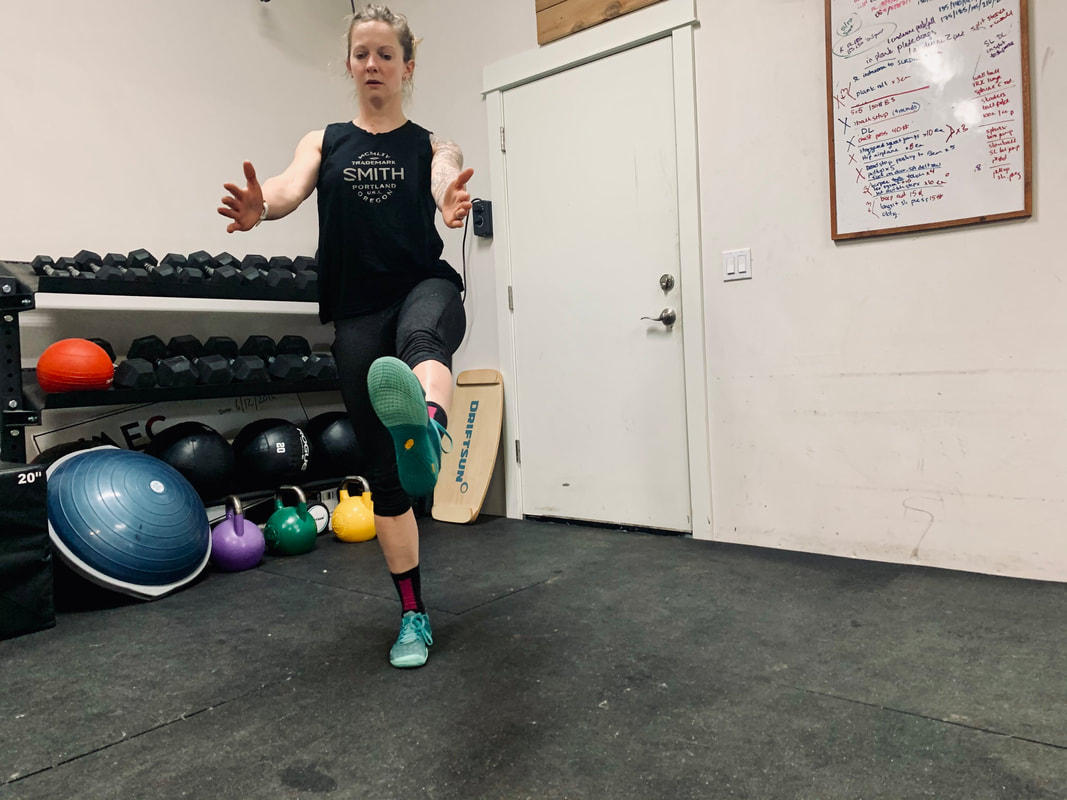
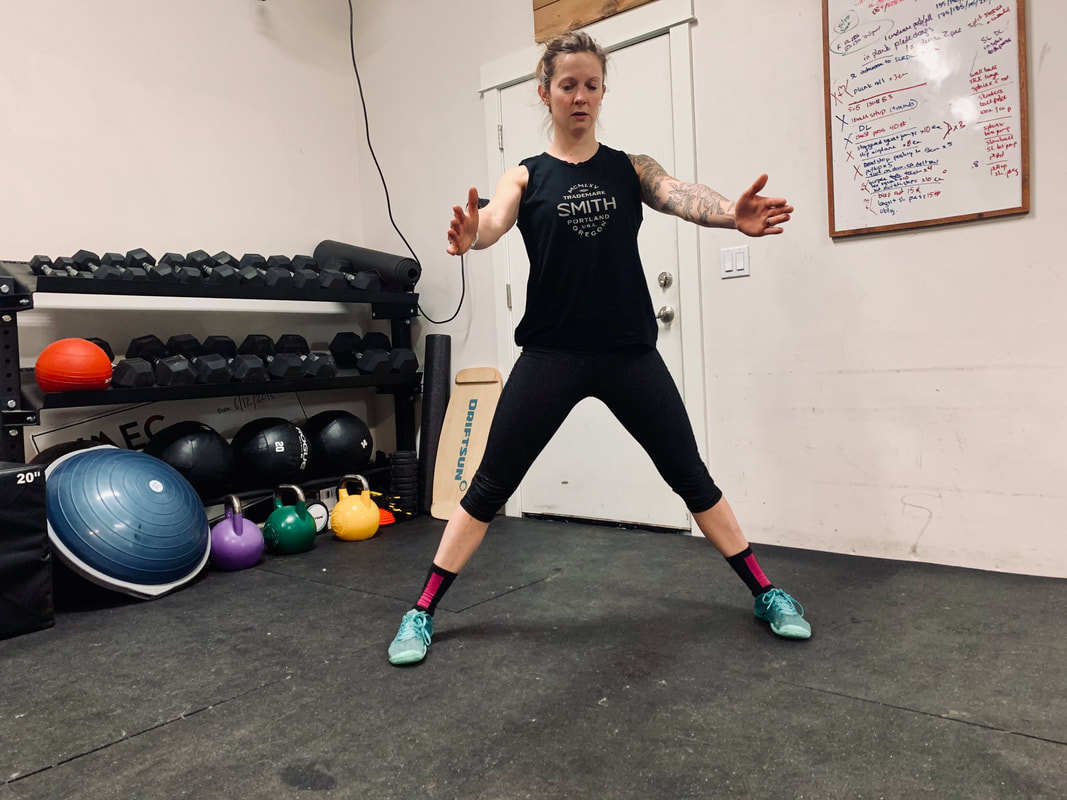
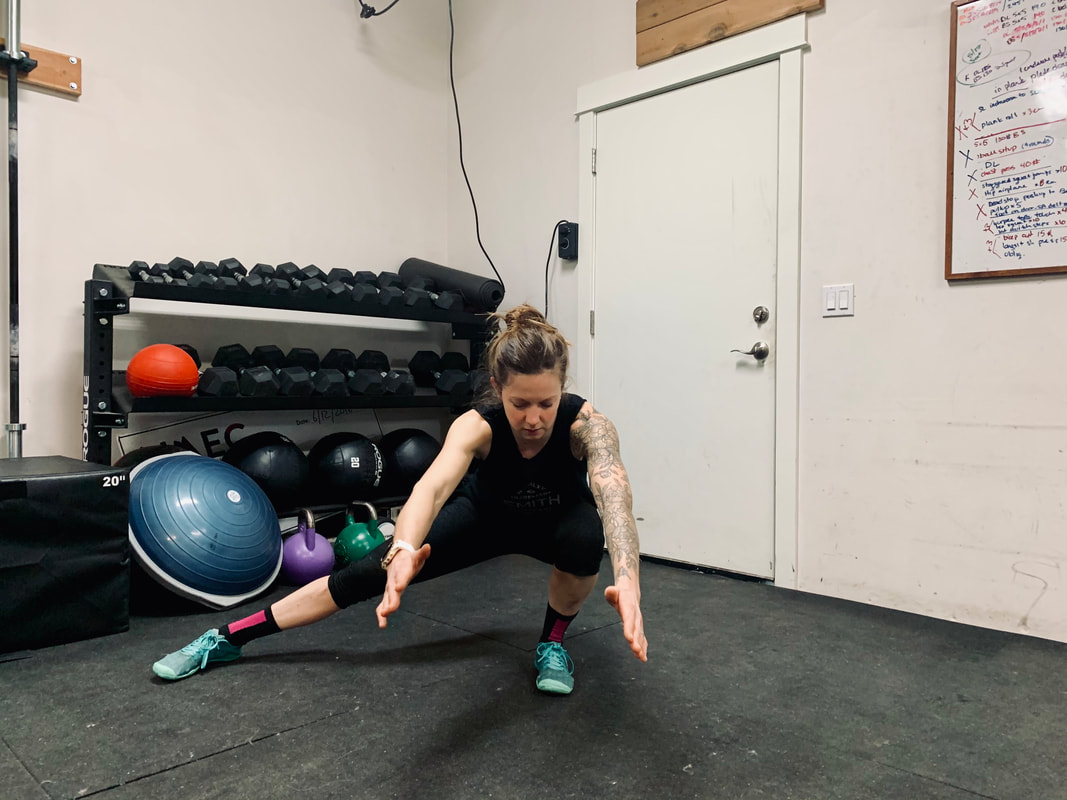
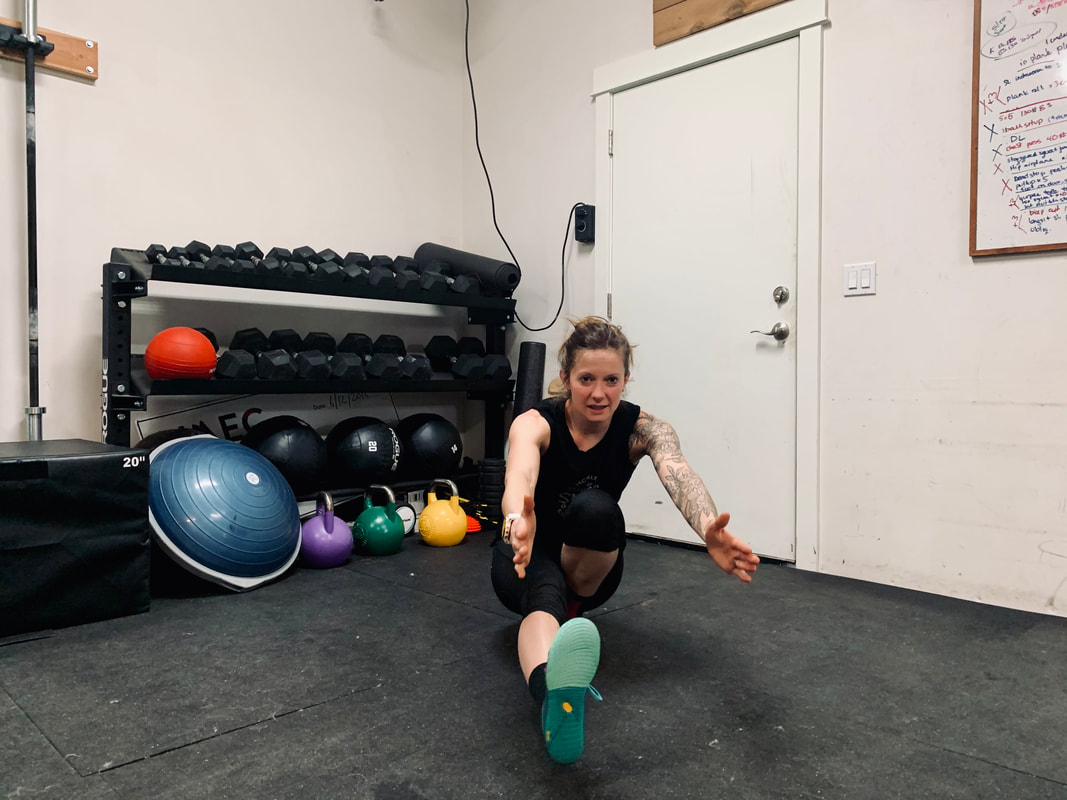
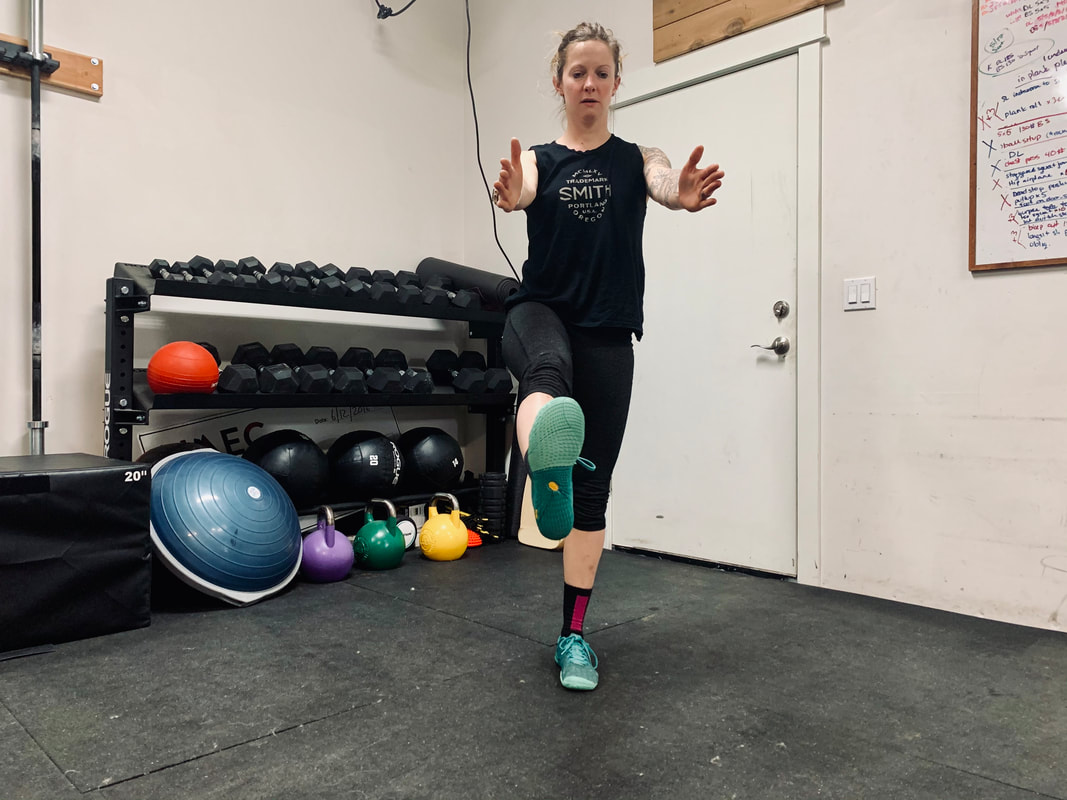
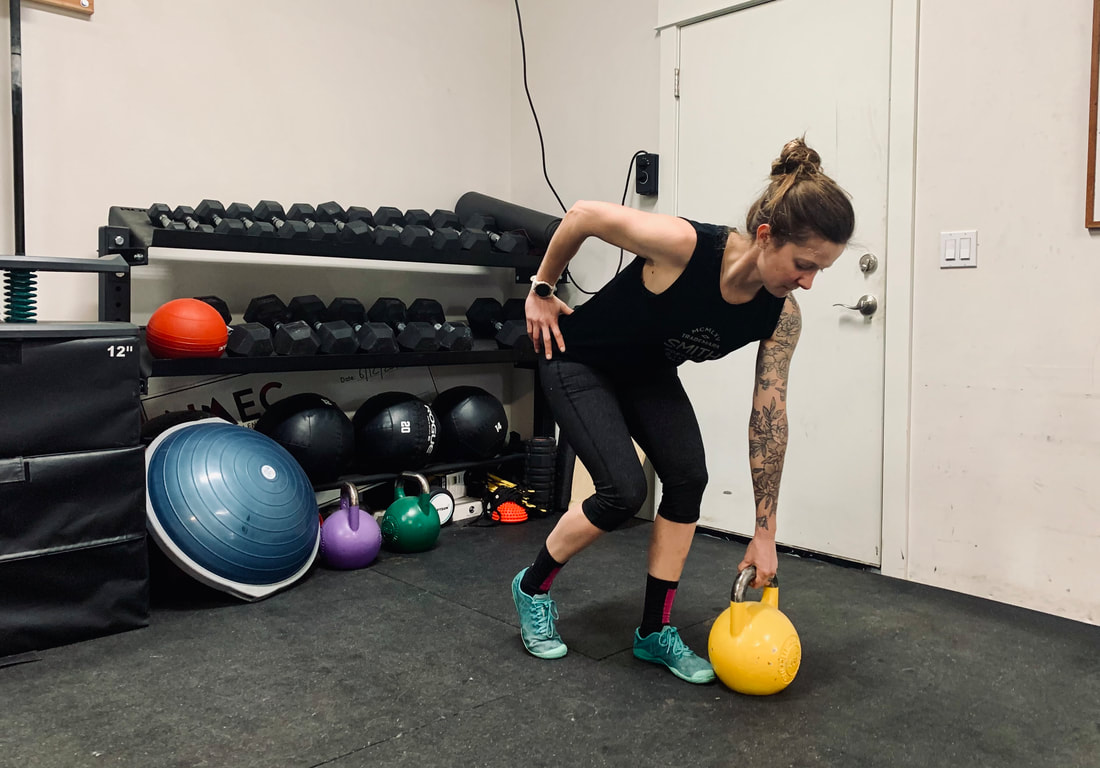
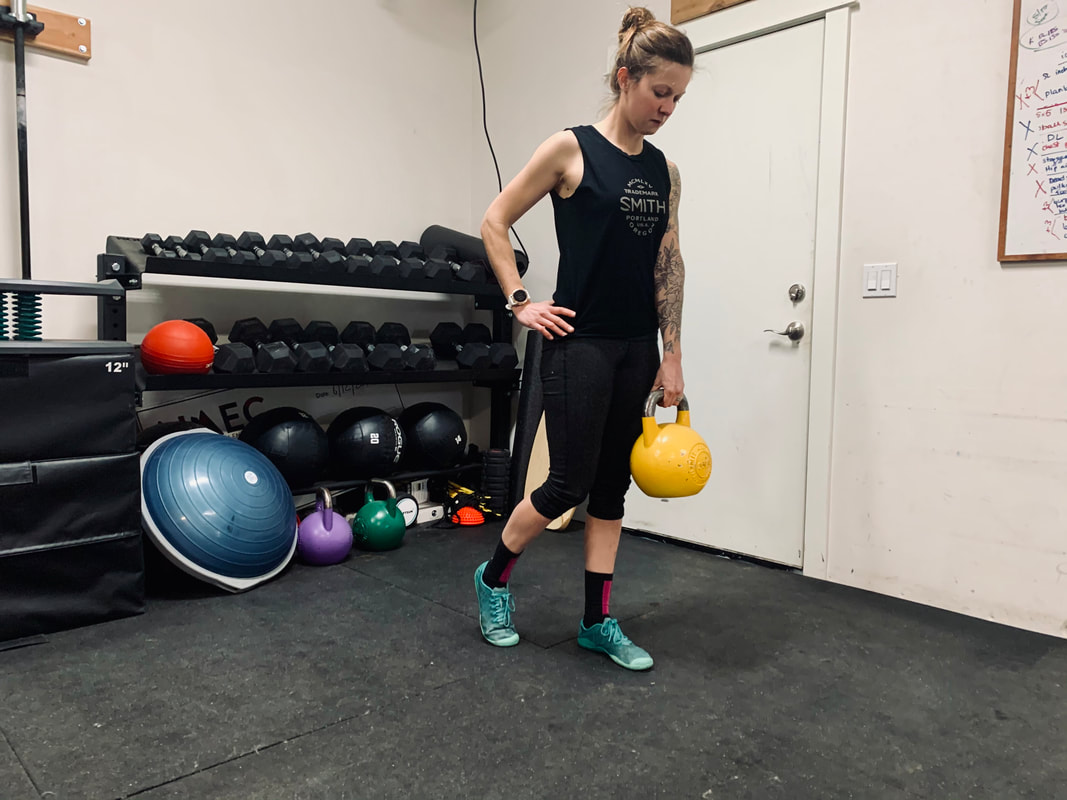
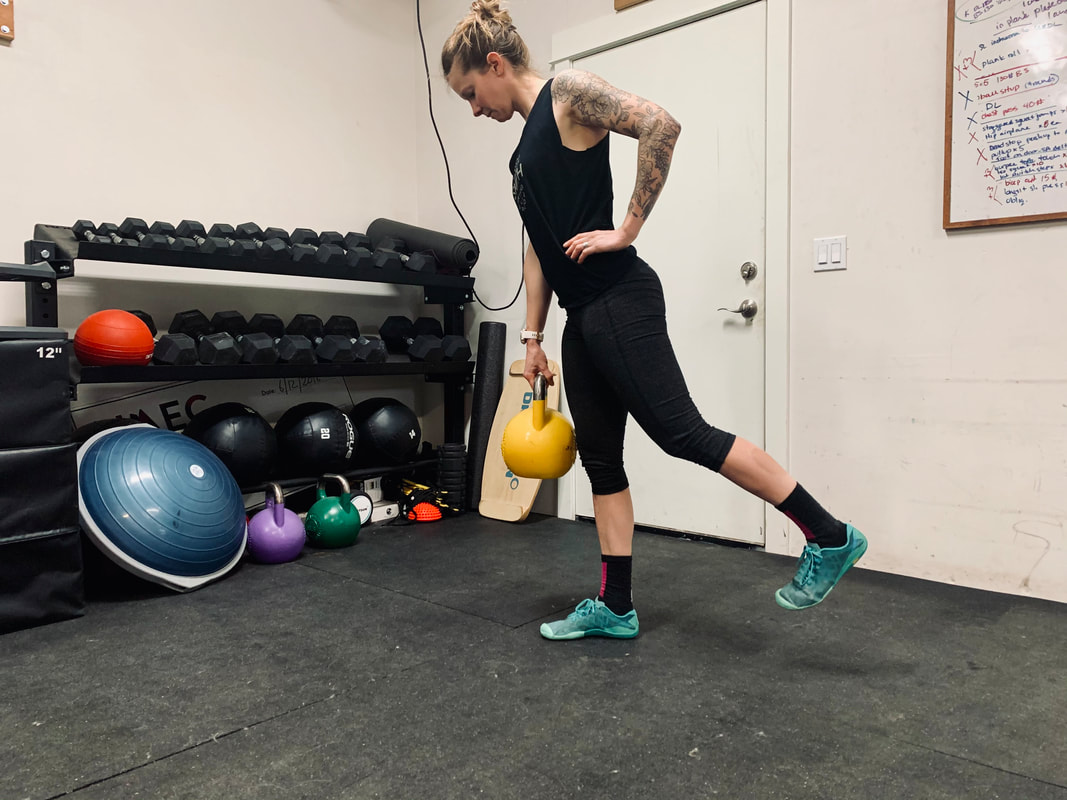
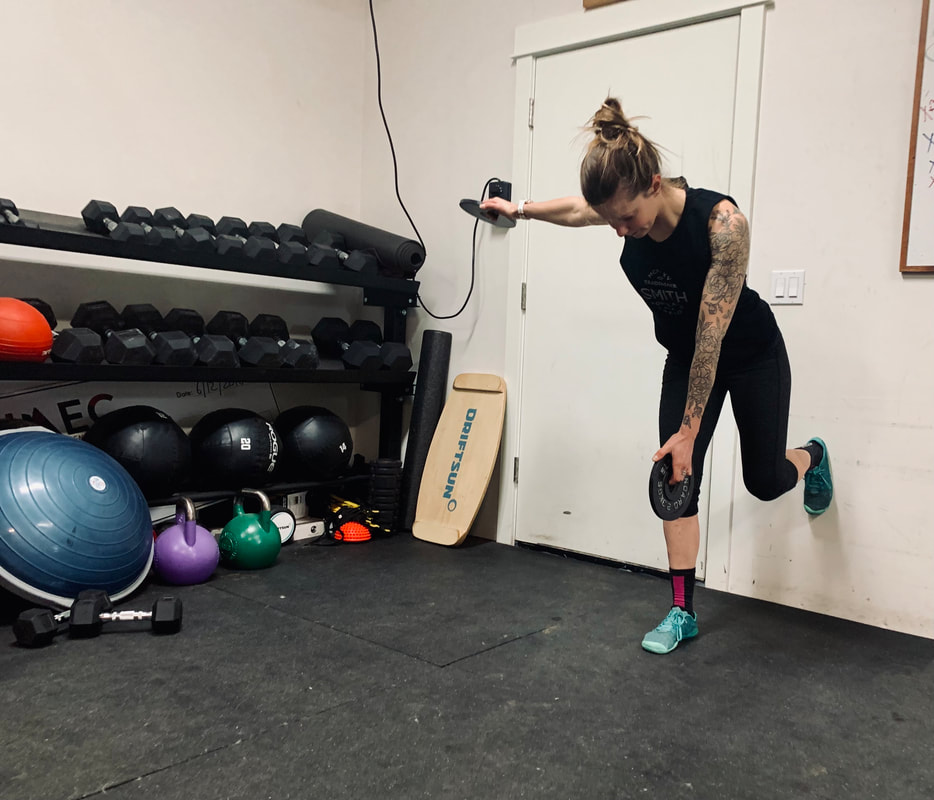
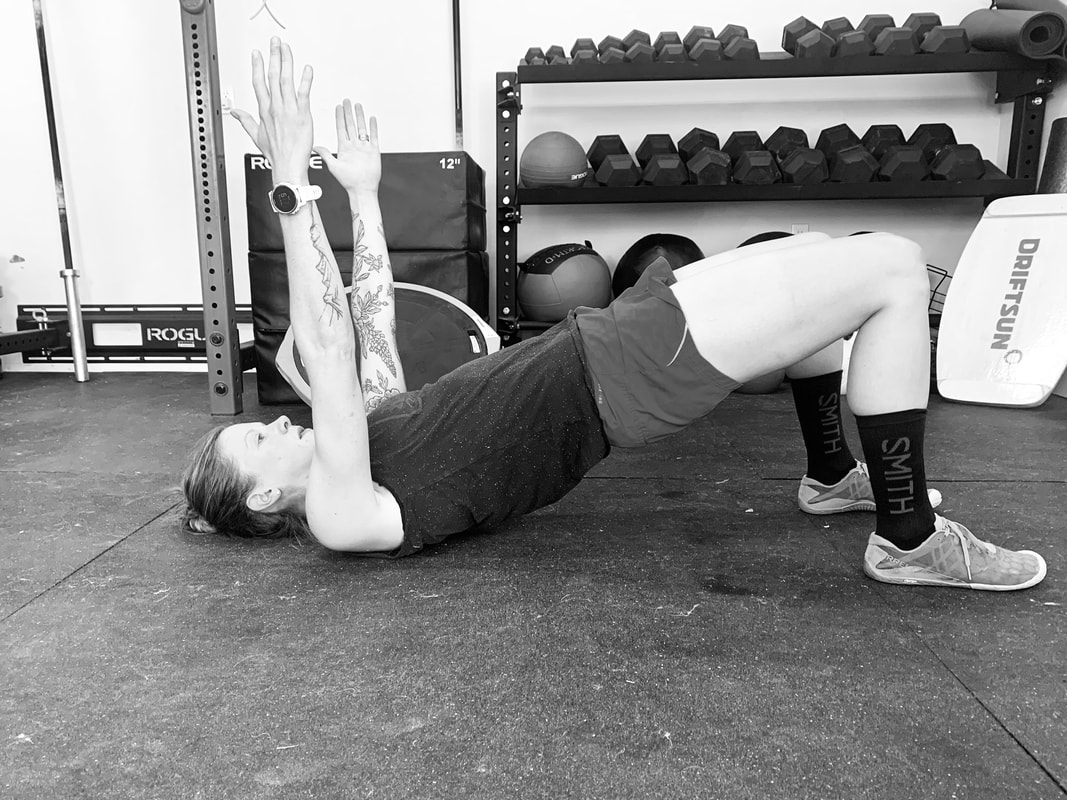
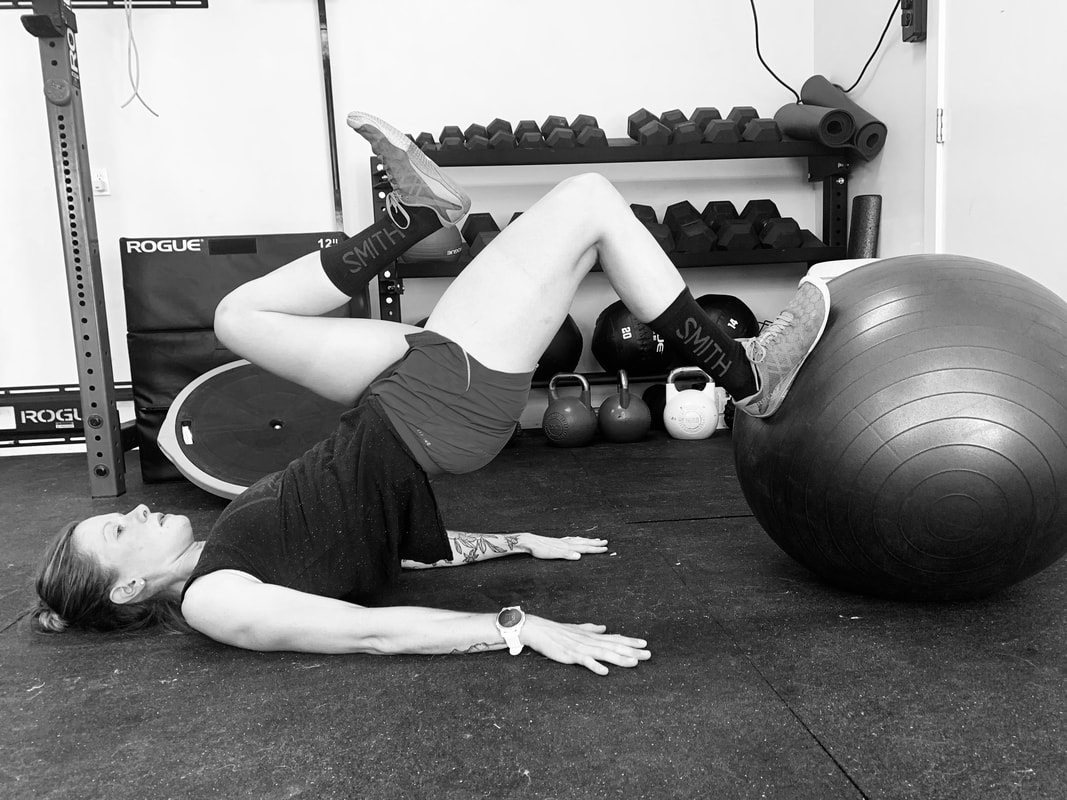
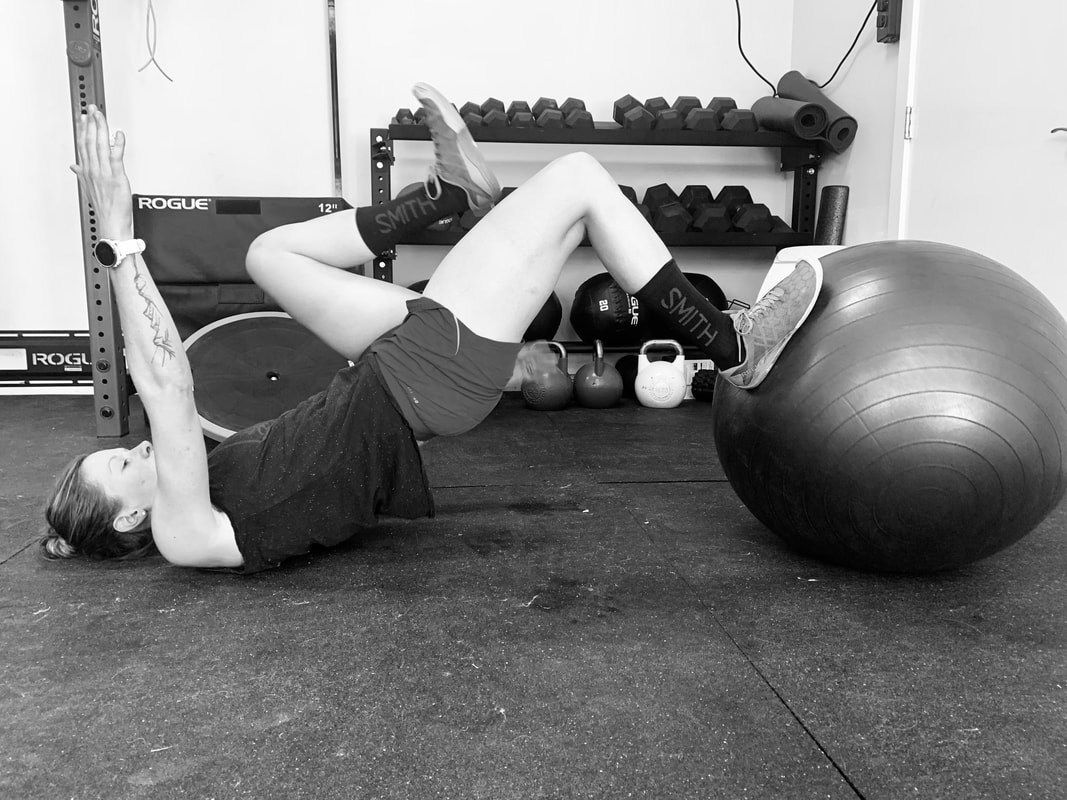
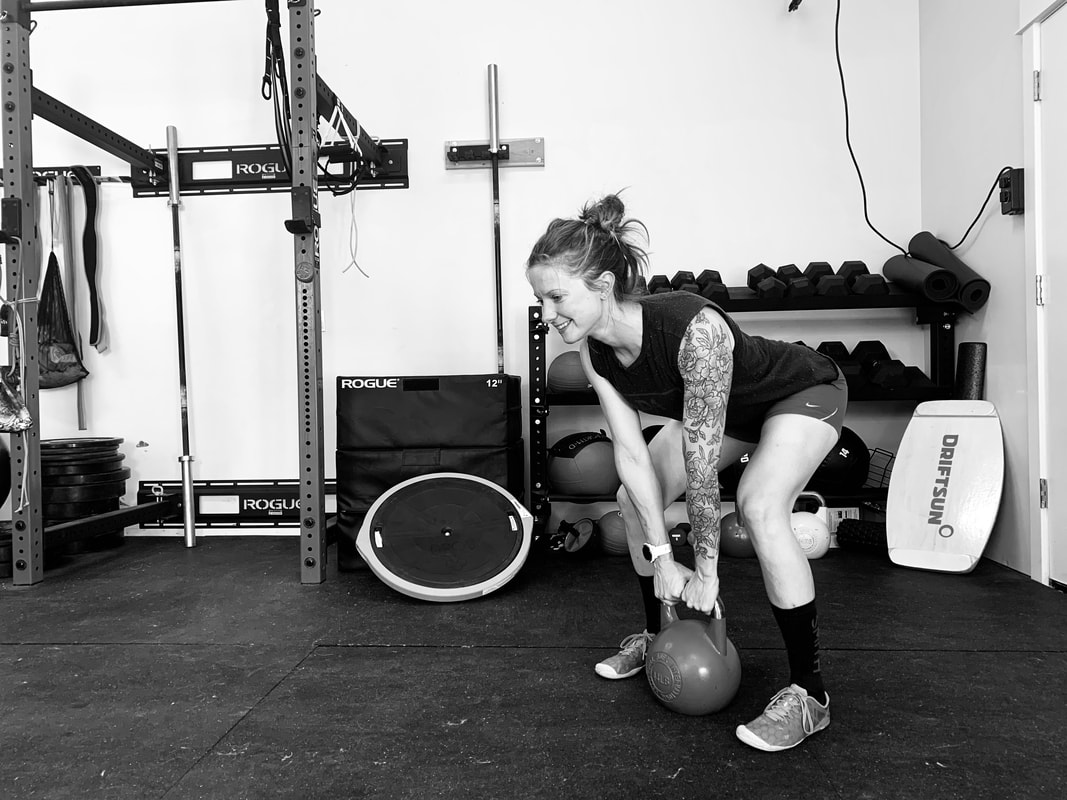
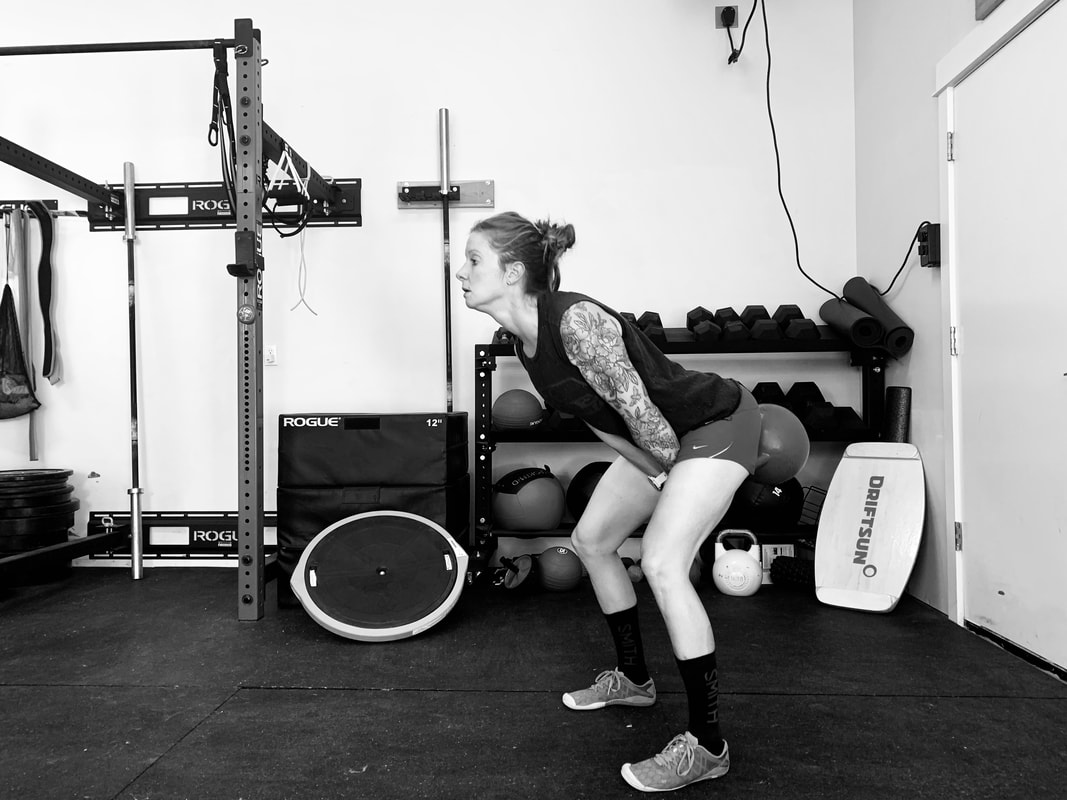
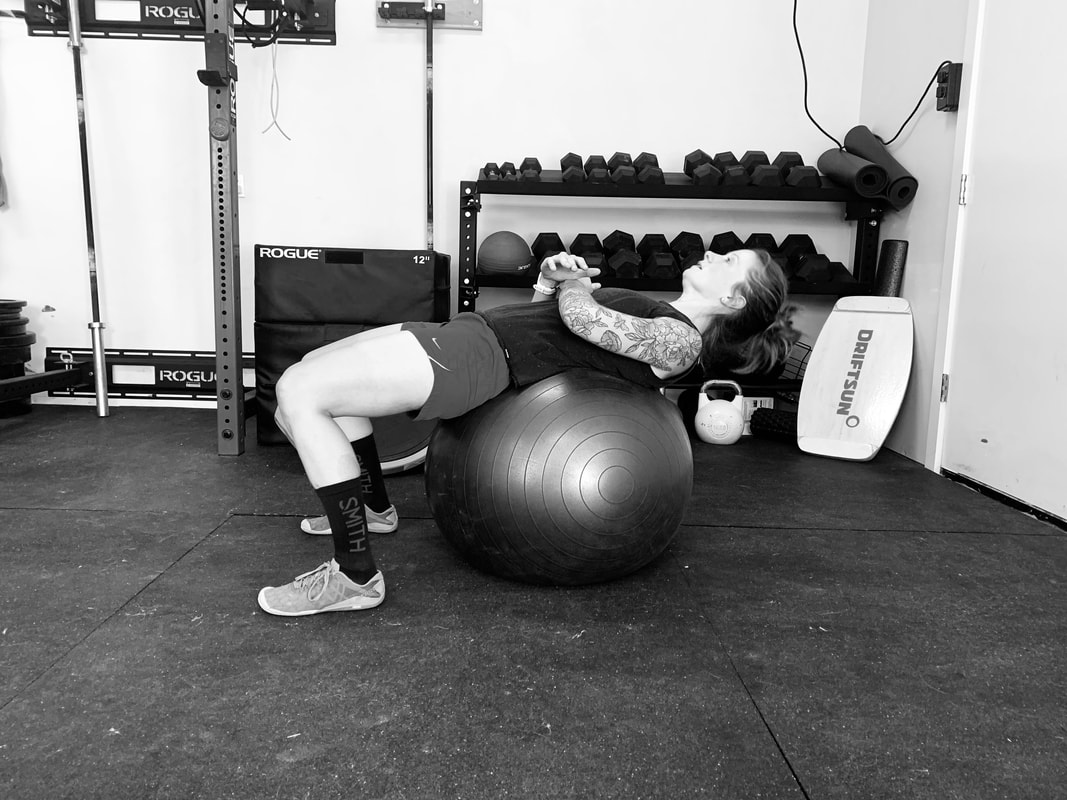
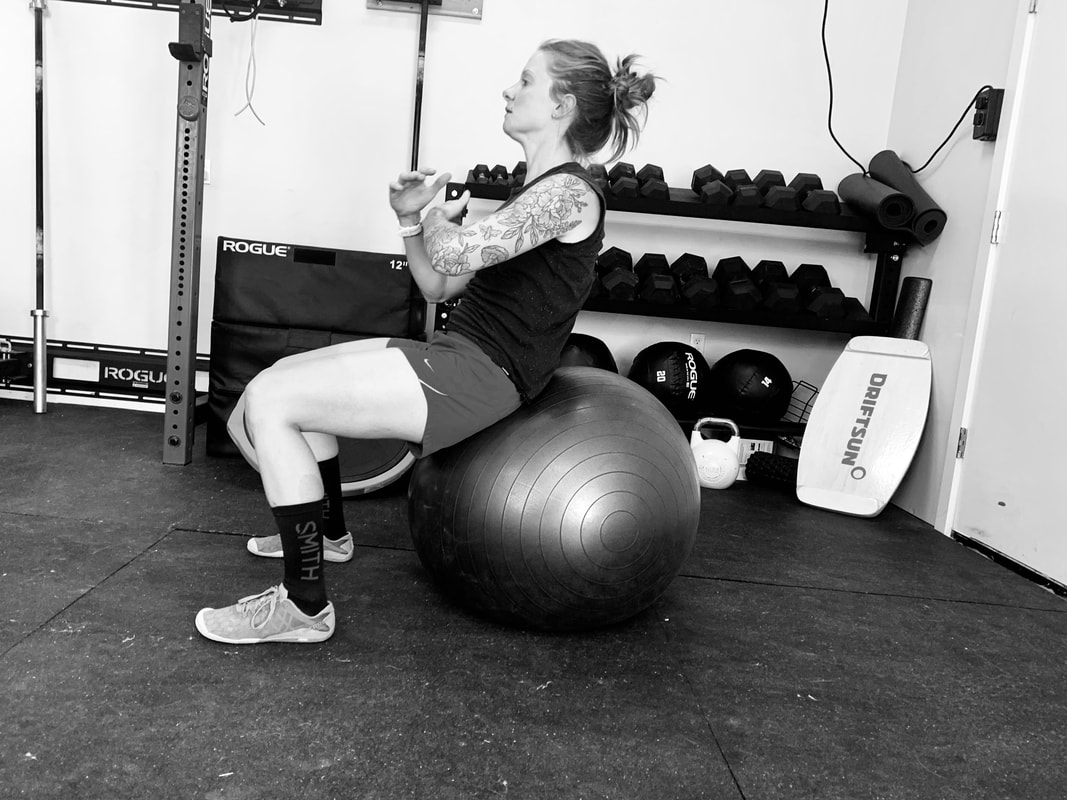
More soon, Kim Hardin Primary movers in cycling include your posterior chain: the hamstrings, glutes, posterior hip and low back muscles. These muscles are crucial to generating power, as well as controlling the hip and directing the pedal stroke (power to the cranks!). At times, these muscles may become inhibited via incorrect saddle position, lack of pelvic stabilization, or lack of hip mobility. A lack of hip mobility looks different on each person: hips rocking back and forth or side to side, incorrect knee tracking at the top of a pedal stroke (outwards, figure 8's, etc), and posterior rotation of the pelvis. Over time, these movement patterns can lead to discomfort and injury, in addition to a lack of power production and on-bike performance. Follow along on some of my favorite hip mobilizations to improve your overall hip health and on-bike performance! Warm-Ups: Wake up those hips with some simple band work... Bandwork: Clamshells Start in a sidelying hooklying position with shoulders, hips and ankles stacked over each other, respectively, and an exercise band just above your knees. Your shoulders should be in line with your hips, which should be in line with your ankles. Engage your core, exhale, and open at the knees only so far that your hips do not rock open. Hold this position for 30 seconds, then immediately perform 8 reps. Repeat for 3 sets each side. Pro Tip: If your hips start to rock open when you open at the knees, you have opened too far - for some, this may be a movement of inches! Bandwork: Sidelying Hip Extension Remain on your side, exercise band just above your knees, and extend your legs. Engage your core, breathe out, and raise your top leg upward - imagine pushing out through your heel. Hold for 30 seconds, then immediately perform 8 reps of side-lying hip extension. Roll onto your other side and repeat for 3 sets each side. Pro Tip: If your hips start to rock open when you lift your upward leg, you have opened too far. 90-90 Hip Switch: Start in a 90-90 position, sitting up as tall as possible with both hips and knees flexed to 90 degrees. Start with your torso facing towards your left (front) leg, and while keeping your torso tall, come up onto your toes slightly, and perform a simultaneous external rotation of your right hip and internal rotation of your left hip - you will end up with your right hip as your "front" leg. Engage your core, and sit up into the movement. Flow to each side 10 times and repeat for 3 sets. Hip Airplanes: Start in a forward lunge position, left leg forward, right heel off the ground, and arms at the back of your head. Hinge forward at the hips about halfway and while engaging your core, rotate to the left (towards your forward leg) then back to neutral. From neutral, engage your core and rotate to the right (away from your forward leg) opening up your hips. Return to your neutral and repeat 8 times on each side for 3 rounds. Pro Tip: The lower you are able to hold your torso, the harder this will be. However, be sure to hold your torso via engaging your core. Do NOT lay it on your forward leg. Functional Training: Single Leg Stand to Press While it sounds really simple, this exercise is really effective and a good way to get your neurons firing! Sit on a table, bench, or box, feet shoulder-width apart and about 8-12" from the box. Hold a barbell or dumbbell in both hands as though you were going to do a push-press, and lift your right foot off the ground. In one smooth, slow motion, engage your core, stand up on your left leg and press the weight overhead. Slowly lower yourself back to the box for one rep. While performing this movement, be sure to keep your hips level side to side, and square to the front. The slower you move, the more difficult it will be. Perform 10 reps each side, 3 rounds. Pro Tip: Start with a tall box. As it becomes easy, move to a shorter box, and add more weight. Tall Kneel to Functional Slamball: Start in a tall kneel holding a medicine ball of your choice. In one smooth movement, come to a low squat, knees at 90 degrees, then slam the medicine ball into the ground in front of you as hard a possible. Catch the ball mid-air and immediately step backwards into the tall kneel. Repeat for 10 ball slams, 3 rounds. Be sure you are alternating which legs as you step into and out of the low squat! Lateral Hip-Shift to Eccentric SL Squat: This one is HARD, but is one of my favorites that doubles both as a warm-up as well as a strengthening exercise! Start with your feet shoulder-width apart, then take a decent sized lateral lunge to the right. With arms forward for counterbalance, shift your weight over your right leg and lower down as far as you possibly can. Fully unweight your left leg, and swing your left leg to the front - imagine reaching out through your heel with a straight leg. From here, stand back up in an eccentric SL squat. Once standing, swing your left leg back to its original position and flow to the other side: Perform 5-8 reps each side, 3 rounds. Pro Tip: Only go down as far as you can hold the position - you do NOT want to be sitting on the floor in the "down" position! As you gain mobility, you will be able to go lower, while as you gain strength you will be able to better stand from said low position. Staggered Stance Weighted Deadlift Start holding a kettlebell or dumbbell in your right hand with your feet in a staggered stance, right leg forward. You should be up on your toes on your back leg with the majority of your weight over your standing leg. Engage your core and hinge forward at the hips as you let the kettlebell lower towards the ground. Lower down until you can no longer keep your hips square to the front or torso straight. Keeping your core engaged, breathe out and return to standing. Important: As you stand, be sure your abdominals are truly engaged as they provide a natural stopping point at the top of the movement, preventing you from overextending at your low back. Use your "accessory" foot for balance and support, as needed. Repeat 10x each leg, 3 rounds. Pro-tip: I recommend holding the kettlebell in the same hand as your standing leg - this lateral placement brings in your adductors. +Want an added challenge? Fully eliminate your support leg, and add weight - Be sure to keep a slight bend in your standing leg and avoid locking out your knee Single Arm Rear Delt Row off Wall: Stand with shoulders and hips both level and square to the front. Shift your weight to your right leg, and place your left foot on the wall behind you, knee bent at 90 degrees - you may need to adjust your distance from the wall. While pressing back into the wall with your left foot, and into the ground with your right, engage your core and hinge forward at the hips slightly. From here, perform alternating single-arm rear delt. rows - Perform 6-8x each side, 3 rounds. The key here is to move slow and press through your feet! +Want a different kind of challenge? Mix it up with a Single Arm Row! These few exercises serve as a simple introduction to hip mobility and stability. Use them in your warmup, complete them together as a circuit, or in addition to your workout for a full-body challenge. There are thousands of hip mobility/stability exercises, and many many variations, however, it's important to start basic, and progress as you gain strength and stability. What's most important is to be consistent with your workouts - you'll notice as you do so, your aches and pains will be less and with greater hip mobility, your power production should improve as well. 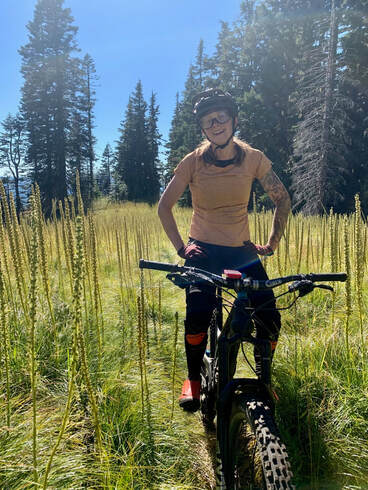 See you on the trail, Kim Hardin ACE Certified Personal Trainer @kimannhardin @meetthehardins www.meetthehardins.com Stats: Age: 31 • Professional Enduro Athlete, Small Business Owner: KickStand Coffee & Kitchen, Hood River OR • ACE Certified Personal Trainer • PMBIA Level 1 MTB Instructor • B.S. Human Physiology • M.S. Healthcare Administration Sponsors: EVIL, Chris King Precision Components, Race Face, Schwalbe Tires, Dakine, SMITH, PUSH Industries, Dumonde Tech and KickStand Coffee & Kitchen This is 2020, which means most plans or ideas have had to change - Nick and I wanted to put together and after work "Hot Lap" meeting once a month starting earlier this year, but didn't feel comfortable with the current state of things amidst COVID. It's now October, and we're thinking of getting these going, but appreciate your thoughts. Please consider filling out the survey below - if we get enough positive feedback and good feelings about social distancing, we'll get this party started! The 2020 ride schedule would look a little something like this, pending National Forests are Open and COVID status: October: Post Canyon, OR November: Syncline, WA December: Gravel Grind in The Dalles All ride participants would be eligible for a schwag drawing at the end of the year: Race Face Handlebars, Chris King water bottles, Dumondetech Chain lube & more! 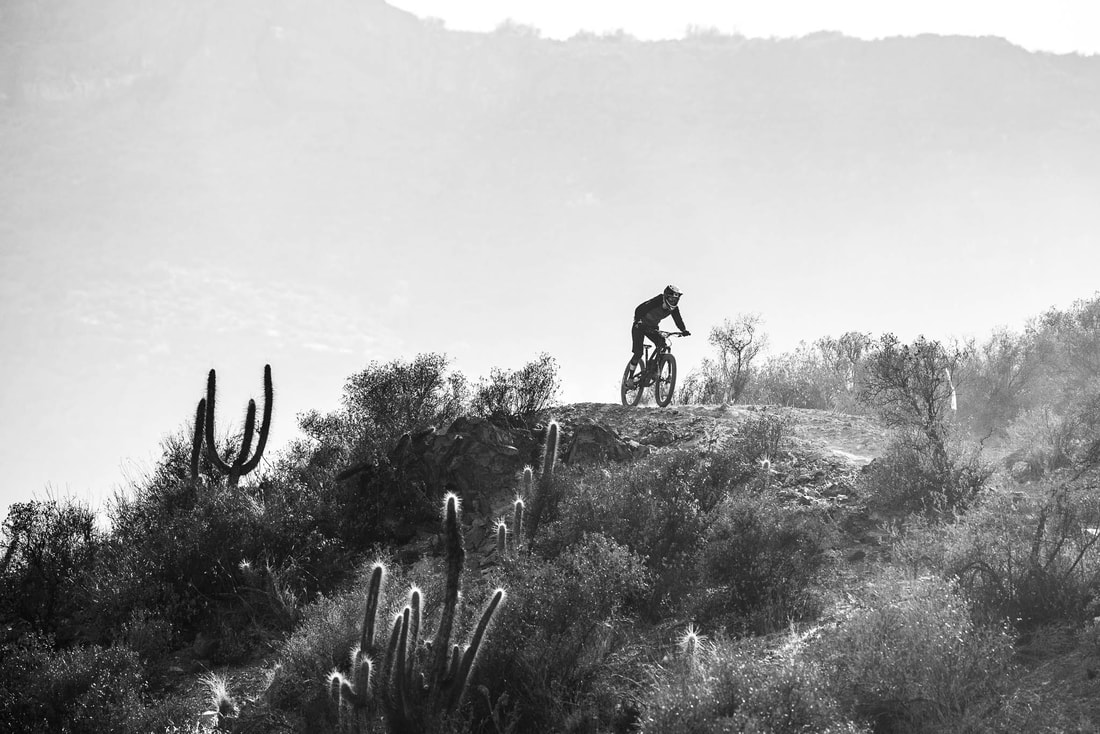 Your torso is your powerhouse -- you can have the strongest legs in the world, but if you have a weak core, you'll notice you won't be able to use that leg power as well or as effectively as if you had a strong torso. Chances are technical climbs are pretty difficult for you, and long days out on the bike leave you hurting in more ways than one. If your core is weak, your spine and legs have less support and what were little aches and pains throughout your body, specifically your low back, will become more prominent. Not only is a strong core vital to preventing injury, when it is conditioned and well trained, your performance, strength, coordination and balance will also improve. WHAT IS YOUR CORE? Your “core” encompasses your abdominal and mid to low back muscles (rectus abdominus, transverses abdominus, obliques, erector spinae, mulitifidi, latissimus dorsi, and more). These muscles provide stability to both the upper and lower body in all activities: walking, sitting, skipping, cycling, etc., as well as protect your spine. Here are some cycling-specific core exercises to strengthen your powerhouse, prevent injury, and improve your cycling. Whenever possible, start basic with some "bracing" exercises, similar to as you do while riding, and progress as your strength and stamina improve! *These exercises may not be suitable for some individuals. Consult your physician before trying any of these movements.* 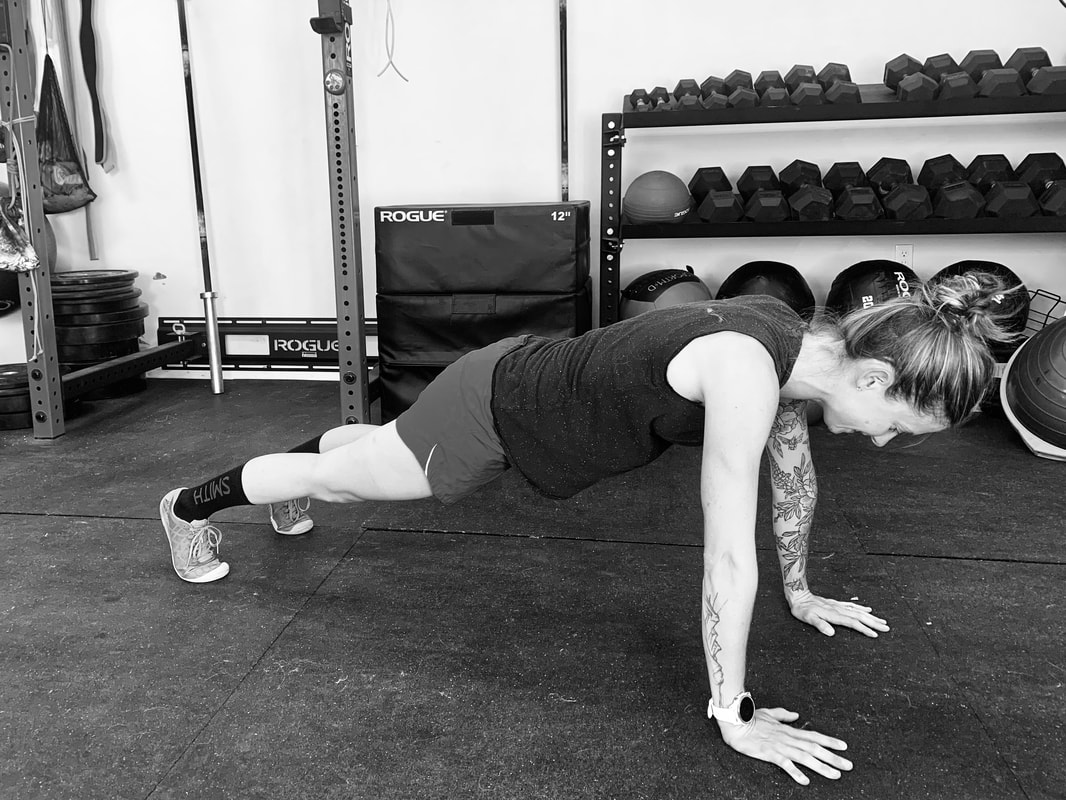 1. HIGH PLANK: The plank is the most basic of core bracing exercises. Place your hands on the floor, wrists aligned with shoulders, as though you're about to do a pushup. Feet are shoulder width apart, and your spine is neutral (Avoid dipping at your hips or hyperextending at your knees). Ground your toes to the floor, engage your core, squeeze your glutes and press upward through your hands/shoulders. Focus your gaze at a spot on the floor about a foot in front of your hands, and keep a nice neutral spine as you hold the position. Hold until you can no longer maintain a neutral spine. Don't forget to breathe! Complete 3 rounds. 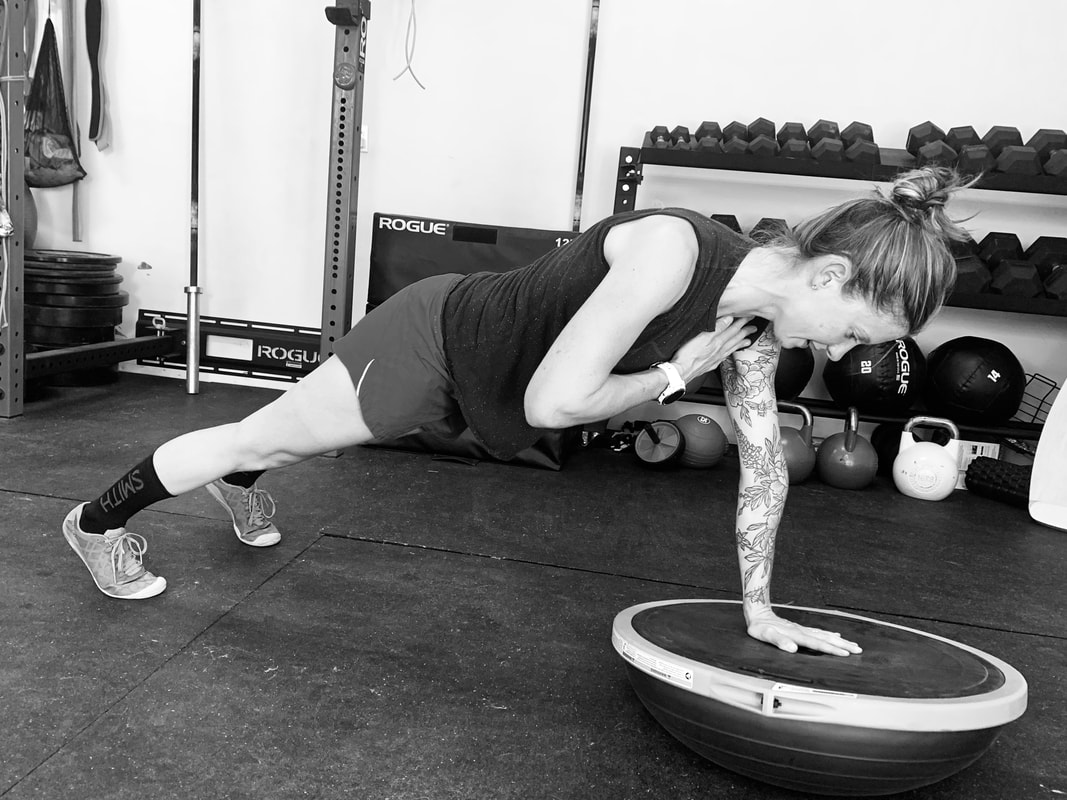 Want more of a challenge? Only progress as you are able while keep your hips level, core braced. + High plank on a BOSU. + Tap your feet: From a high plank, move your right foot outward, then return to original position. Move your left foot outward, then return to original position. Alternating sides, repeat for x 10 each. + Shoulder Taps: From a high plank, tap your left shoulder with your right hand, then return to high plank. Tap your right shoulder with your left hand, and return to high plank. Alternating sides, repeat for 10 each. Do this on the flat side of a BOSU for even more of a challenge! + Up-downs: From a high plank, lower yourself to your forearms, then push yourself back up, one hand at a time to a high plank. Repeat for x 5 each side. + Single-arm high plank. + Single-arm high plank on the flat side of a BOSU ball. + Extra credit: From a high plank, jump your feet forward to just behind your hands, knees slightly bent. Jump back to plank, then forward again, but this time with straight legs. Continue alternating "tuck" movements for a full core workout! 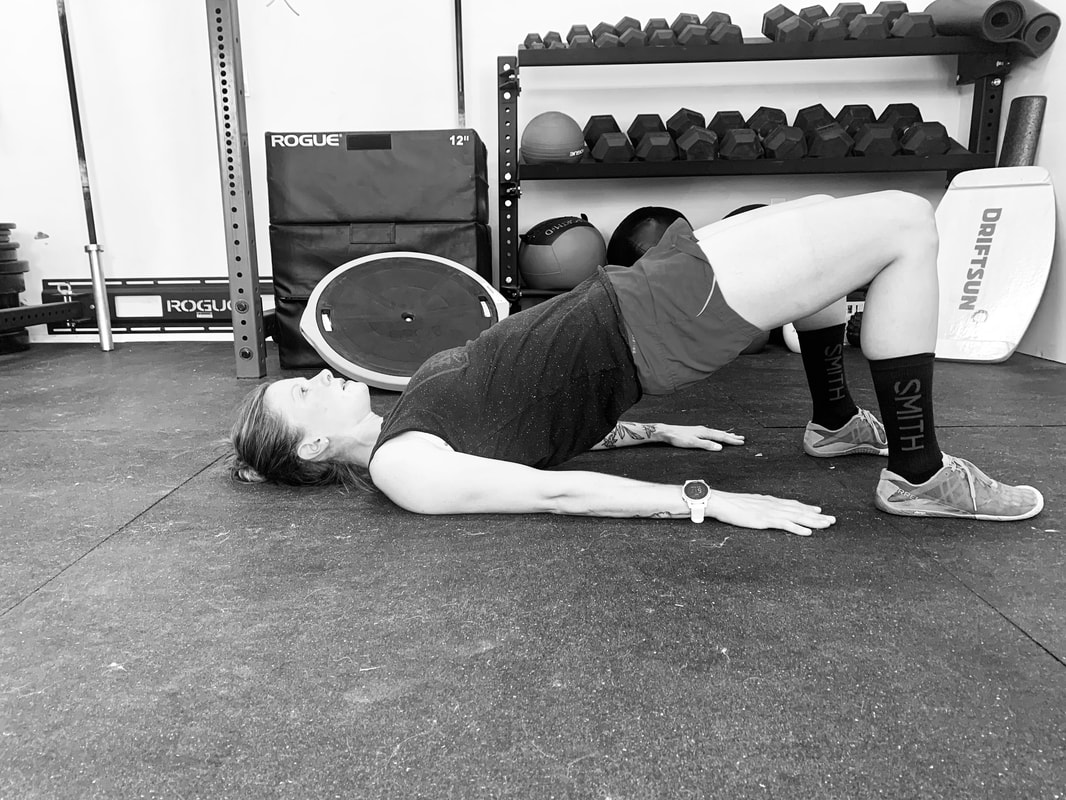 2. BRIDGES: Bridges are another form of core-bracing, but begin adding in basic movements to address muscles deep in your low back and pelvis. Pelvic stability is key to using leg strength effectively. To perform a bridge, start laying on your back in a hook lying position, knees bent, feet shoulder width apart, arms at your sides (palms down). Place your feet at a comfortable distance from your body - the further your feet are from your body, the more your hamstrings are engaged. The closer your feet are to your body, the more your glutes are engaged. Perform a "kegel ", bracing your core and while keeping your hips level, squeeze your glutes and bring your hips upward towards the ceiling. Hold until your hips begin to drop or perform a series of 10 reps. Complete 3 rounds. Tip: Drive through your heels (literally lift your toes off the ground!) to better engage the hamstrings and glutes! Hold for time or perform a series of reps. Want more of a challenge? Only progress as you are able while keep your hips level. If you find your hips dropping on one side or the other, go back a step. + Add weight: Hold a dumbbell, phonebook or your best friend's dog over your pelvis, and bridge away! + Add in the arms: Prior to lifting your hips upward, lift your arms up so your wrists are directly over your shoulders. Keep them there and bridge upward. + Do it one leg at a time: If you're able to perform a standard bridge, and keep your hips level, give this a try! From the hook lying position, bring your left leg towards your chest. Keep your right foot on the floor, drive through your heel, and while keeping your hips level, lift them up towards the ceiling. Perform a series of reps, while actively keeping your left leg as close to the body as possible, then switch sides. Tip: Try holding a tennis ball in the leg folded up to your chest for the entirety of the exercise. + Marching: From the hooklying starting position, perform a "kegel", and bridge upward through both feet. Stabilize yourself, and proceed to slowly lift your right foot off the ground. Return your right foot to the ground, then lift the left foot off the ground, returning it to the ground. This is a stability exercise and is to be done slowly. Repeat the exercise, alternating legs, for a total of 10 each side. Complete 3 rounds. If you're comfortable here, add in the arms! By now you're probably ready for some active core work... 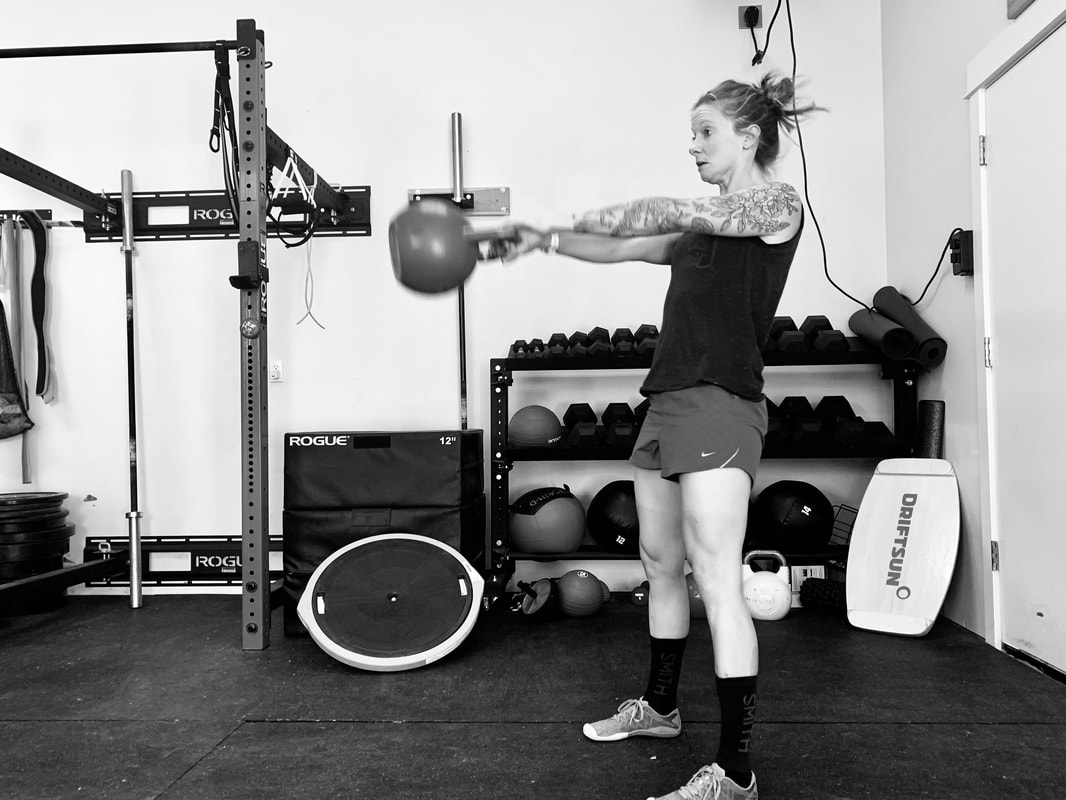 3. KETTLEBELL (KB) SWING: The swing is an active movement that addresses the posterior chain, by driving a kettlebell (KB) in a pendulum motion from between the knees to anywhere eye level to overhead. To properly perform a KB swing, you are swinging the kettlebell via your hips and legs, not your arms, "It's all in the hips"! To start the swing, while standing upright, hold a KB with both hands between your legs via straight arms. From here, soften the knees, and hinge at the hips, letting your butt descend down and backward. Then, brace with your core, and quickly stand, driving your hips forward via one big "thrust" - you'll feel the KB swing forward and up. The bigger the thrust, the higher the end elevation of the KB. For those with a shoulder history, aim to swing no higher than eye level. As the KB descends, shift your weight back into your heels, and allow yourself to hinge forward at the hips, receiving the KB as it swings back in between your legs. Once the KB reaches its most backward trajectory, drive through your heels and hips to bring the KB into the upward part of the swing. Repeat for reps. TIPS: Work to keep your feet flat on the floor for the entirety of the movement. There is a tendency to roll your feet outward at the bottom of the movement to give the KB space - resist this! This is an ongoing challenge for me too! Want more of a challenge? + Single arm swings: Try the swing holding the KB in one hand - you may need a lighter KB for this one. + Alternating single arm swings: While performing a single arm swing, at the bottom of the swing, pass the KB from right hand to left, then swing! At the bottom of the next swing, pass the KB from left hand to right. + Add in a balance challenge by performing a KB swing while standing on the flat side of a BOSU ball. 4. EXERCISE BALL SIT-UP: Simple, but effective. Sitting upright on a large exercise ball, brace your core, and slowly lower your torso backwards on the ball. Keep your torso straight, and avoid tucking your chin. Once your torso is level with the floor, sit up using your abdominals, while still holding that original abdominal "brace/kegel". Keep your chin up, and think about reaching it up and forward as you sit up. Tip: Its common for the exercise ball to roll slightly as you situp, however, root through your feet and actively avoid the ball's roll as you sit up. 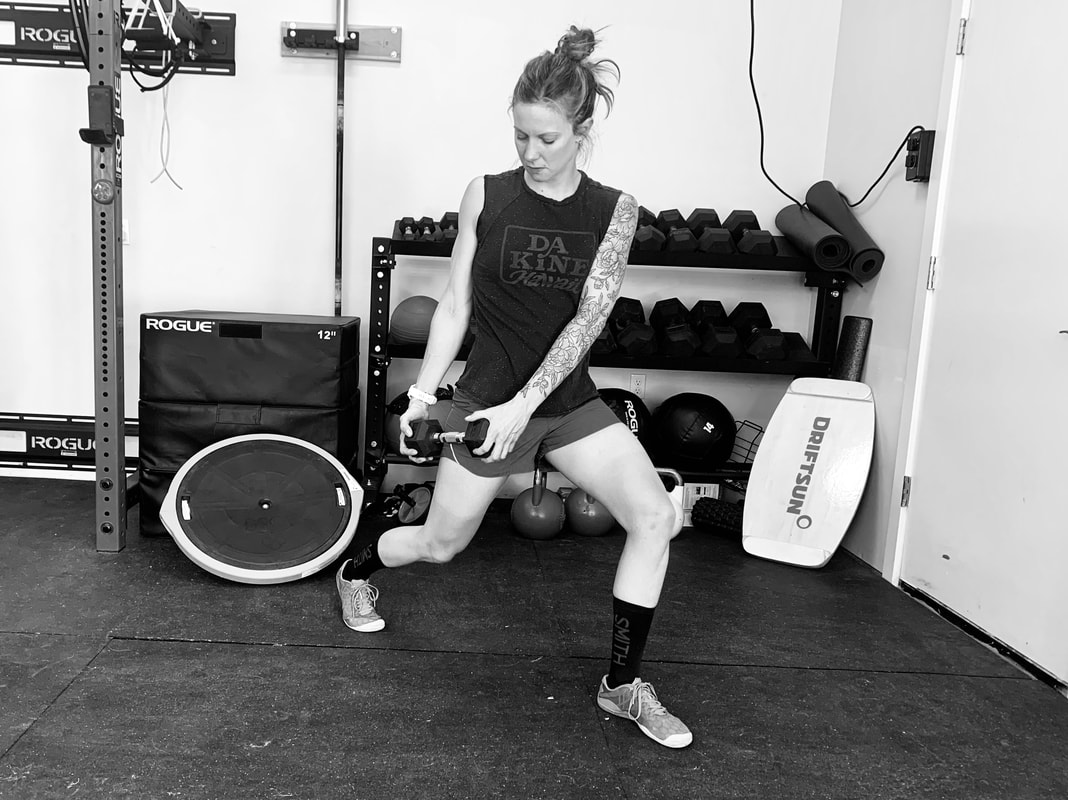 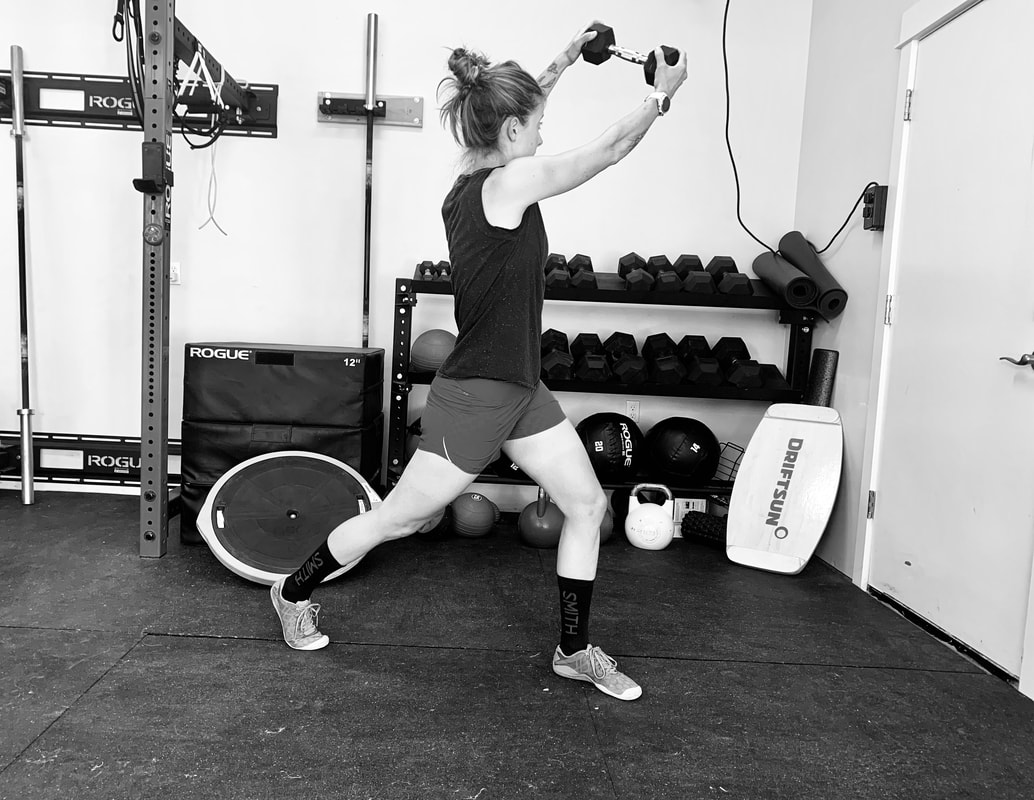 5. STATIC LUNGE REVERSE WOOD CHOP Assume a high lunge position with your left foot forward and right foot back. You should be up on your toes on your back foot, and hips square to the front. Facing forward, hold a dumbbell at hip level at your right hip. Brace your core, and with straight arms, reach the dumbbell up and across your body to the left, performing a reverse wood-chop motion. Slowly return the dumbbell to the original position at your right hip, allowing full rotation at the torso, while maintaining your hips square to the front as much as possible. Tip: Increase weight to increase difficulty. Want more of a challenge? + Perform the reverse wood chop with your front foot on the flat side of a BOSU ball, a balance board, or half round for both a strength and balance challenge! + Make it even more difficult, and place each foot on a half round, foam roller or other balance challenging device. These 5 exercises serve as a simple introduction to CORE strength and stability. There are thousands of core exercises, and many many variations, however, it's important to start basic, and progress as you gain strength and stability. What's most important is to be consistent with your workouts - you'll notice as you do so, your aches and pains will be less, your technical climbing will improve, and your lengthy rides will seem easier! 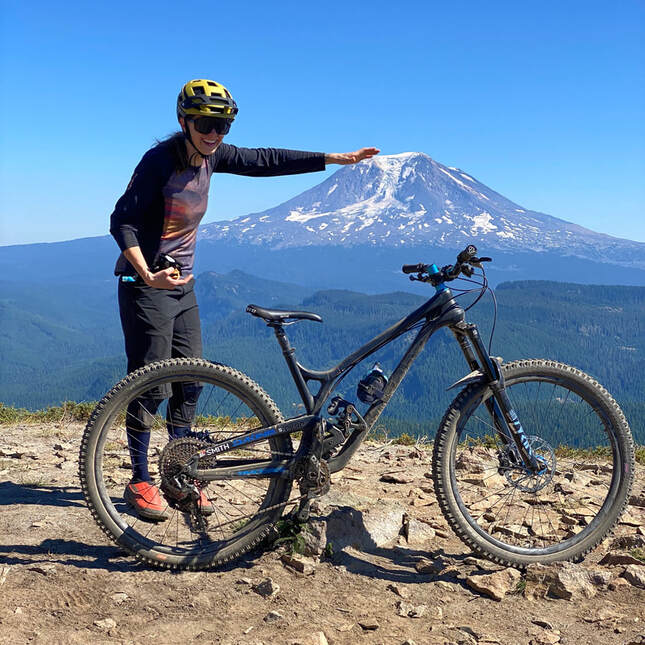 See you on the trail,
Kim Hardin ACE Certified Personal Trainer About the Author: Kim Russell has a B.S. in Human Physiology and is an ACE certified personal trainer. She is a retired Professional Whitewater Paddler of over 12 years, most notable winning the Little White Salmon Downriver Race in 2015, and in the same year was nominated for Canoe and Kayak Female Paddler of the Year. After a shoulder surgery in 2012, Kim turned her focus to racing Enduro on pedal bikes, with notable wins such as the North American Enduro Cup (2016/2017), Cascadia Dirt Cup Overall (2016/2017), 2nd at Transcascadia 5 day enduro (2018), 2nd at Andes Pacifico 5-day enduro (2020) as well as various top finishes in the Enduro World Series (Colombia, Madeira, Italy, Chile, Argentina). She is also a PMBIA certified Level 1 MTB Instructor, and loves sharing her passion of riding with others. She is a small business owner, operating KickStand Coffee and Kitchen in Hood River, Oregon alongside her husband Nick. Want to learn how to really impress your friends? Learn how to do a proper driveway skid as part of @chriskingbuzz ‘s Global Game of Bike!
1. Wear a helmet. 2. Lower your seat all the way. 3. Find a straight section of road, and pedal forward to get some momentum. At the point you want to skid, grab a whole bunch of rear brake and turn slightly in the direction you want to skid, in this example, to the left. 4. Take your left foot off your pedal to provide you a bit of support, and let the bike’s rear end slide away from you. If you want to skid right, turn your wheel right and take your right foot off the pedal. The more speed you start with and the more you turn you wheel, the more aggressive your skid will be! Oh, and always, always grab the REAR brake to initiate the skid! Pro tip: practice in your neighbors driveway 🤣 or maybe don’t... Remember, Global Game of Bike is a Stay at Home Challenge! Stay home and be safe :) See you around the neighborhood, Kim Hardin In case you missed Nicks' round 6 of @chriskingbuzz ‘s #GlobalGameofBike on IG this spring, follow along on a wheelie how to with step by steps below... Don’t forget, always wear a helmet!
1: Find a nice grassy area that is flat to slightly uphill for practice. 2: Gearing: Start mid-range of your cassette- about a 30 tooth. ⚙️ 3: Pedal forward to gain momentum and initiate a front wheel lift (using your pedal stroke vs just pulling back). 4: Sit back over the rear wheel, and open up your torso - straight arms is 🔑 ! 5: Set your gaze slightly forward of your front wheel and pedal forward. If you start to go over backwards, use your rear brake to bring your front wheel down. Overtime, experiment with modulating the rear brake to find the “sweet spot” for balance. Don’t be afraid to turn your bars as well as move your knees to correct for side to side imbalances as well! To be specific, if you’re falling to the right, to correct back to center, turn your handlebars to the left and perhaps wing out your left knee. It’s a delicate balance of small movements to keep you from falling side to side, but with practice, it will come! Remember, consistent, regular practice is key! Bonus points: Cowboy wheelie! Once you’ve nailed the wheelie, try taking a hand off the bars! 🐎 Got questions? Send them over! Nick Hardin |
AuthorsProfessional Athletes. Archives
August 2023
Categories |


 RSS Feed