 Our Gorge Guide is finally here!
We love it and think you will too - there’s lots to explore in the gorge, so we made a guide to keep handy so your bucket list of adventures so your bucket list gets checked. If you need some local help getting pointed in there gift direction or a frosty beverage to quench your thirst, you always know where to find us at basecamp. Grab your copy from KickStand or download a pdf HERE XOXO, Kim and Nick Hardin
0 Comments
Concussions S.U.C.K. They are different for everyone, but deserve the utmost respect, because if you ring your bell hard enough, and don't give your body time to recover and repair, you can be left with symptoms for life. The last run of our last day on our first Whistler trip of the year, we dropped into one of my most favorite, fun, low stress jump lines that we'd hit plenty already that week. It was raining, I was tired, and not really very focused that day, but said, "Hey, we hit this so much, I could do this with my eyes closed - let's hit it". Lack of focus turned into me tapping my brakes, in combination with hitting a gust of wind, and I knuckled a gap jump. Not even that bad of a crash, but apparently rung my bell just right... I hit my head real hard. Hard enough to get knocked out for a quick moment, and have the room spinning for days, not to mention a massive headache, inability to focus, lack of real short term memory, and pain anytime I looked at a phone or computer screen. I was forever exhausted, even doing the littlest of things - unloading groceries from the car. Over the next few week, I went to go into protection mode to give my body the best opportunity to recover as quickly as possible, because honestly, I just felt too shitty to do anything else. 1. Avoid screen time as much as much as possible: as feeling better, work up to short intervals of screen time followed by larger rest intervals. 2. Avoid any sort of "pounding" activity - running, jumping, etc... Some light exercise can help improve recovery by increasing blood flow, however, too much can quickly turn things the other direction. I chose dog walks, light stretching... 3. Eat an Anti-inflammatory Diet: Limit your sugar & gluten intake. Avoid all alcohol - think about reducing inflammation to promote healing. Otherwise, eat from the rainbow to ensure you get you micro & macronutrients! Feed your brain! Can't get what you need? Order up some 1st Phorm Greens & Reds and make life easy. 4. Supplements: Multivitamin + Protein + Creatine: Multivitamin's to ensure you're getting your vitamins. Protein + Creatine to fuel your body. According to the Nutrients Journal (2021), Creatine Supplementation & Brain Health, "There is a potential for creatine supplementation to improve cognitive processing, especially in conditions characterized by brain creatine deficits, which could be induced by acute stressors." 5. Reduce and/or eliminate outside stress - that may be physical or emotional. Think of yourself in a very fragile state - avoid loud noises, bright lights, TV, etc...take it easy and give your body REST in all realms! With a whole lot of rest, every day my symptoms improved - It took about 2 weeks to be able to look at my phone or computer screen without getting headaches or overly fatigued. I was off the bike for a couple weeks, and did my best to simply rest. If you hit your heat AT ALL, let alone hard, I can't stress enough listening to your body, taking it easy and giving yourself time to recover. Even if you don't have symptoms, your brain is fragile and worth giving rest. You only have one, and the trails will always be there! More soon, Kim  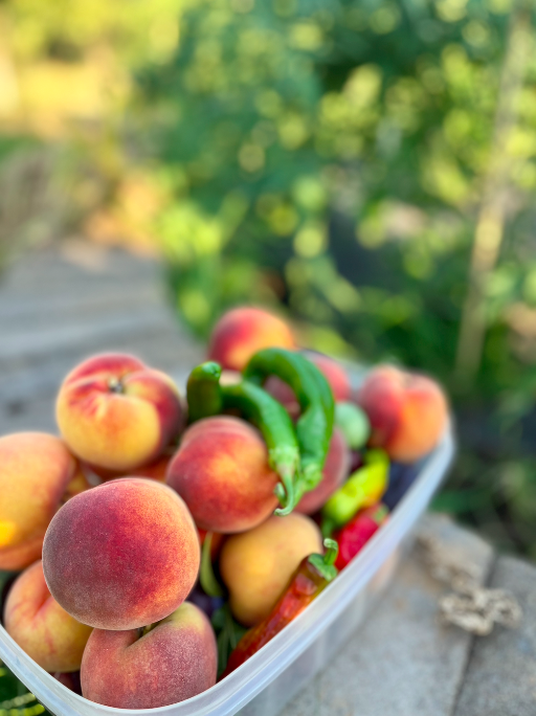 There's something extra special about growing your own food - While we've always had some sort of vegetable garden, however, fruit is a brand new adventure! Our first introduction to large quantities of fruit was this year's organic peach harvest at Stellegacy Farms - while we only have two trees, there was more fruit than we knew what to do with! Most of our friends have gotten a goody bag, however, we're still left with more than enough to have to get creative....Our latest challenge - How many different ways can you use peaches? Follow along! Pro Tip: To quickly pit peaches, slice along the crease at the top & twist apart. Pop the pit out and voila! 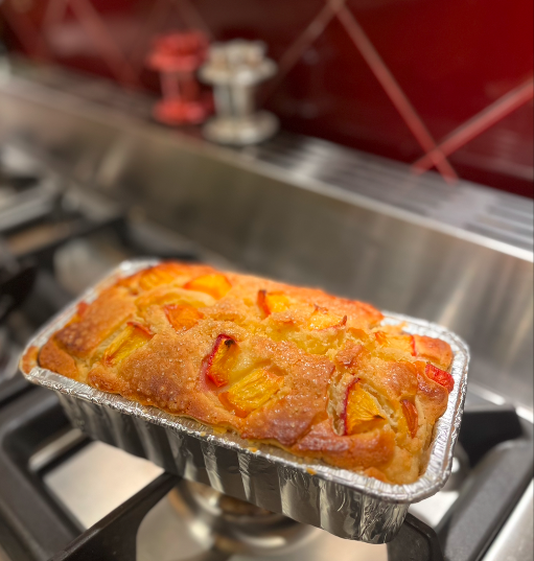 1. One-Bowl Peach Bread: Zest from 2 lemons 1/2 cup full-fat Greek Yogurt 1 cup sugar 1/2 cup olive oil 1 tsp vanilla extract 2 large eggs 2 Tbsp Fresh squeezed lemon juice 2 tsp baking powder 1/2 tsp salt 1 1/2 cups fresh peaches, diced Turbinado sugar for sprinkling on top Preheat oven to 350F, and grease a 8 1/2 x 4 1/2 pan. Combine the above ingredients, wet first, then slowly adding dry ingredients. Transfer from bowl to pan, and top with turbinado sugar. Cook for 60-70 minutes, rotating half way. Let cool to room temperature before serving. Best served with a scoop of vanilla ice cream! 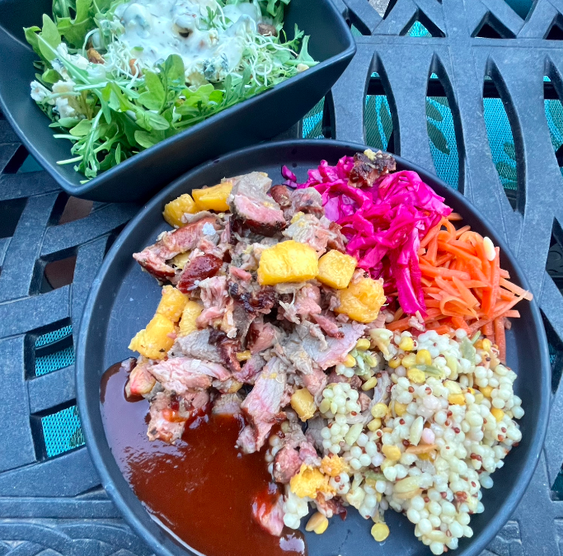 2. Smoked Peaches & Pork Shoulder: It's Traeger Season! Toss on a pork shoulder - we generally cook ours at 200F for 6-7 hours. When you pull the pork, toss on whole peaches on the top rack for 6-8 minutes. Cut up and toss with pork shoulder for a delicious dinner!  3. Peach Margarita: Enough said, and a fun spin on on classic at KickStand Coffee & Kitchen! 1.5 oz blanco tequila 1 oz peach puree .75 oz lime juice .5oz gran gala Rim a rocks glass with lime salt. Add all ingredients to a shaker with ice - shake vigorously. Double strain into a glass of your choice + ice. 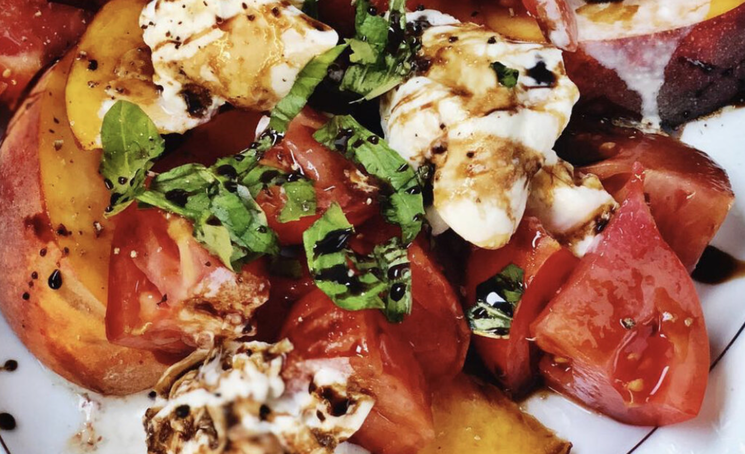 4. Peach-Tomato Burrata Salad: Grab 1 heirloom tomato, 1 medium sized peach (no pit) - cut them up into medium sized chunks. Toss with 2 tsp sherry or balsamic vinegar, add a pinch of salt and pepper. Just prior to serving, add about 5-6 basil leaves, torn into small pieces - next level, delicious! 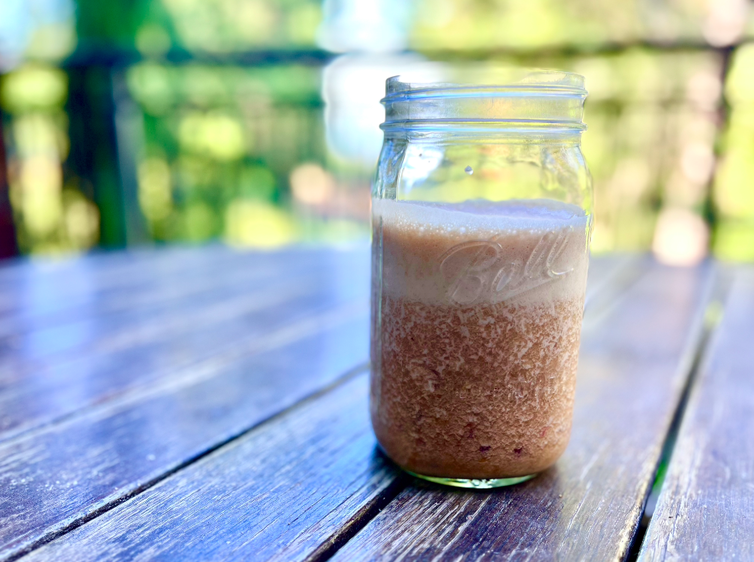 5. Peach Protein shake: Take 2 pitted peaches & blend them up, skin included! Add a scoop of your favorite protein powder and voila! My favorite combo is 1st Phorm Phormula 1 Vanilla + Peaches + 1 tsp cinnamon for that antioxidant boost! 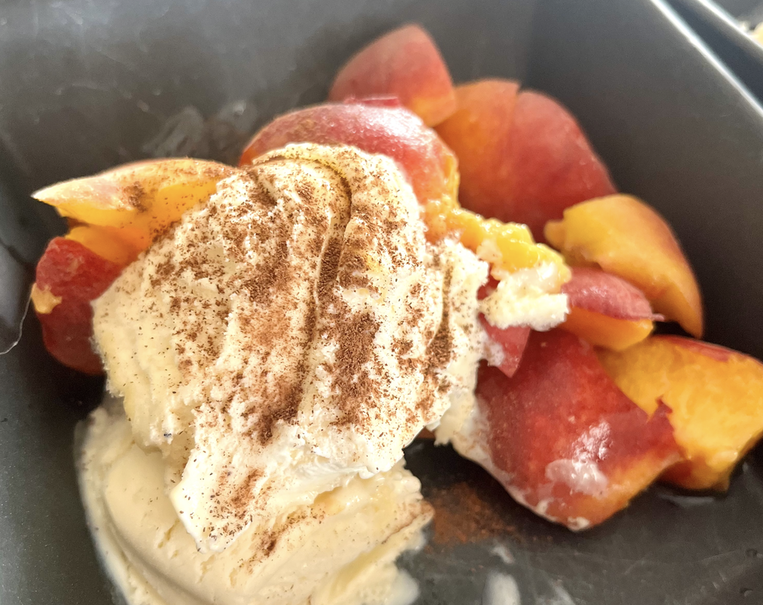 6. Grilled Peaches & Ice Cream Basic AF, but soooooo delicious! 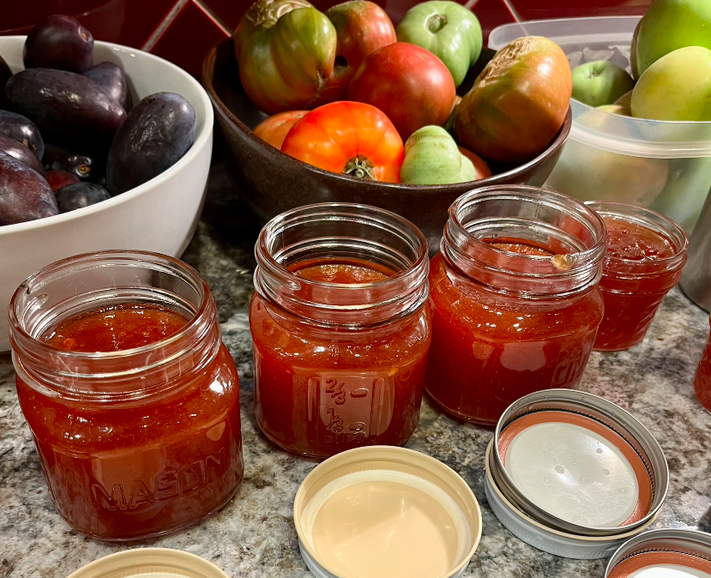 7. Peach-Habanero Jam
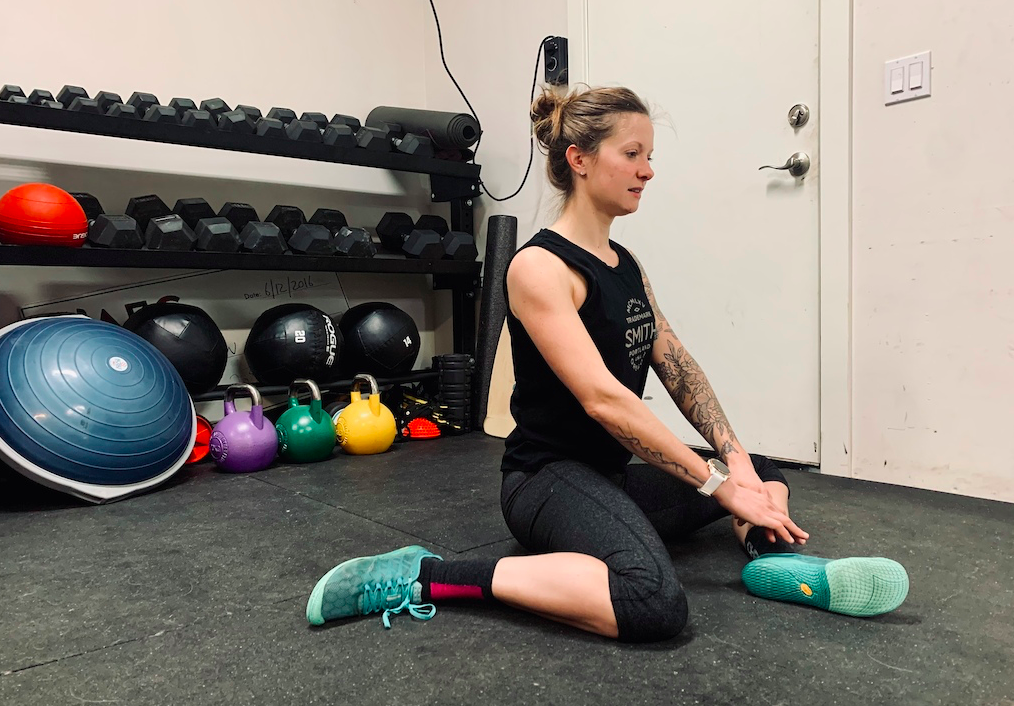
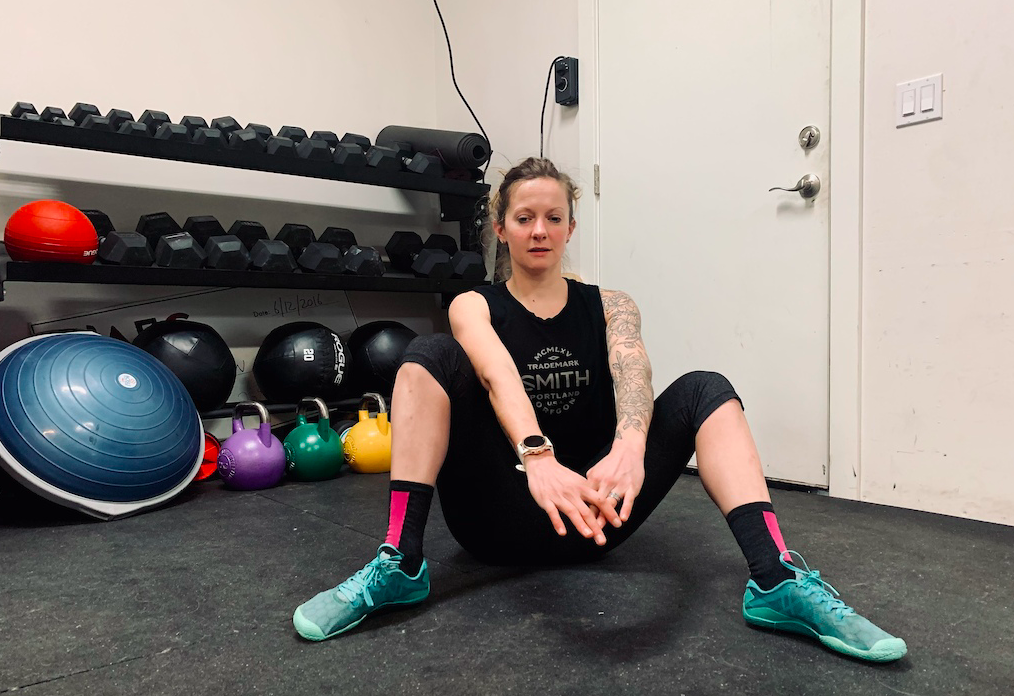
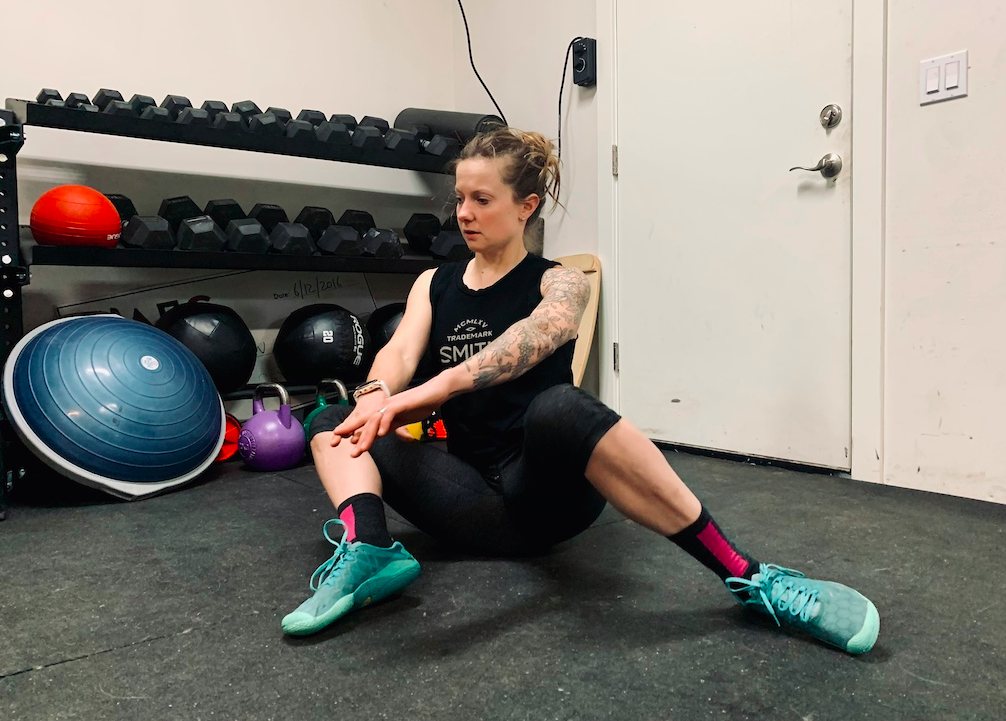
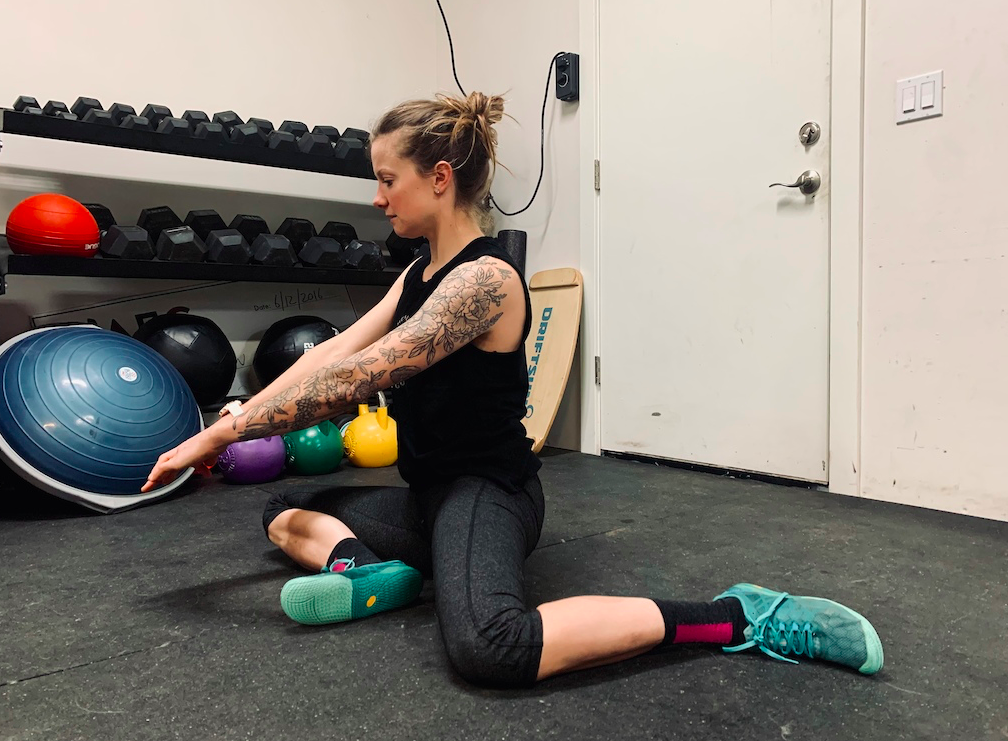
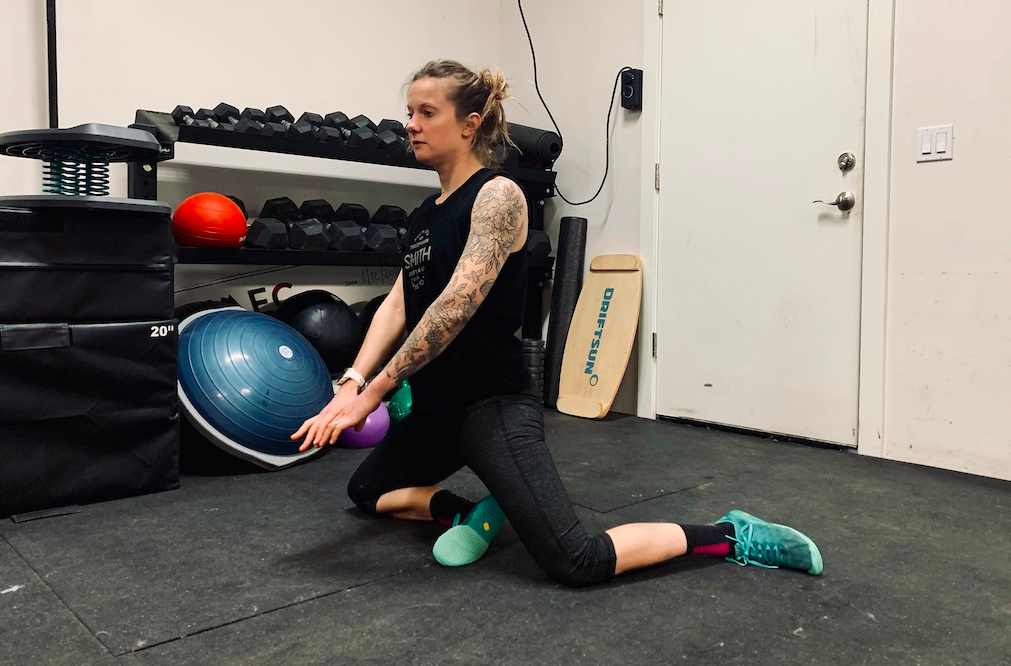
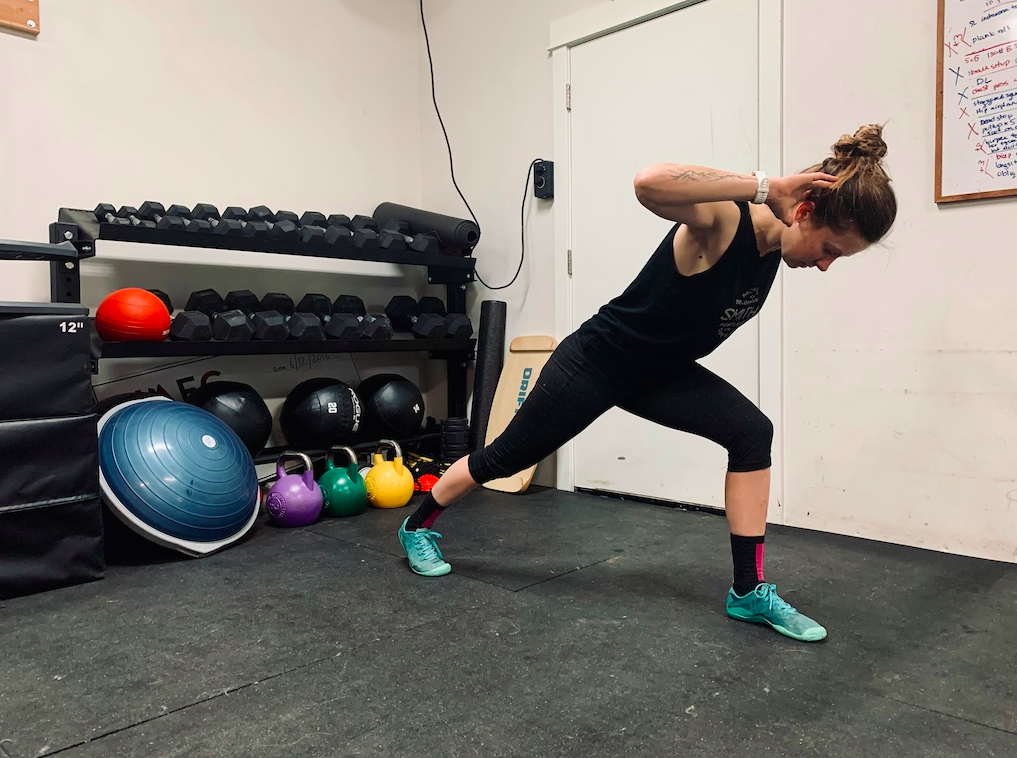
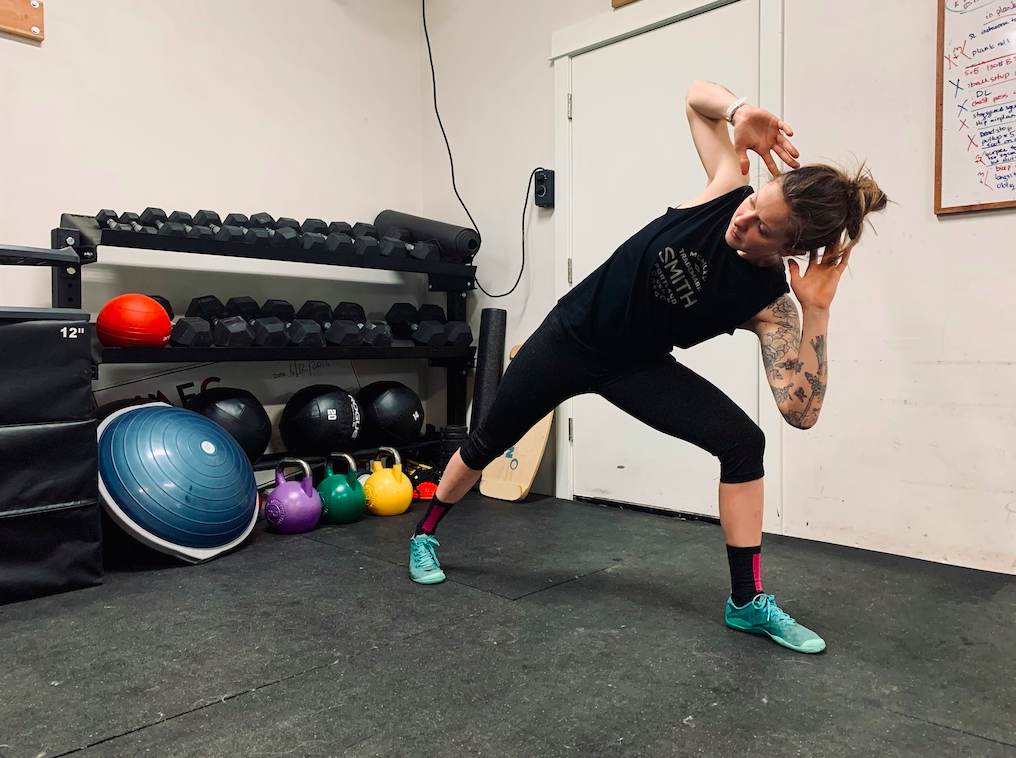
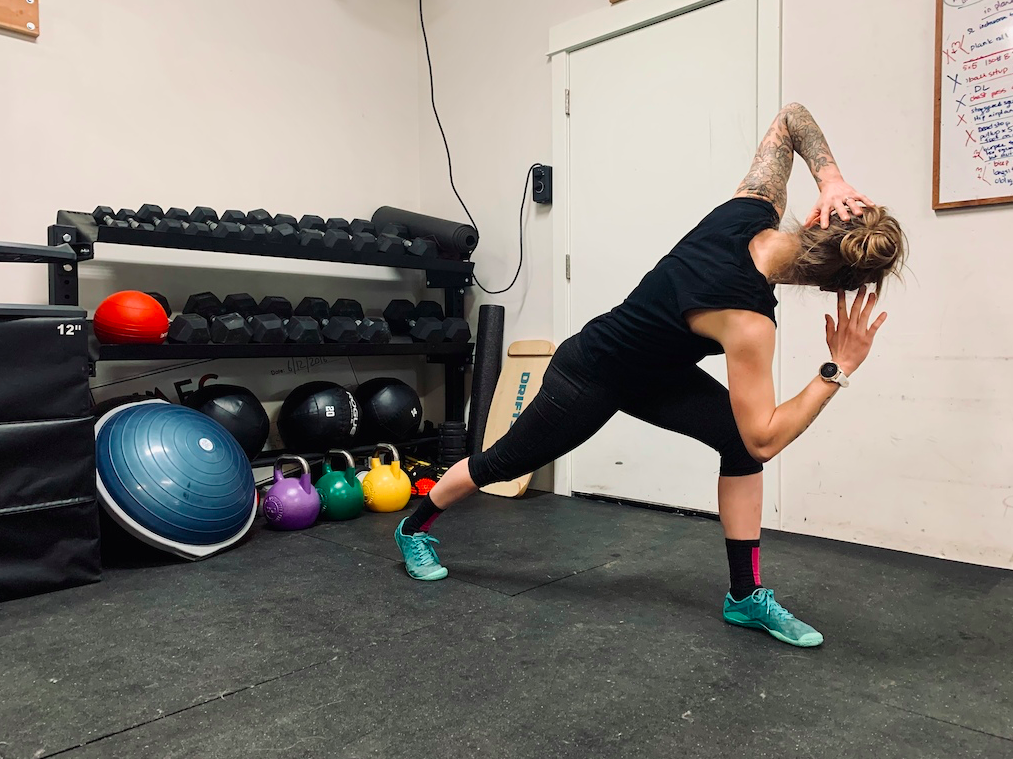
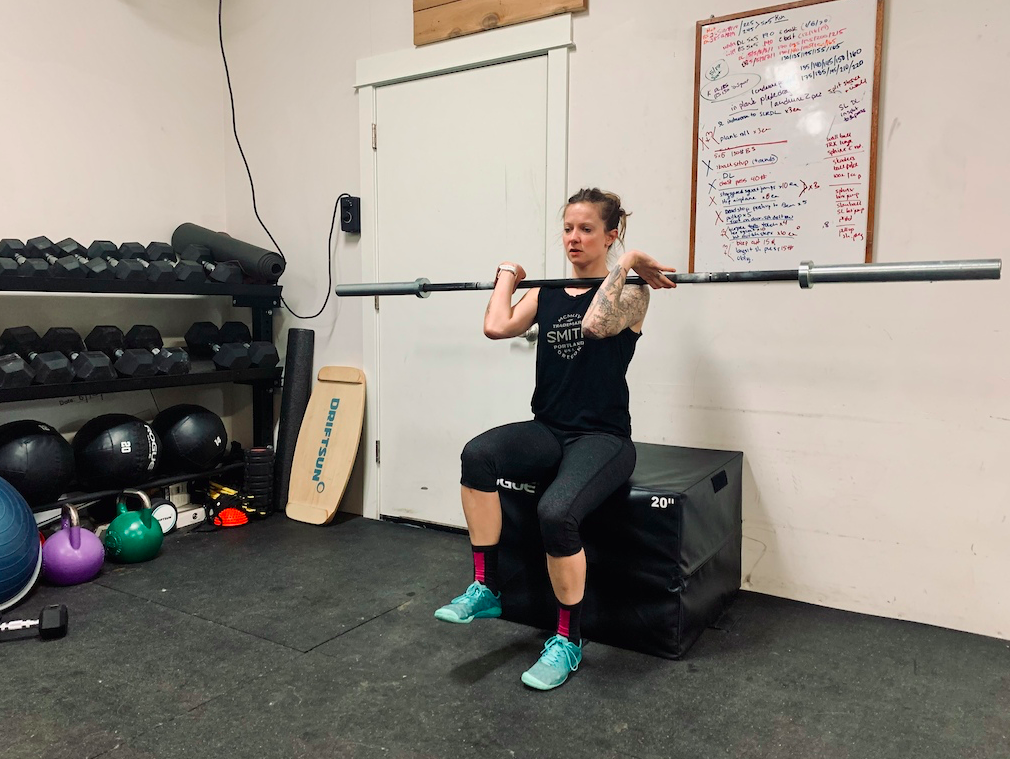
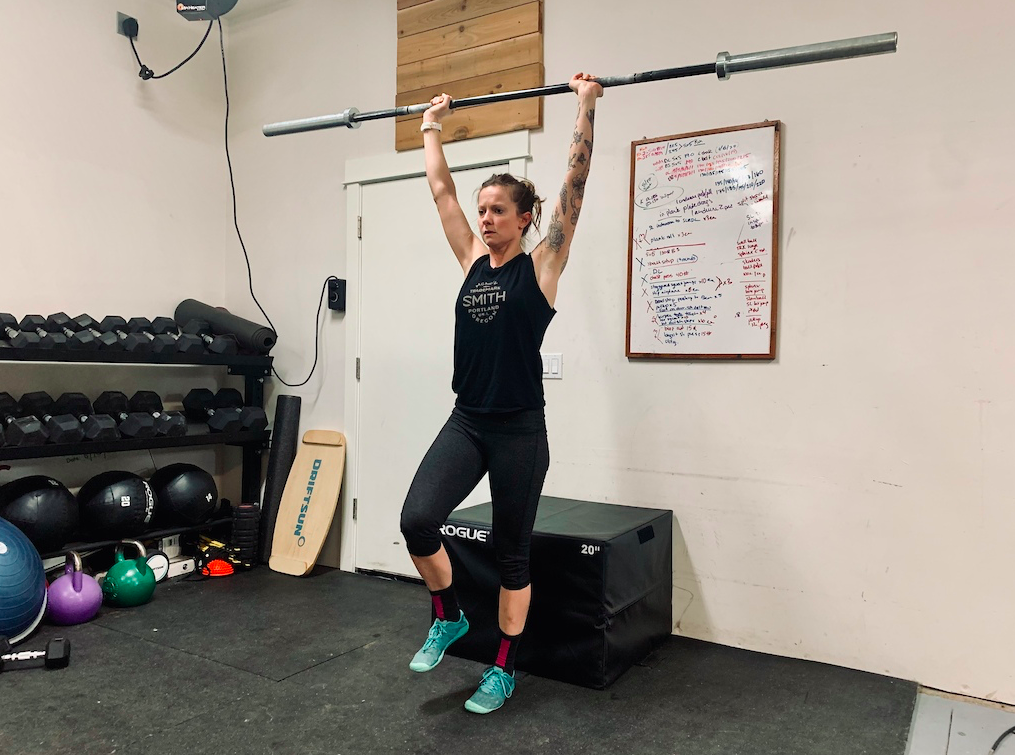
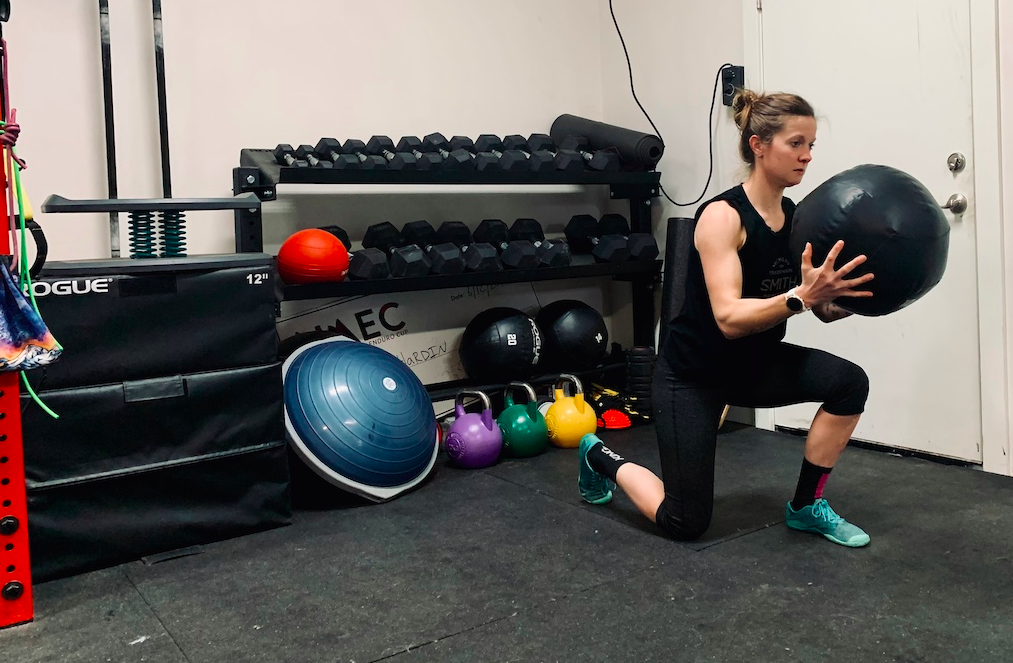
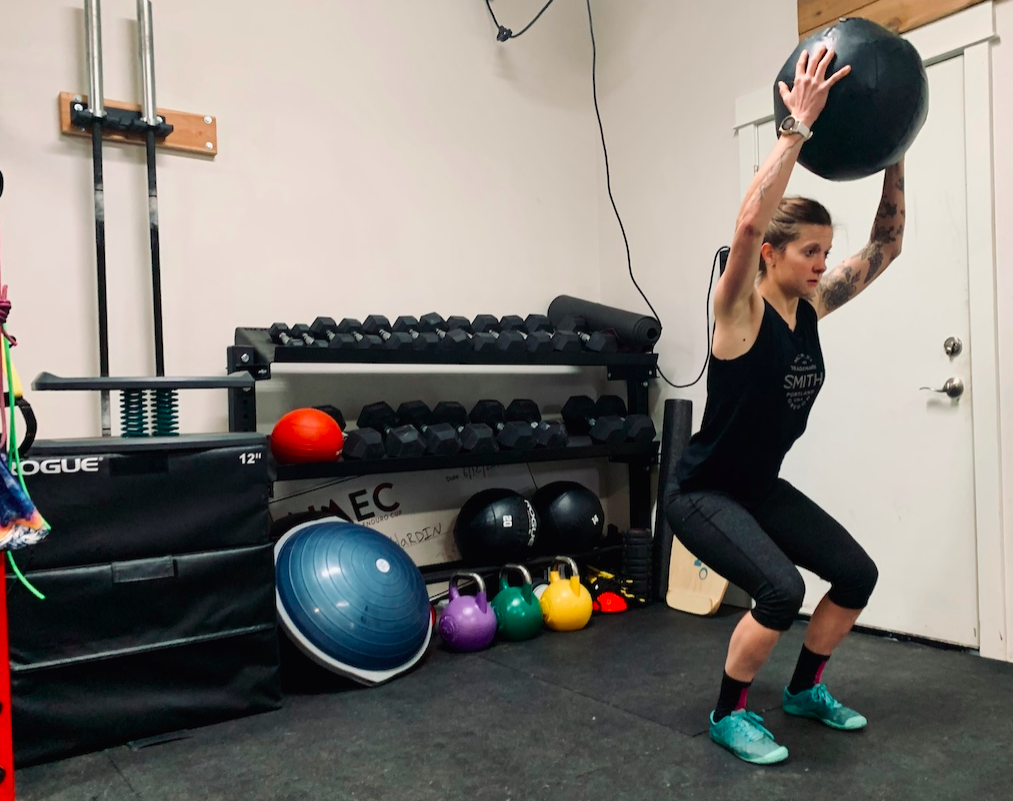
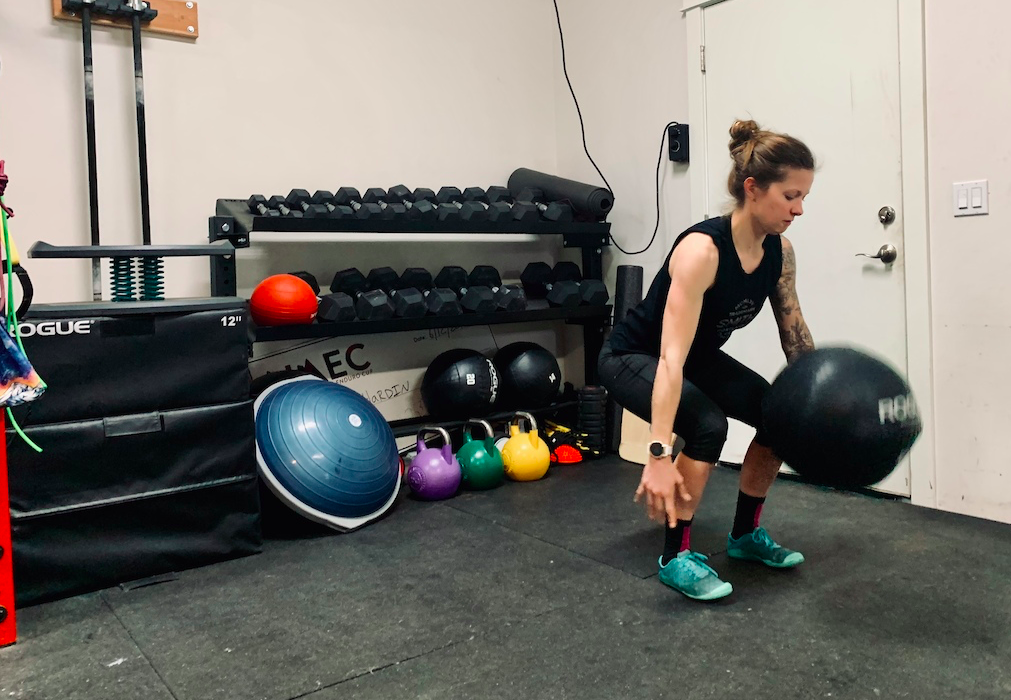
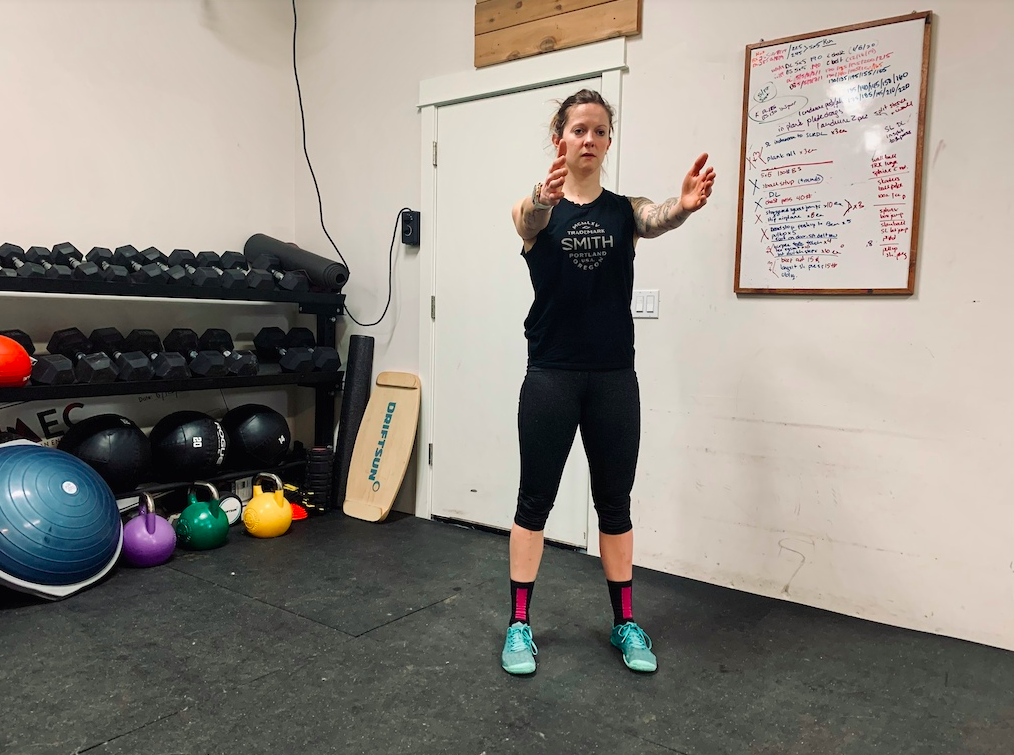
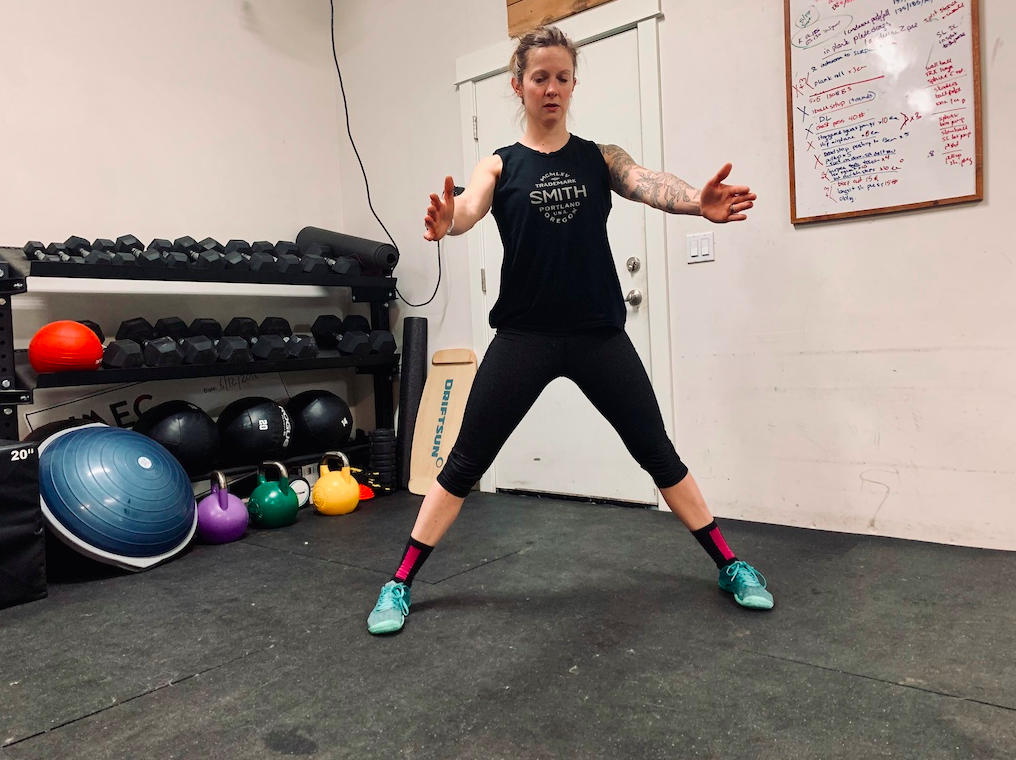
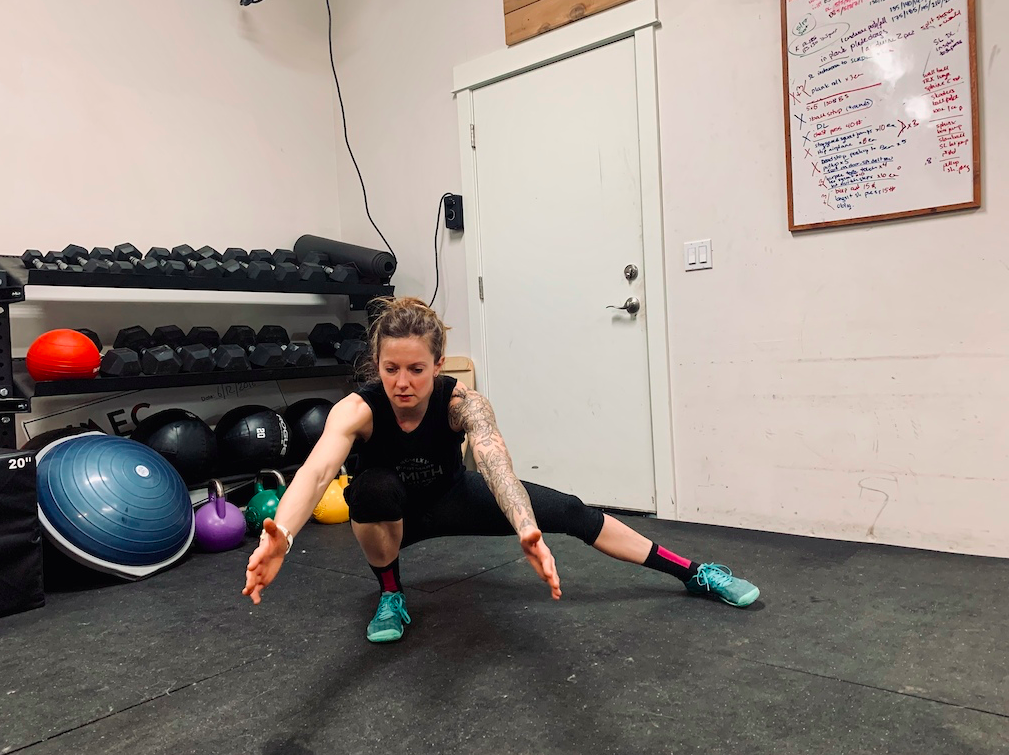
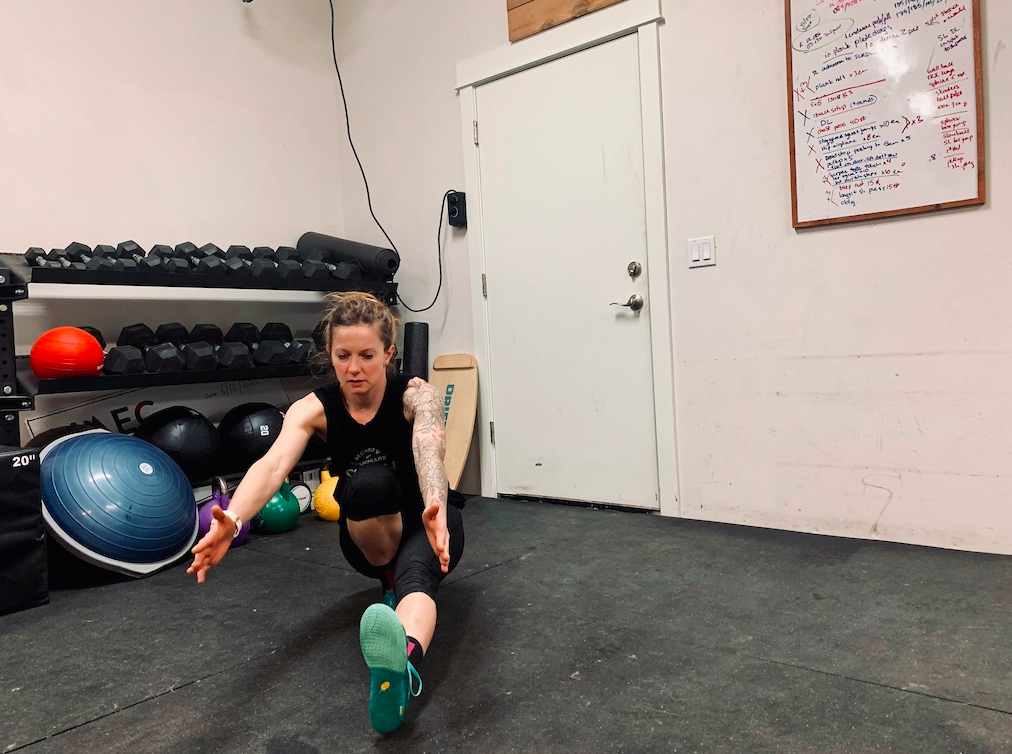
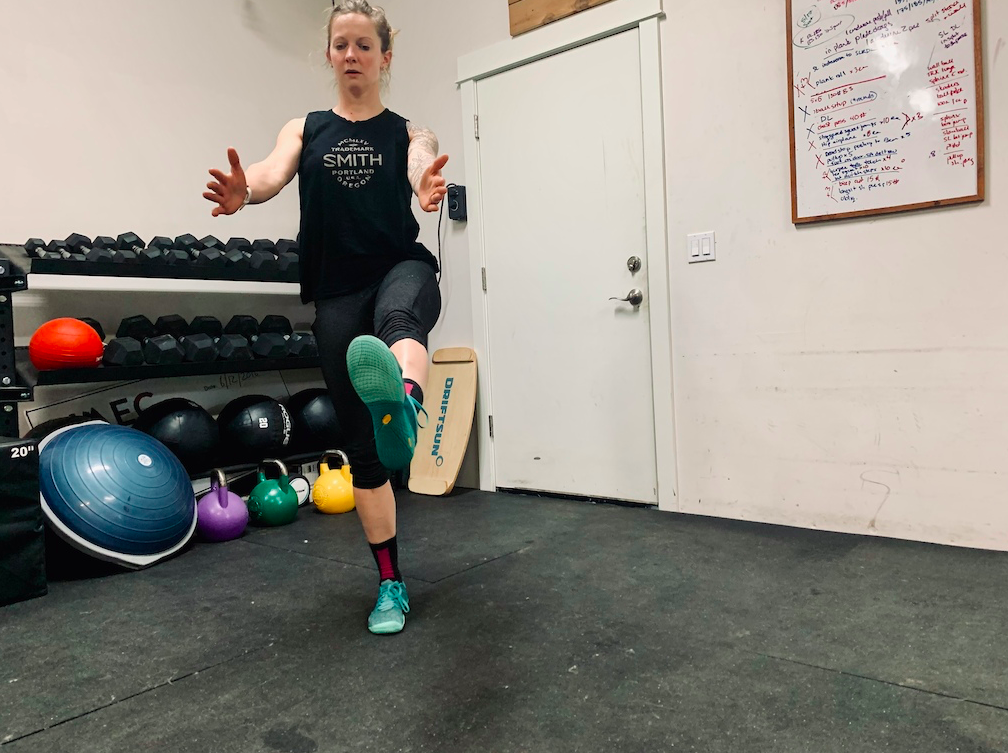
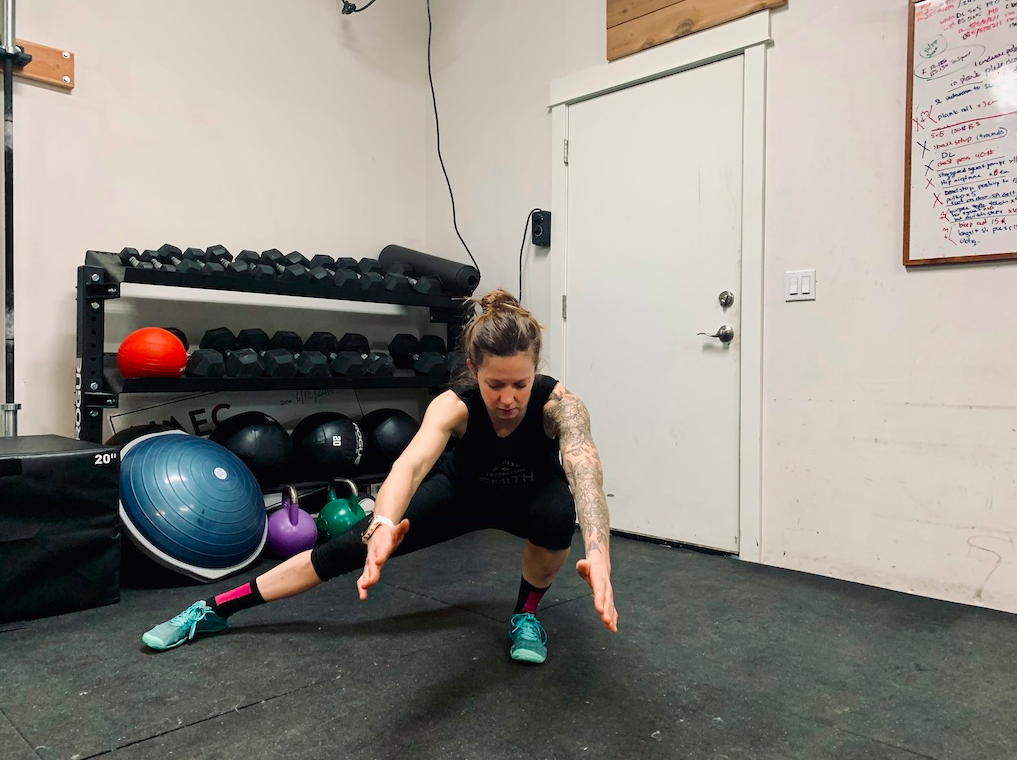
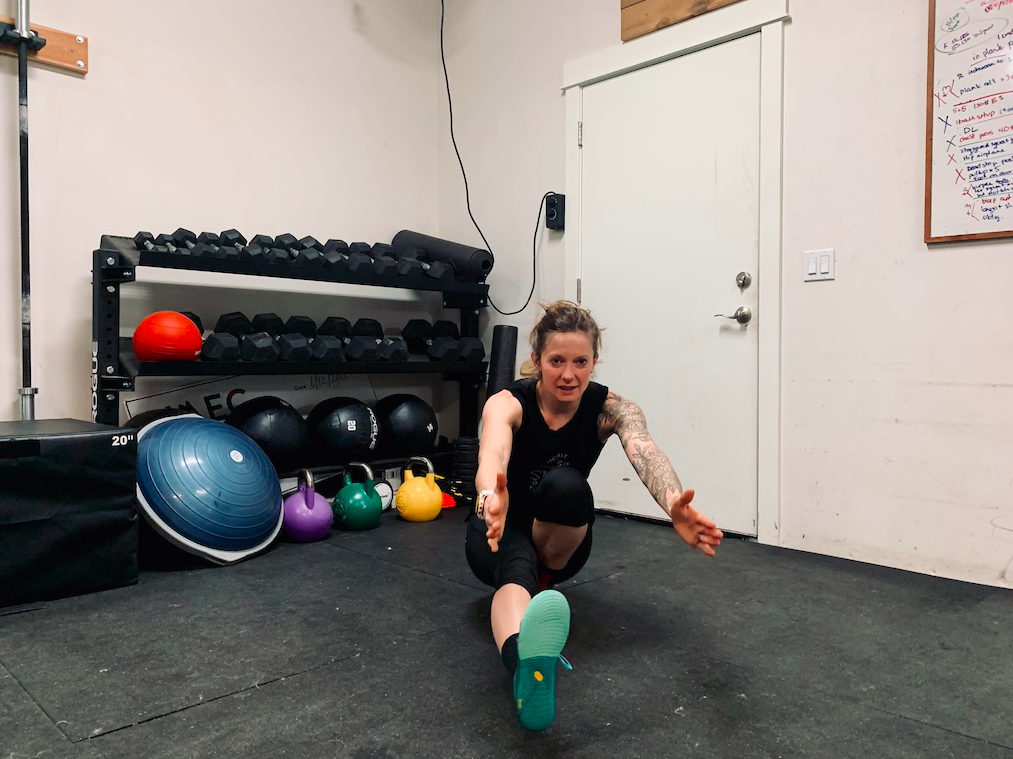
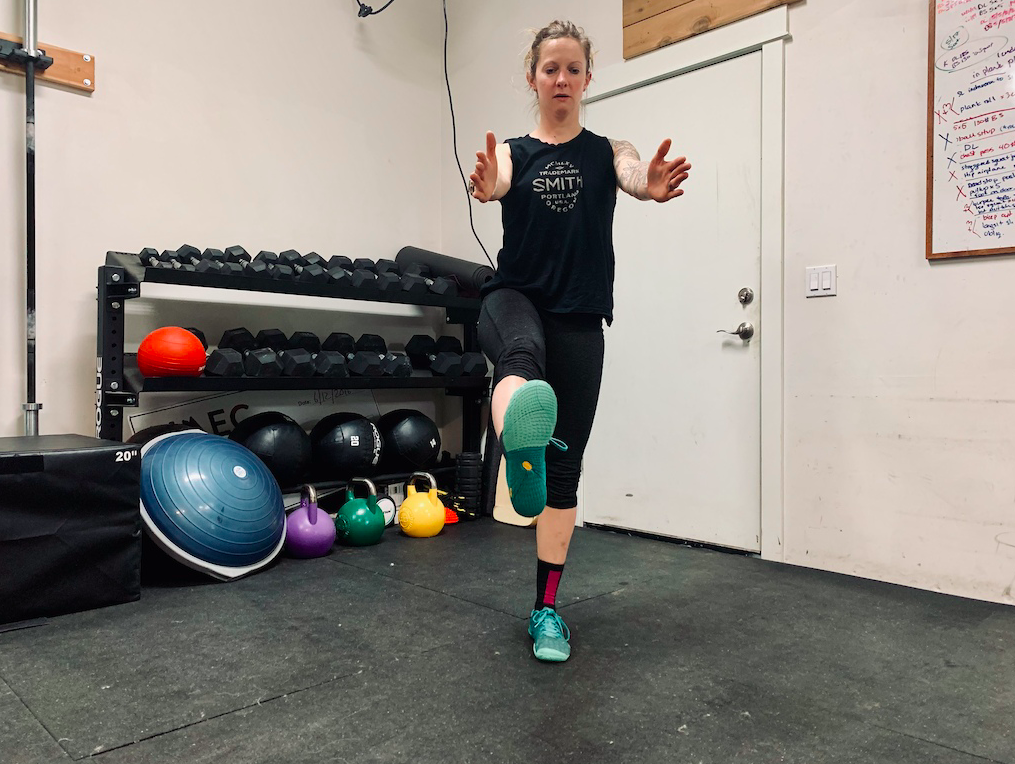
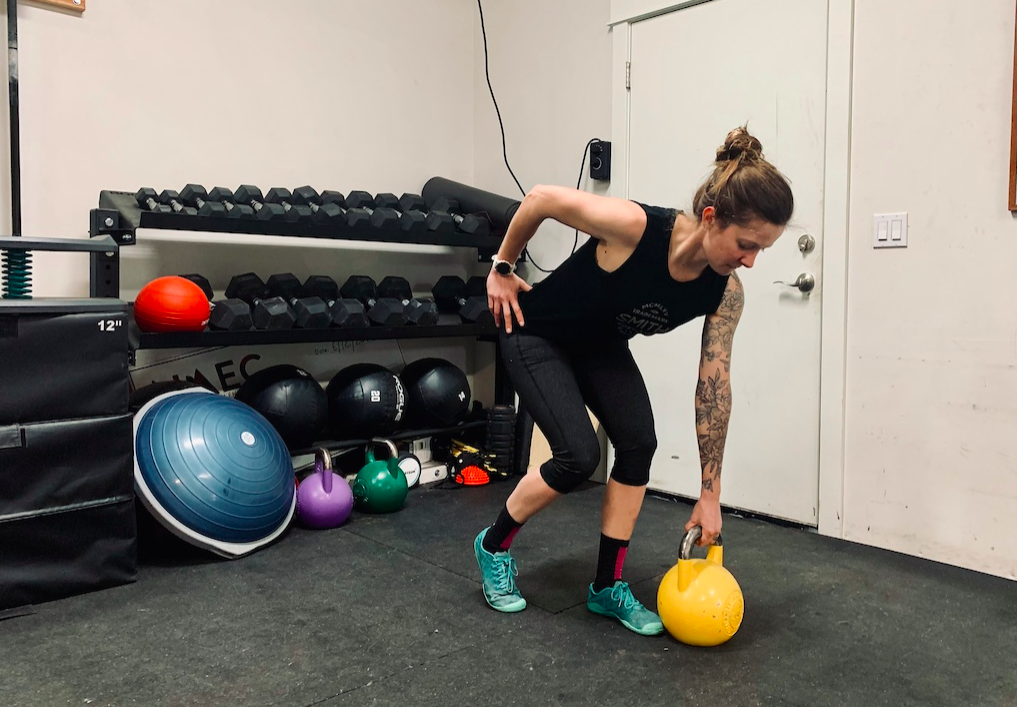
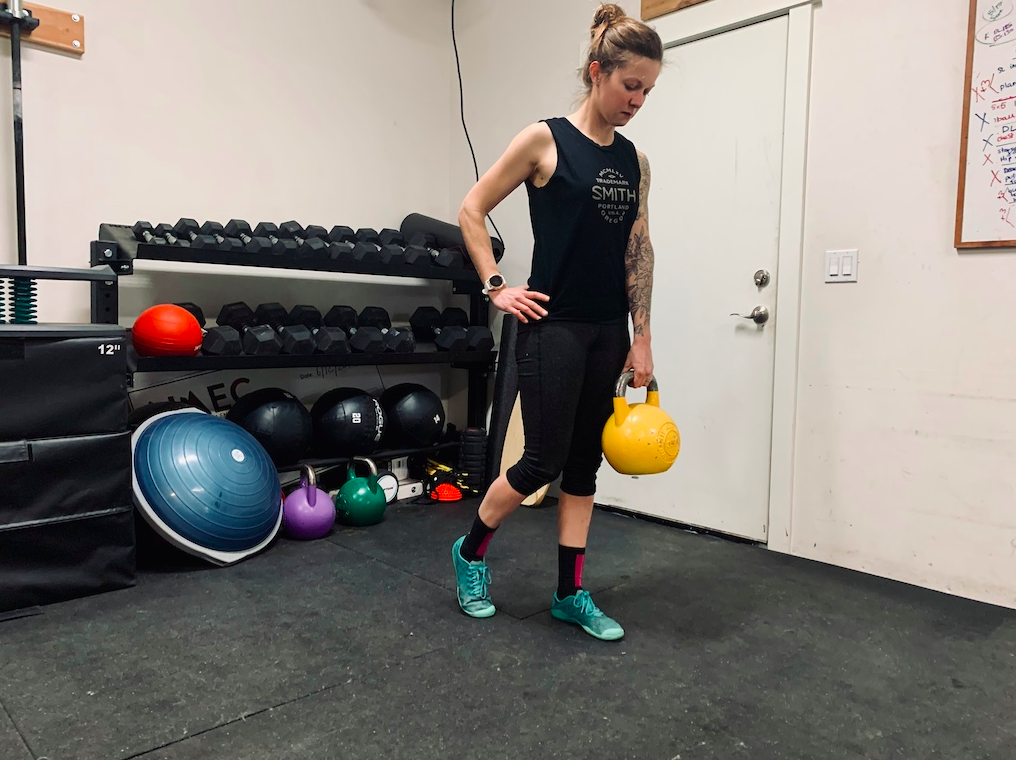
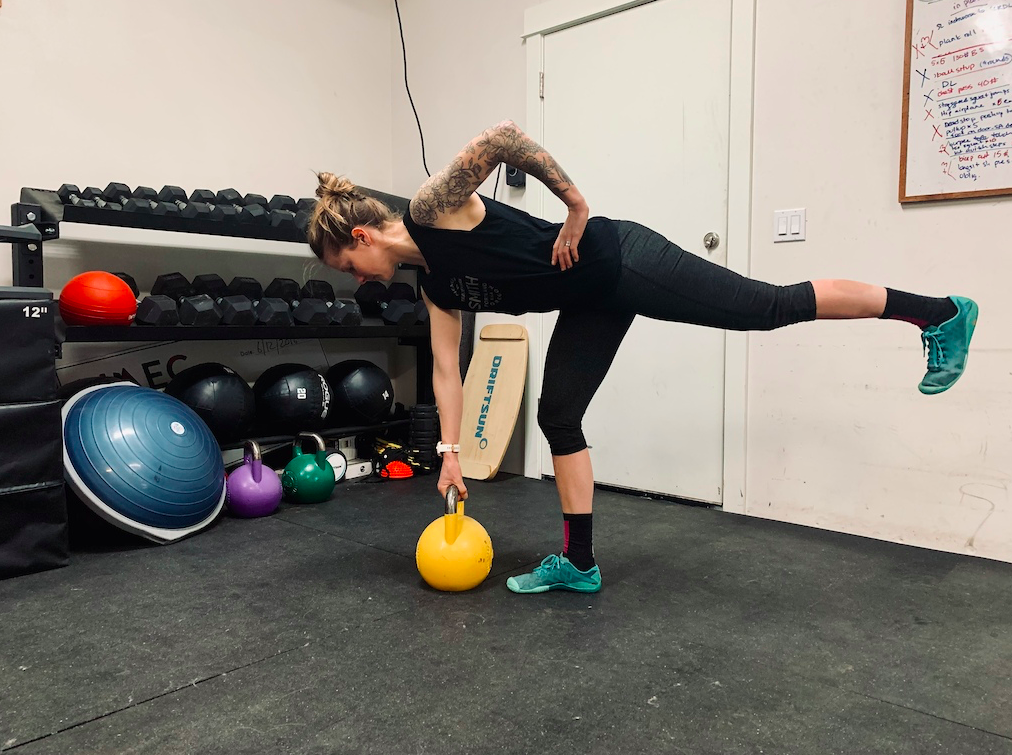
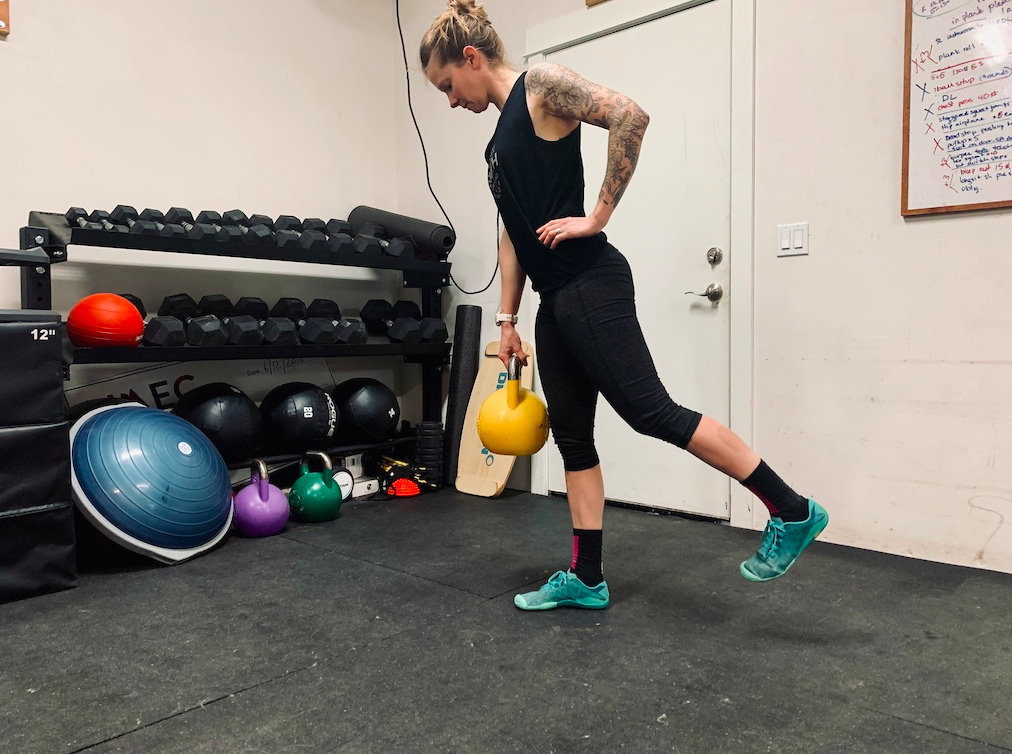
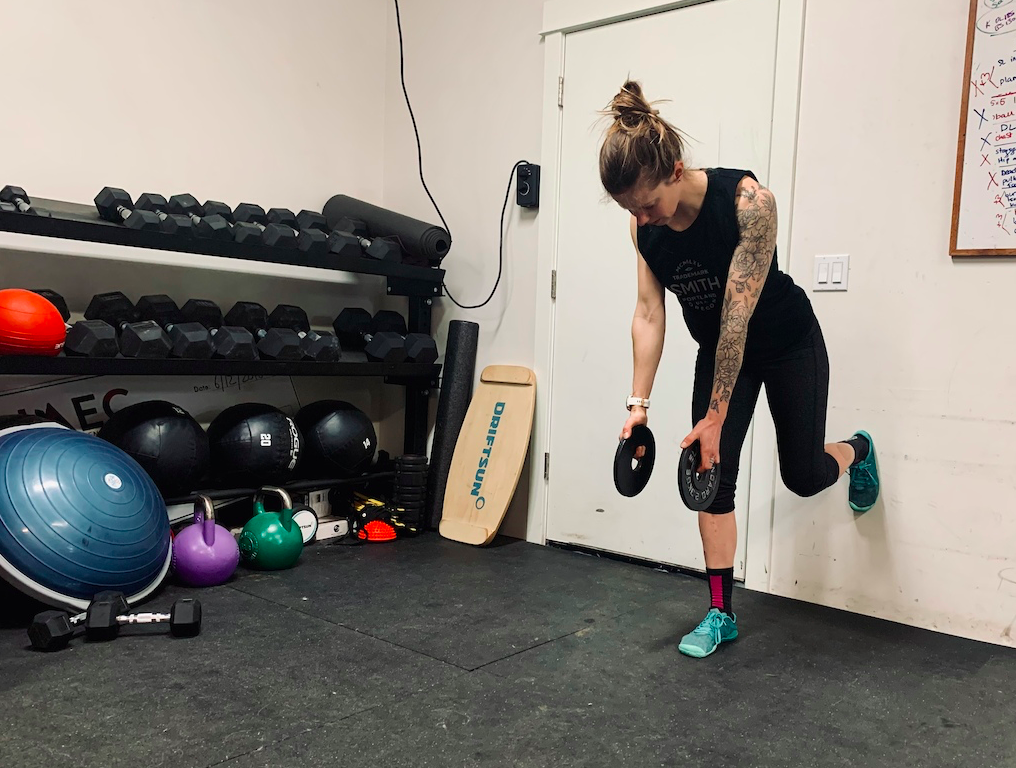
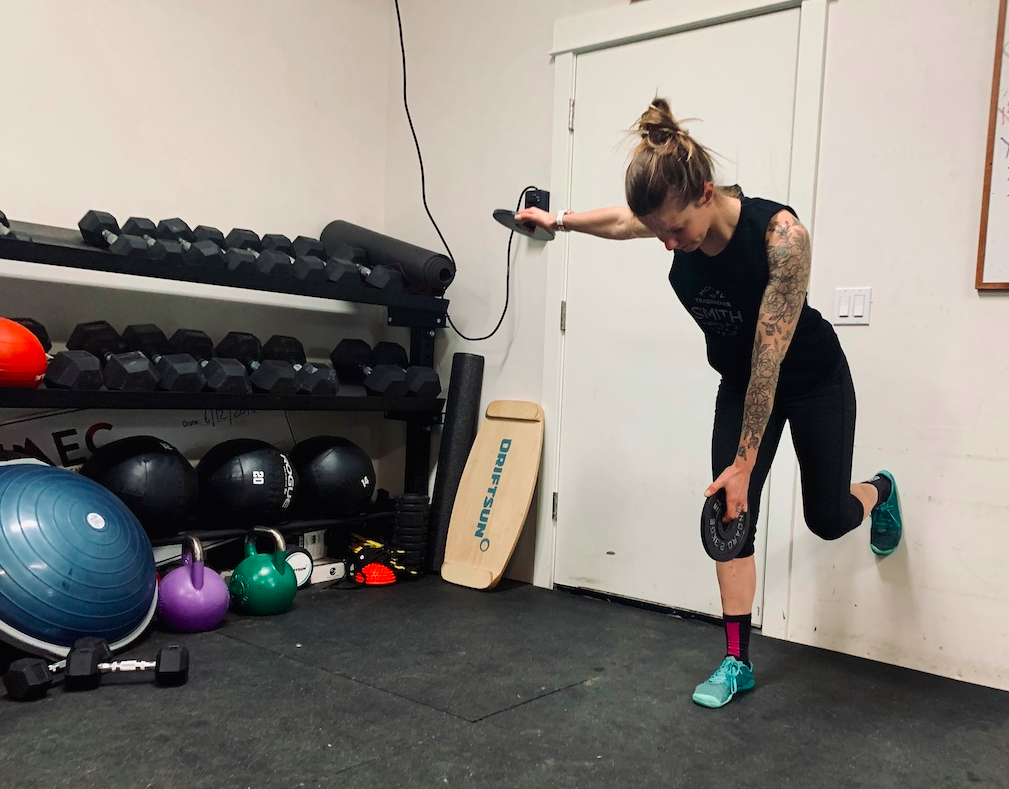
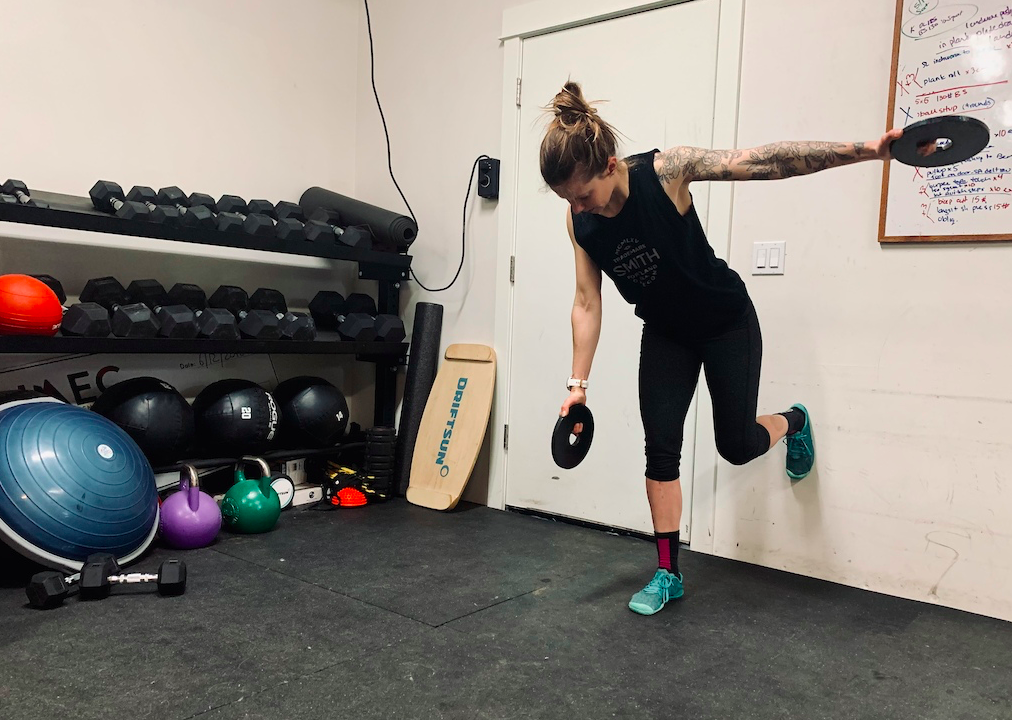
5 peaches, skin on, cut into quarters, pitted 3 habaneros, cut in half, seeded 2 Tbsp lemon juice 57 grams fruit pectin powder 5 cups granulated sugar Sterilize jars and lids/rings in hot water. Combine peaches and habaneros in blender and puree until smooth. Pour into a large pot, add lemon juice & fruit pectin. Stir well and bring to a boil over medium heat. Once boiling, stir constantly, boiling for another 5 minutes. Add the sugar, ands tire well to combine. Bring to a rolling boil over medium high heat. Once you have achieved the rolling boil, continues to cook for one minute. Remove from heat, fill your jars, leaving about 1/4" of space. Loosely cover the jars with lid + snap ring. Tighten 3/4 of the way. Fill another large pot with water, add jars of jam, and bring to a boil. Boil for 20 minutes, then carefully remove jars, being careful to keep them vertical. Allow them to rest on a flat surface for 24 hours - you will hear the popping sound of your jars being sealed. If any do not seal (you can press down on the top and they make a popping sound), store in the refrigerator to be used within a few weeks. Otherwise, sealed jars may be tightened fully and kept in dry storage at room temperature for up to a year. What's your favorite way to use fresh local peaches? Comment below - Taking suggestions! Xo, Kim Hardin  Primary movers in cycling include your posterior chain: the hamstrings, glutes, posterior hip and low back muscles. These muscles are crucial to generating power, as well as controlling the hip and directing the pedal stroke (power to the cranks!). At times, these muscles may become inhibited via incorrect saddle position, lack of pelvic stabilization, or lack of hip mobility. A lack of hip mobility looks different on each person: hips rocking back and forth or side to side, incorrect knee tracking at the top of a pedal stroke (outwards, figure 8's, etc), and posterior rotation of the pelvis. Over time, these movement patterns can lead to discomfort and injury, in addition to a lack of power production and on-bike performance. Follow along on some of my favorite hip mobilizations to improve your overall hip health and on-bike performance! Warm-Ups: Wake up those hips with some simple band work... Bandwork: Clamshells Start in a sidelying hooklying position with shoulders, hips and ankles stacked over each other, respectively, and an exercise band just above your knees. Your shoulders should be in line with your hips, which should be in line with your ankles. Engage your core, exhale, and open at the knees only so far that your hips do not rock open. Hold this position for 30 seconds, then immediately perform 8 reps. Repeat for 3 sets each side. Pro Tip: If your hips start to rock open when you open at the knees, you have opened too far - for some, this may be a movement of inches! 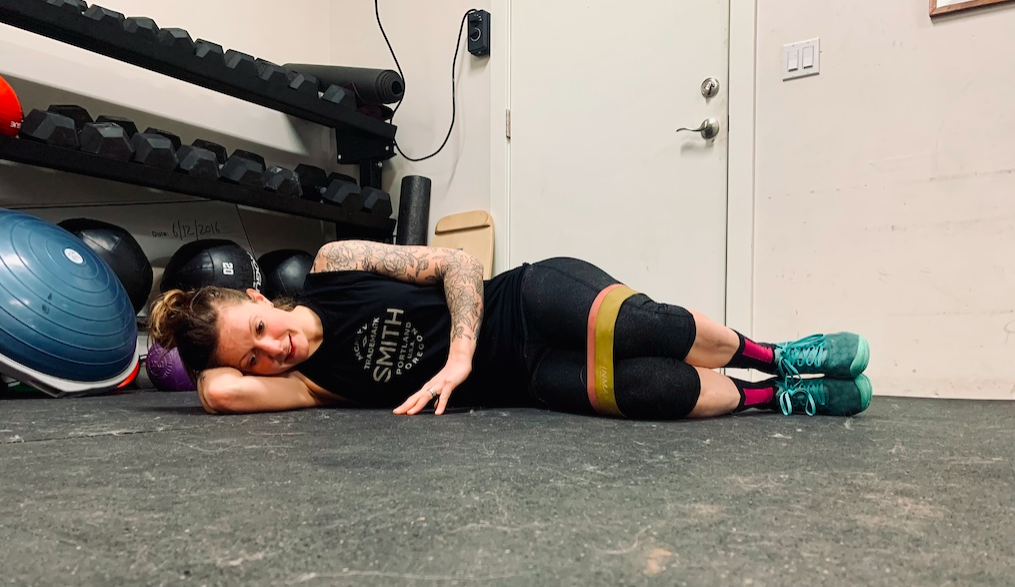 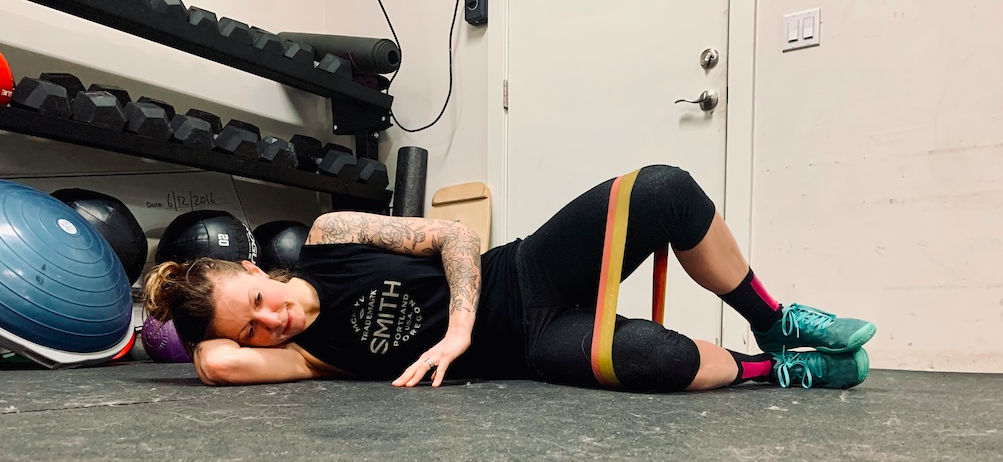 Bandwork: Sidelying Hip Extension Remain on your side, exercise band just above your knees, and extend your legs. Engage your core, breathe out, and raise your top leg upward - imagine pushing out through your heel. Hold for 30 seconds, then immediately perform 8 reps of side-lying hip extension. Roll onto your other side and repeat for 3 sets each side. Pro Tip: If your hips start to rock open when you lift your upward leg, you have opened too far. 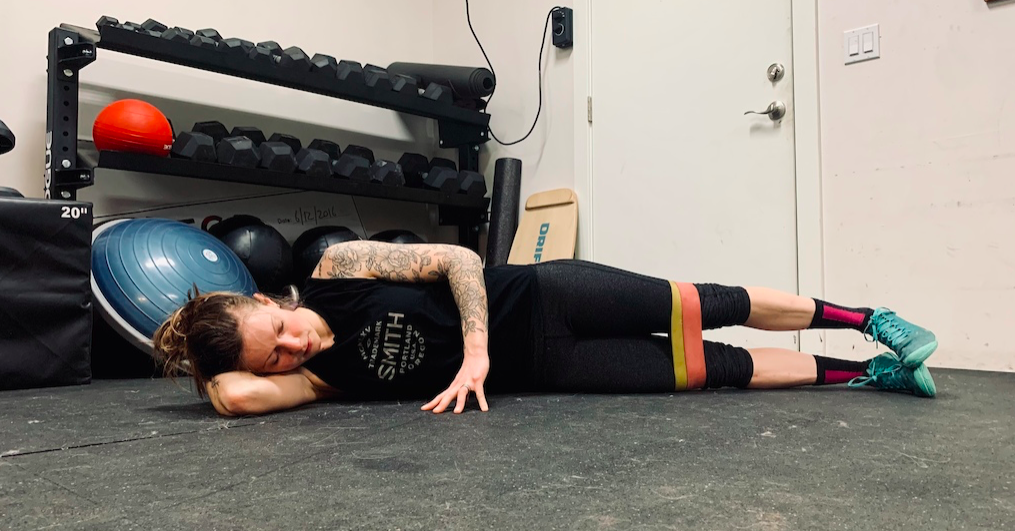 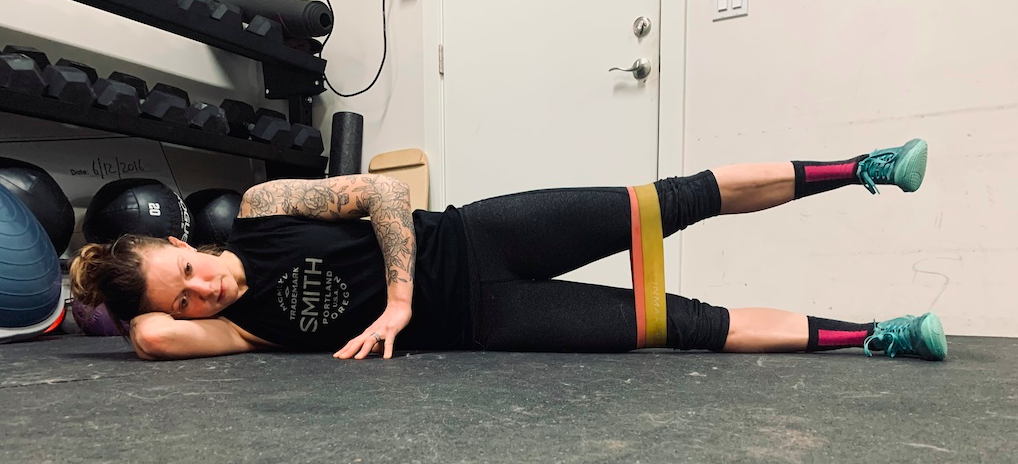 90-90 Hip Switch: Start in a 90-90 position, sitting up as tall as possible with both hips and knees flexed to 90 degrees. Start with your torso facing towards your left (front) leg, and while keeping your torso tall, come up onto your toes slightly, and perform a simultaneous external rotation of your right hip and internal rotation of your left hip - you will end up with your right hip as your "front" leg. Engage your core, and sit up into the movement. Flow to each side 10 times and repeat for 3 sets. Hip Airplanes: Start in a forward lunge position, left leg forward, right heel off the ground, and arms at the back of your head. Hinge forward at the hips about halfway and while engaging your core, rotate to the left (towards your forward leg) then back to neutral. From neutral, engage your core and rotate to the right (away from your forward leg) opening up your hips. Return to your neutral and repeat 8 times on each side for 3 rounds. Pro Tip: The lower you are able to hold your torso, the harder this will be. However, be sure to hold your torso via engaging your core. Do NOT lay it on your forward leg. Functional Training: Single Leg Stand to Press While it sounds really simple, this exercise is really effective and a good way to get your neurons firing! Sit on a table, bench, or box, feet shoulder-width apart and about 8-12" from the box. Hold a barbell or dumbbell in both hands as though you were going to do a push-press, and lift your right foot off the ground. In one smooth, slow motion, engage your core, stand up on your left leg and press the weight overhead. Slowly lower yourself back to the box for one rep. While performing this movement, be sure to keep your hips level side to side, and square to the front. The slower you move, the more difficult it will be. Perform 10 reps each side, 3 rounds. Pro Tip: Start with a tall box. As it becomes easy, move to a shorter box, and add more weight. Tall Kneel to Functional Slamball: Start in a tall kneel holding a medicine ball of your choice. In one smooth movement, come to a low squat, knees at 90 degrees, then slam the medicine ball into the ground in front of you as hard a possible. Catch the ball mid-air and immediately step backwards into the tall kneel. Repeat for 10 ball slams, 3 rounds. Be sure you are alternating which legs as you step into and out of the low squat! Lateral Hip-Shift to Eccentric SL Squat: This one is HARD, but is one of my favorites that doubles both as a warm-up as well as a strengthening exercise! Start with your feet shoulder-width apart, then take a decent sized lateral lunge to the right. With arms forward for counterbalance, shift your weight over your right leg and lower down as far as you possibly can. Fully unweight your left leg, and swing your left leg to the front - imagine reaching out through your heel with a straight leg. From here, stand back up in an eccentric SL squat. Once standing, swing your left leg back to its original position and flow to the other side: Perform 5-8 reps each side, 3 rounds. Pro Tip: Only go down as far as you can hold the position - you do NOT want to be sitting on the floor in the "down" position! As you gain mobility, you will be able to go lower, while as you gain strength you will be able to better stand from said low position. Staggered Stance Weighted Deadlift Start holding a kettlebell or dumbbell in your right hand with your feet in a staggered stance, right leg forward. You should be up on your toes on your back leg with the majority of your weight over your standing leg. Engage your core and hinge forward at the hips as you let the kettlebell lower towards the ground. Lower down until you can no longer keep your hips square to the front or torso straight. Keeping your core engaged, breathe out and return to standing. Important: As you stand, be sure your abdominals are truly engaged as they provide a natural stopping point at the top of the movement, preventing you from overextending at your low back. Use your "accessory" foot for balance and support, as needed. Repeat 10x each leg, 3 rounds. Pro-tip: I recommend holding the kettlebell in the same hand as your standing leg - this lateral placement brings in your adductors. + Want an added challenge? Fully eliminate your support leg, and add weight - Be sure to keep a slight bend in your standing leg and avoid locking out your knee. Single Arm Rear Delt Row off Wall: Stand with shoulders and hips both level and square to the front. Shift your weight to your right leg, and place your left foot on the wall behind you, knee bent at 90 degrees - you may need to adjust your distance from the wall. While pressing back into the wall with your left foot, and into the ground with your right, engage your core and hinge forward at the hips slightly. From here, perform alternating single-arm rear delt. rows - Perform 6-8x each side, 3 rounds. The key here is to move slow and press through your feet! + Want a different kind of challenge? Mix it up with a Single Arm Row! These few exercises serve as a simple introduction to hip mobility and stability. Use them in your warmup, complete them together as a circuit, or in addition to your workout for a full-body challenge. There are thousands of hip mobility/stability exercises, and many many variations, however, it's important to start basic, and progress as you gain strength and stability. What's most important is to be consistent with your workouts - you'll notice as you do so, your aches and pains will be less and with greater hip mobility, your power production should improve as well. 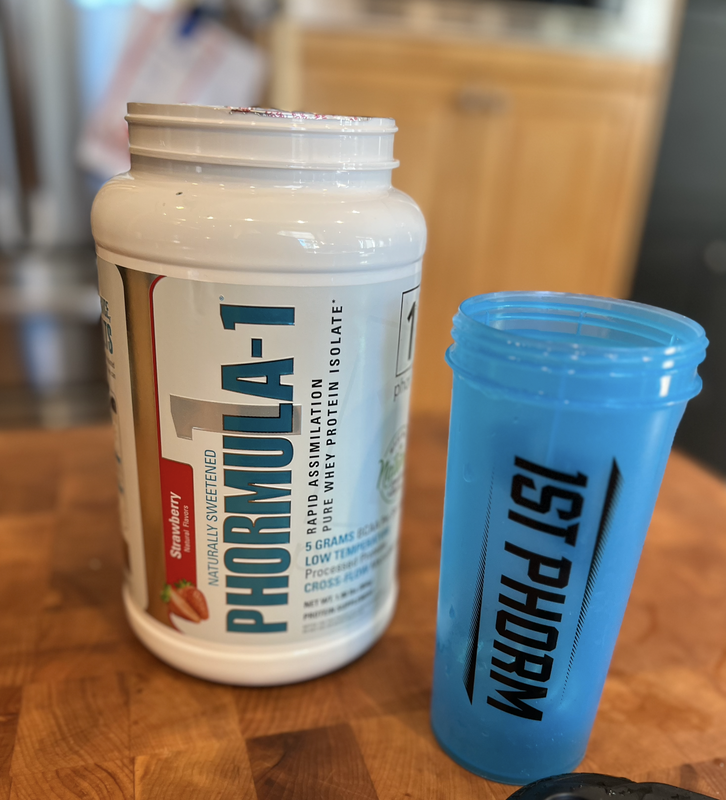 Post-workout, be sure to fuel your body and recover properly!
Within 30 minutes of completion, I drink a Whey Protein Isolate Shake + Creatine for further recovery benefits. Protein wise, there are many different kinds on the market - whey concentrate, isolate, casein, & blends. Isolate is most ideal post-workout as it is easily digest & rapidly assimilated - further promoting amino acid retention, as well as improved rate of repair & muscle growth. I highly recommend 1st Phorm's Formula 1 Protein Powder - my favorite flavor is Strawberry. It tastes just like a strawberry shake! The protein Isolate is top notch: "Low-Temperature Processed Cross-Flow Micro-Filtrated" meaning it's a very bioavailable, rapid assimilating protein source that is ideal for proper pre & post-workout supplementation. Give it a go, and in tangent with regular, consistent workouts, see the results for yourself! See you on the trail, Kim Hardin |
AuthorsProfessional Athletes. Archives
August 2023
Categories |

 RSS Feed